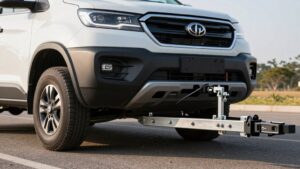
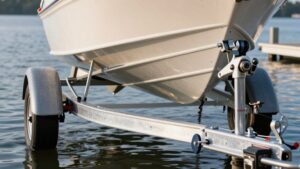
How to Hook Up a Tow Bar to Your Dinghy Vehicle and RV
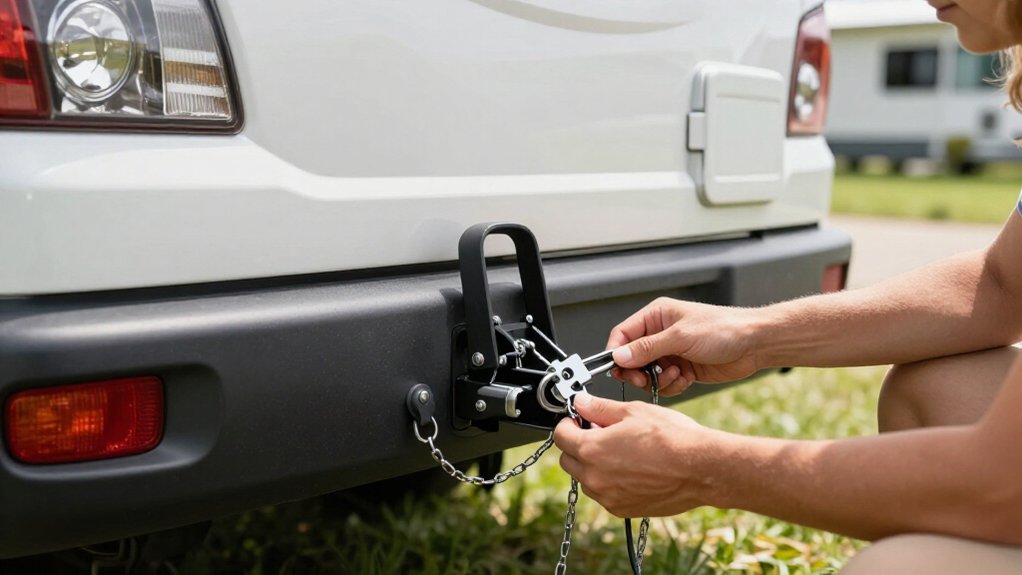
Before hookup, confirm your dinghy is approved for flat towing, its GVWR fits the tow bar’s rating, and its baseplate, brakes, and wiring are compatible.
Park both vehicles on level ground.
Measure from ground to each pin-hole center; keep heights within three inches, using the built-in rise/drop or a receiver as needed.
Connect and lock the arms, cross safety cables beneath the hitch, and attach electrical and breakaway connections.
Test lights and braking, then stow arms.
Continue for setup guidance.
Tow Bar Self-Alignment and Leveling
Because a Demco tow bar’s arms move independently, it can self-support, self-align, and self-level to make hookup and disconnection easier.
Before you tow, check that the bar sits parallel to the road surface or within three inches higher or lower. Measure from the ground to the center of the attaching pin hole on the towed vehicle, or to the center of the receiver pin hole at the coach’s rear. If measurements differ by no more than three inches, you’re within safe-towing tolerance.
If they differ by more, use the tow bar’s built-in 1½-inch rise or drop. For differences over 4½ inches, add a rise/drop receiver in the needed increment to bring the bar as close to parallel as possible. Then recheck measurements before towing.
Vehicle-Specific Towing Compatibility
After confirming the tow bar is level, verify that every part of the setup matches your dinghy and coach.
- Match the Demco tow bar’s channel and capacity range (7,500, 21,000 lb GVWR) to your vehicle’s rated tow weight; never exceed the lowest applicable rating.
- Choose a baseplate engineered for your dinghy’s specific frame attachment points; it provides the secure connection between vehicle and tow bar.
- Confirm a coiled electrical cable and compatible brake, tail, and turn signal interface, such as the proper diode kit or connector option, operate the dinghy’s lights.
- Install supplemental braking required for flat towing in every US state. Select a Demco system intended for your RV or coach and dinghy combination; carefully verify both vehicles’ requirements and manufacturer instructions before each trip departure.
Step 1: Set Up on Level Ground
Before hooking up, park the RV and dinghy on level ground and compare the ground-to-center heights of the dinghy’s attachment pin hole and the coach’s receiver pin hole.
Measure each hole from the ground to its center; don’t estimate by eye. The two measurements should match or differ by no more than 3 inches.
If the difference exceeds 3 inches, use the tow bar’s built-in 1½-inch rise or drop to correct the alignment. When the difference exceeds 4½ inches, add a rise/drop receiver in the appropriate increment, then recheck both heights. Make adjustments before connecting the vehicles, and confirm the bar sits as close to parallel as possible, within 3 inches in either direction. Don’t proceed with an out-of-range setup; correct the height first, safely.
Step 2: Verify Vehicle Towability
Confirm that your dinghy is approved for flat towing by checking its owner’s manual; the correct transmission, clutch, or brake setup depends on the vehicle.
Verify that its tow rating and gross vehicle weight rating (GVWR) fall within your tow bar’s limits; Demco models, for example, cover 7,500 to 21,000 pounds GVWR. Check baseplate mounting areas and frame compatibility, and use approved hardware that secures the vehicle without weakening its structure.
Confirm your dinghy can accept a supplemental braking system suited to both vehicles; every U.S. state requires braking for a vehicle in tow. Before departure, verify you have an electrical cable and connector or activation solution for the dinghy’s brake, tail, and turn lights, then test that the signals function.
Step 3: Connect the Tow Bar Arms
With the RV and dinghy aligned on level ground, connect each tow bar arm to its corresponding baseplate, making sure both arms are properly seated and move independently for easier alignment. Use the Demco Easy Trigger Release to make connecting and disconnecting easier, but don’t rely on it instead of checking that each arm is fully mounted and seated.
Check that the tow bar sits parallel to the road, within 3 inches above or below level. Measure from the ground to the center of the dinghy attaching-pin hole or the RV receiver-pin hole.
If you’re outside that tolerance, first use the built-in 1-1/2-inch rise or drop adjustment. If the difference exceeds 4-1/2 inches, add a rise/drop receiver to bring the bar as close to parallel as possible.
Step 4: Attach Safety Cables
Next, attach the safety cables to the designated points on the RV and dinghy baseplate, crossing them under the hitch points to form a cradle that can catch the load if the tow bar separates. Connect each end to its specified attachment point; don’t use frame openings. Keep the cables crossed beneath the hitch and untwisted.
Allow enough slack for normal suspension movement, but keep them clear of the road. Adjust their length so they can catch the assembly if the connection fails. Seat and secure every hook, pin, and latch, then confirm the cables won’t snag or rub. Recheck the connections alongside the tow-bar and baseplate attachment points at each hookup; harsh conditions can loosen hardware or cause excessive movement.
Step 5: Test Lights and Signals
Once the safety cables are secured, test the electrical connection before driving. Have an assistant watch from the side and rear as you press the motorhome’s brake pedal and activate each turn signal. Confirm the dinghy’s brake lights and indicators illuminate without delay or cross-wiring. Check each lamp separately: the motorhome’s left command shouldn’t trigger the right side, or vice versa.
Keep the vehicle stationary during checks, and don’t rely on dashboard indicators alone; your assistant’s view confirms the dinghy’s exterior lamps work.
Switch on the motorhome’s headlights and verify the dinghy’s tail lights work; this checks the running-light circuit through the connector. If equipped with a supplemental braking system, confirm it activates on demand during braking tests so the dinghy’s brakes respond in sync.
If any function fails, don’t drive. Recheck the coiled electrical connection and inspect the brake, tail, and turn activation wiring method, whether you use a diode kit or connector-based option. Repeat the full test after correcting a fault.
Step 6: Stow Tow Bar Arms
After confirming the lights work, use the Demco tow bar’s Easy Trigger Release to control each arm as you return it to the stowed position.
Because the arms move independently, stow each one fully; don’t leave either partially folded. Keep a grip and guide each arm without placing fingers near pinch points. Align the arms with their designated storage positions, then engage the restraints until each arm locks securely.
Check that neither arm hangs down or can swing into the towed vehicle’s motion path. Inspect clearance around the baseplate and confirm no component can shift during travel. Finally, look over the tow bar to verify it’s aligned and properly configured. Correct any movement or incomplete locking before you connect the safety cables and wiring.
Verify Breakaway Switch Connection
Before towing, verify that the dinghy’s breakaway switch is connected correctly so it can activate the supplemental brakes if the vehicle separates from the RV. Route the breakaway cord so it has enough slack for full turns but will pull tight immediately if separation occurs. Check that it won’t rub against tow-bar arms, baseplate hardware, or wiring, and that nothing can snag or obstruct it.
Inspect each terminal for a tight, corrosion-free connection; loose or corroded contacts can prevent brake activation. Follow your supplemental braking system’s instructions to test the breakaway function. Pull the cord as directed and confirm that the dinghy’s brakes actuate. Don’t assume the switch works. Verify its operation and correct any routing or connection problem before you tow.
Tow Bar Height Measurement
To measure tow-bar height, measure from the ground to the center of the attaching pin hole on the dinghy, or to the center of the receiver pin hole at the rear of the RV.
| Check | What to do |
|---|---|
| Dinghy point | Measure ground to attaching-pin-hole center. |
| RV point | Measure ground to receiver-pin-hole center. |
| Target | Keep tow bar parallel, or within 3 inches higher or lower. |
| Adjustment | Over 3 inches: use built-in 1-1/2-inch rise/drop; over 4-1/2 inches: add receiver. |
Compare readings before you connect the bar. A difference greater than 3 inches can angle the assembly, increasing stress while towing. Correct it; don’t accept misalignment.
Above 4-1/2 inches, add a rise/drop receiver in an increment that brings the tow bar as close to parallel as possible. Recheck both measurements after fitting.
Lubricate Tow Bar Pivot Points
Once the tow bar is aligned, check that its pivot points move freely, then clean off dried lubricant and road grime. Use the lubricant specified by the tow bar manufacturer; products that aren’t approved may damage bushings or seals. Apply it to each moving joint and pivot, where metal contact makes wear and binding most likely.
Wipe the surfaces clean first so the lubricant coats the metal rather than trapping grit against it. Afterward, manually cycle the arms through their normal range and confirm each moves independently and smoothly; don’t road-test the bar to check lubrication. Keep this task on your maintenance schedule, and repeat it after long trips or exposure to rain or snow to limit corrosion and excess friction at pivot points.
Conclusion
Before you tow, confirm your dinghy’s towability and compatibility with both vehicles. Park on level ground, measure tow-bar height, and correct any mismatch before connecting the arms.
Make sure each arm locks securely, then verify the breakaway switch is attached to the designated point. Stow the arms when they’re not in use, and lubricate pivot points as specified by the manufacturer. Don’t rely on appearance alone; perform the prescribed pre-trip checks every time you hitch up.