How Do Trailer Brake Controllers Work? Gain, Output and Sensors Explained
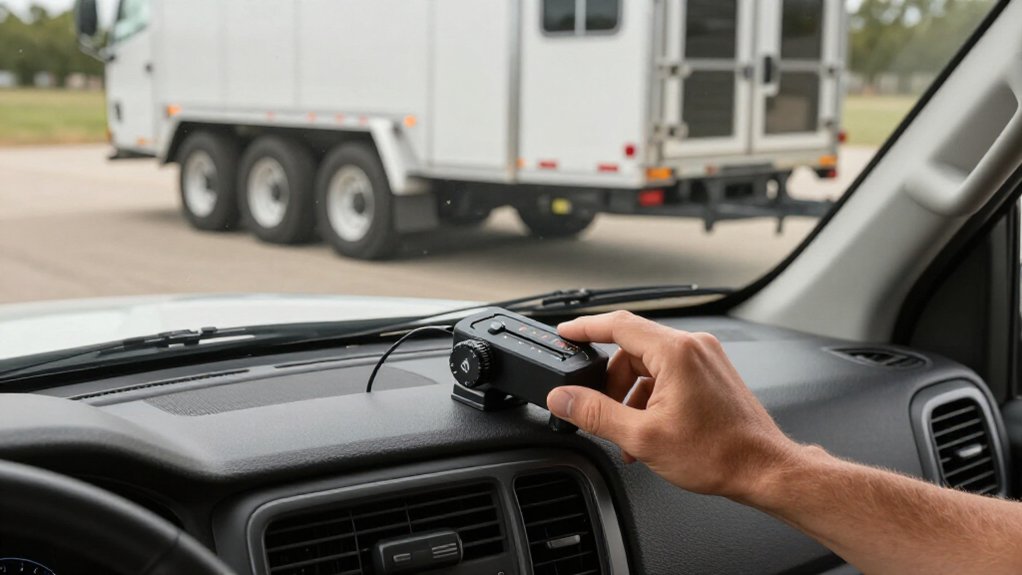
Your controller converts brake signals into output that energizes trailer electromagnets, pressing shoes against drums. Gain sets maximum output, not what you’ll get at every stop.
A proportional controller uses an inertia sensor to match output to deceleration; a time-delay unit ramps output at a preset rate after pedal activation.
Set gain for firm braking: too much can lock wheels, while too little lets the trailer push. Controller type and conditions matter, too.
How Gain Controls Brake Output
Gain sets the controller’s maximum permitted trailer-brake output, not the amount it applies at every stop.
In a proportional controller, an inertia sensor measures tow-vehicle deceleration and ramps trailer-brake output up or down, while respecting that ceiling. A time-delay controller also uses gain as its maximum, but it doesn’t measure deceleration; it increases output at a preset rate until it reaches the limit.
Too much gain can cause abrupt stops, trailer tugging, or wheel lockup. Too little can let the trailer push the tow vehicle or slow inadequately.
Because manufacturers don’t standardize gain scales, start near the middle, often around 3–4 on a 10-point scale. Then fine-tune with test stops, first near 20 mph and then at 30–40 mph, seeking smooth, even braking.
Brake Pedal Input Triggers Output
When you press the tow vehicle’s brake pedal, the controller receives a brake signal and begins commanding trailer-brake output. For a time-delay unit, that input starts a preset ramp: trailer braking rises at a selected rate until it reaches the gain-limited maximum. The controller doesn’t measure your deceleration to set this ramp; pedal activation initiates the programmed increase.
A proportional controller uses the same brake input to identify braking demand, while its inertia sensor continuously adjusts commanded voltage as your deceleration changes. This lets output track measured vehicle response rather than follow a fixed timing curve.
In either design, the controller sends controlled electrical output through the tow vehicle’s brake-output circuit and 7-way connector. Current energizes the trailer’s electromagnets, which move the brake shoes against the drums. Gain caps the permitted output, so pedal input can’t command braking beyond your configured maximum setting.
Wet-Road Braking Effects
Because wet or slick pavement reduces tire grip, trailer-brake output that works on dry roads may be too strong and lock the trailer wheels, causing a skid and a less stable stop.
When water lowers tire-road friction, the same commanded current can produce a different effective braking force. Electric brakes use an electromagnet to press the shoes against the drum; reduced tire traction, not weaker brake hardware, limits how much force you can use safely. Lower the controller’s gain, which caps maximum output, until the trailer slows smoothly without tugging or wheel slip.
After rain, standing water, or a temperature change, retune with controlled stops from around 20–40 mph. Seek firm, even deceleration, and watch for sliding. Repeated tire slip can overheat the brakes.
Proportional vs. Time-Delay Controllers
A proportional controller uses an inertia sensor to match trailer-brake output to your tow vehicle’s deceleration, up to the gain limit. A time-delay controller responds to your brake-switch signal and ramps output toward a preset maximum at a fixed rate.
To choose between them, compare proportional response and compatibility requirements with the time-delay controller’s ramp-rate and maximum-level adjustments.
Proportional Brake Response
Unlike time-delay controllers, which ramp trailer-brake output at a preset rate after receiving the brake signal, proportional controllers use an inertia sensor to measure the tow vehicle’s deceleration and adjust output accordingly.
During gentle slowing, you’ll typically see a lighter trailer-brake command; harder deceleration prompts the controller to increase output more quickly, helping the trailer slow in step with your vehicle.
The accelerometer determines the response to detected motion, while your selected gain or power setting limits the maximum command. So, treat gain as a ceiling, not as the mechanism that senses braking intensity. If you set gain too low, the controller can’t deliver enough trailer braking even during a forceful stop. If you set it appropriately, the sensor can modulate output across changing deceleration levels without exceeding that cap. This distinction explains why proportional response varies with braking demand, while the gain setting defines its upper bound in response to measured deceleration continuously.
Time-Delay Brake Output
Time-delay controllers begin applying trailer-brake output when they receive the tow vehicle’s brake signal, then increase it at a preset rate until it reaches the gain setting’s maximum. Unlike a proportional controller, which uses an accelerometer to detect deceleration, a time-delay unit doesn’t measure how quickly your vehicle slows.
It follows its timing profile after the brake signal arrives, so its commanded output reflects elapsed time and your preset settings, not measured deceleration. The gain or power control sets the output ceiling: the ramp can’t exceed the maximum you select. You typically adjust that ceiling and the ramp’s aggressiveness to shape the trailer’s braking response during each event.
Choosing Between Controller Types
Your choice depends on how closely you want trailer braking to follow the tow vehicle’s deceleration.
A proportional controller uses an inertia sensor to measure slowing and adjusts trailer voltage accordingly. Gentle braking produces lighter output; rapid deceleration raises it quickly, up to your gain limit. This tailored response can reduce trailer jerk and sway.
A time-delay controller senses only the brake signal, then applies a preset ramp to its maximum. It uses the same ramp whether you brake gently or hard, so response may feel less matched. In either design, gain caps commanded power; it doesn’t indicate force delivered.
| Type | Sensing and response | Practical effect |
|---|---|---|
| Proportional | Measures deceleration; varies output | More closely tracks braking |
| Time-delay | Ramps after brake signal | Consistent, less tailored output |
Trailer Load and Balance
Your load distribution and tongue weight affect axle loading, tire traction, and the braking force each wheel can use. Set brake gain for the trailer’s actual weight and braked axles: a heavy load may need more output, while a light or poorly balanced load can cause tugging or wheel lockup.
Worn or misadjusted brakes can also require more output, so reassess gain when load or brake condition changes.
Load Distribution
Trailer load distribution changes how effectively each axle’s brakes work, so the same controller gain can produce different stopping behavior. When you shift cargo toward one axle, you alter the load each brake must control. A lightly loaded braking axle may respond weakly despite an output that feels excessive; an overloaded or imbalanced trailer can reach wheel lock sooner, producing jerky stops.
Front- or rear-biased loading can change trailer deceleration, making braking feel less smooth at unchanged gain.
| Load condition | Braking effect |
|---|---|
| Balanced axles | More even response |
| Light braking axle | Weaker stopping force |
| Heavy axle loading | Earlier wheel lock |
| Uneven distribution | Drift or sway risk |
Treat balance as part of tuning. Gain limits commanded output; it can’t compensate for weight placement.
Tongue Weight
When you change tongue weight, you change how the trailer loads the hitch and how much braking force it needs for stable, straight stops. A properly loaded trailer typically places about 10–15% of its weight on the hitch. This load helps keep the trailer planted, affecting braking forces overall.
With too little tongue weight, braking transfers less load forward, which can promote sway and make the trailer feel under-braked. Too much can overburden your tow vehicle’s front end and make the trailer track aggressively; excessive braking may produce a sharp tug or lockup sensation. Cargo moves and axle-load changes alter the trailer’s effective braking contribution, even at the same GVWR. A proportional controller’s inertia sensor responds more predictably when you distribute the load.
Balance and Brake Gain
Brake gain sets the maximum output sent to the trailer brakes, so tune it with the trailer loaded on a dry, level, paved surface. Set gain to match the loaded trailer’s weight and brake hardware; the goal is firm deceleration without wheel lockup. Because gain determines how strongly the trailer can pull against your tow vehicle, load balance matters too. Uneven cargo can produce abrupt braking or encourage sway, even when the displayed gain seems appropriate.
Increase or reduce gain in controlled steps while testing, then assess whether the trailer brakes contribute smoothly. Excessive gain causes sharp tugging and may lock the wheels; insufficient gain lets the trailer push the tow vehicle or slow less effectively. Retest whenever cargo shifts, passenger load changes, or you use a different trailer configuration. Matching gross vehicle weight ratings doesn’t guarantee the same setting: axle loads and brake response can differ substantially.
Backing Down a Boat Ramp
On a boat ramp, your controller’s response affects how steadily the trailer slows as you back downhill. A time-delay unit may wait until your brake lights activate, then increase trailer braking toward its preset maximum. A proportional controller instead uses an inertia sensor to match output to the truck’s deceleration on a slippery surface.
Set gain as the maximum trailer-brake output, then tune it for your loaded trailer and ramp conditions; similar rigs may need different settings. First test at low, controlled speed on dry, level pavement. Aim for firm, even stops without trailer tugging or wheel lockup, then recheck on the ramp.
With electric brakes, the tow vehicle sends brake power through its output circuit and 7-way connection whenever you brake. Trailer braking also helps reduce sway during descent.
Breakaway Battery Requirements
If a trailer’s GTM exceeds 2,000 kg, many jurisdictions require a breakaway system in addition to electric brakes.
It uses a trailer-mounted battery and a cable-operated pull switch that remains attached to your tow vehicle. When separation pulls the cable from its connection, the switch activates the battery, which applies the trailer’s electric brakes independently of your vehicle’s brake controller. After activation, the system must keep the brakes applied for at least 15 minutes, helping prevent an uncontrolled trailer from moving.
The battery accordingly needs enough charge and capacity to meet this hold-time requirement. Some jurisdictional guidance, including NSW RMS VIB 6 (2007), specifies continuous charging from the towing vehicle and a warning device that alerts you if charge falls below the required level.
Incorrect Breakaway Battery Wiring
Correct breakaway-battery wiring keeps the system inactive during normal towing and triggers it only when the trailer separates. The breakaway circuit is separate from your brake controller: when the pin pulls free, the trailer battery powers the brakes independently.
- Route and secure switch wiring so hitch flex, potholes, or ordinary towing can’t pull the pin.
- A false trigger can hold brakes on for roughly 15 minutes, creating drag and draining the battery.
- If your setup charges the battery while towing, incorrect charging-circuit wiring can leave charge below the operating requirement.
- Don’t use the battery as a parking brake or test device; use controller output for routine braking.
The system’s purpose is emergency separation braking, not routine stopping. Treat any unintended activation as a wiring fault and verify the breakaway function according to its manufacturer’s procedure before travel. Never rely on it to secure a parked trailer.
Inspect Trailer Wiring Connections
Inspect the 7-pin connector for a secure, locked fit and bent or pushed pins; it carries the brake signal and power to the trailer’s electric brakes.
Check front brake-circuit wiring for secure connections and chafing. Clean and tighten the ground return; poor grounding can cause weak or intermittent braking.
At each wheel, confirm connections to the electromagnet leads at the backing plate or drum; corrosion or loose spade connectors can interrupt current. Trace frame wiring where it flexes near the hitch and axle. Damaged insulation or exposed conductors can stop output to one side or axle. In the junction box, keep the controller output wire separate from the breakaway battery feed, if fitted, and secure both; crossed or loose wires can prevent response.
Conclusion
Set gain only high enough to make the trailer brake firmly without locking its wheels. Match controller response to your braking needs, and account for wet roads, load balance, and low-speed maneuvers such as backing down a ramp.
Before towing, verify the breakaway battery meets requirements, its wiring is correct, and every trailer connection is secure. These checks help your controller deliver predictable braking when you need it, while reducing the risk of sway, skidding, or brake failure.
Flat Tow vs Tow Dolly Selector Quiz
Five-question quiz that routes you to flat towing, a tow dolly or a car trailer, with a weight check and owner's-manual check lists.
Trailer Tire Size Decoder & Wheel Fit Checker
Decode a trailer tire size, get its diameter, compare a replacement size and check rim size, lug count and bolt circle.