What Size Hitch Pin for a 2 Inch Receiver? Diameter and Length
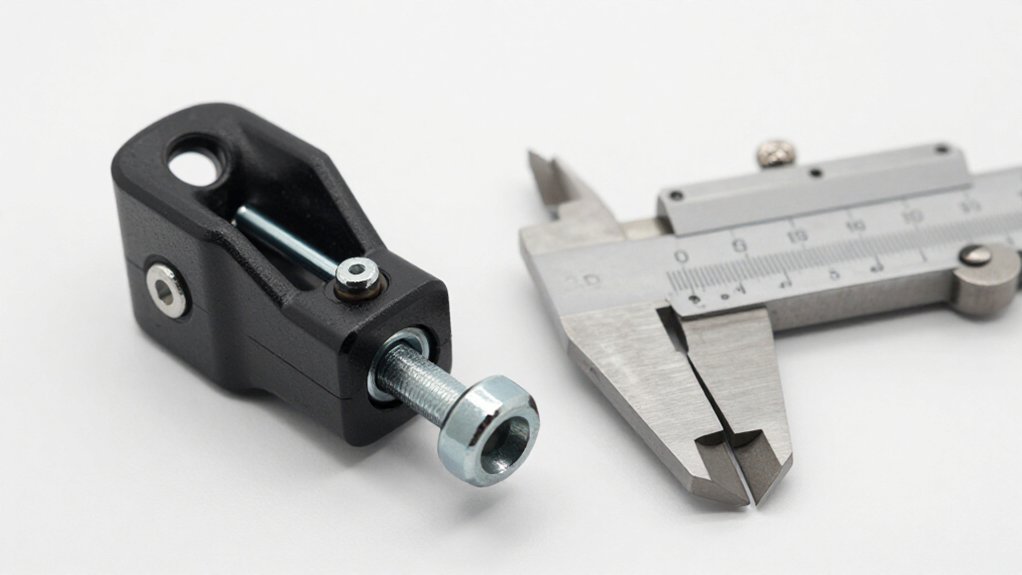
For most 2-inch receivers, use a 5/8-inch-diameter hitch pin; confirm it matches your receiver’s hole and manufacturer’s rating.
Measure usable length along the straight shank, not the handle or overall pin. It should pass through the receiver walls and accessory shank, with enough length for the clip or lock to seat.
Plan for at least 3 inches of usable length.
Don’t force a poor fit or tow if the pin shifts. The checks that follow can help you verify secure fit.
2-Inch Receiver Pin Dimensions
A 2-inch receiver typically takes a 5/8-inch-diameter hitch pin, but diameter isn’t the only dimension to check.
For a common Class III setup, choose a pin whose diameter matches the receiver’s pin hole. For a 2-inch-by-2-inch Class 3/4 receiver, plan on at least 3 inches of usable pin length. Usable length, not overall length, must extend through the receiver tube wall and into the accessory shank.
Measure the portion available for engagement, not just the pin end to end. A common pin may measure about 2-7/8 inches overall, yet that figure alone doesn’t confirm adequate usable length. You should confirm full passage and secure engagement before towing; don’t rely on a pin that leaves slack or fails to reach through both components. Also verify the manufacturer’s rating first.
5/8-Inch Pin Fit Guide
For a 2-inch receiver, use a 5/8-inch hitch pin that fits the pin holes snugly. This standard size suits many Class III, Class IV, and Class V receivers with a 2-inch opening.
| Check | Guidance | Action |
|---|---|---|
| Diameter | 5/8 inch | Match holes |
| Usable length | At least 3 inches | Check reach |
Match the pin diameter to the receiver holes; don’t force a pin that doesn’t fit. Check usable length, the straight section that passes through the receiver and accessory shank. For many Class III and IV setups, choose at least 3 inches. Overall length alone won’t confirm proper engagement, since the head or locking end may shorten the straight insertion section. Secure the retainer, then verify the pin crosses both receiver walls and the shank. Don’t tow with a bent, damaged, or poorly fitting pin.
1/2-Inch Pin Exceptions
Although 5/8 inch is standard for many 2-inch receivers, a 1/2-inch pin may fit only as an exception: confirm the receiver’s pin-hole diameter is truly 1/2 inch before using it. A 1/2-inch pin normally suits Class 1 and Class 2 receivers, typically measuring 1-1/4 by 1-1/4 inches—not standard 2-inch receivers.
If your receiver has a 5/8-inch hole, a 1/2-inch pin can leave excessive clearance, allowing movement and rattling. Don’t assume a pin fits safely because you can insert it. Specialty or aftermarket receivers may use nonstandard dimensions, so check the receiver specifications or measure the hole before installation.
Also verify that the pin’s usable length meets the receiver-and-accessory requirements, ensuring it passes fully through both components and retains them securely. If either dimension is uncertain, contact the receiver manufacturer.
Usable Length Measurement
Measure the straight, load-bearing section that passes through the receiver and accessory shank; don’t count the handle or rely on overall pin length. For a standard 2-inch receiver, choose a 5/8-inch pin with at least 3 inches of usable reach, and account for any added width from an adapter.
If the pin can’t extend fully through for secure clip or lock installation, select a longer pin to prevent excess movement while towing.
Usable Length Defined
Usable length is the straight, load-bearing section of the hitch pin that passes through the receiver tube and accessory shank; it doesn’t include the bent handle or clip end. For a 2-inch Class III or IV receiver with a 5/8-inch pin, you generally need at least 3 inches of usable length. This straight section must pass through the receiver wall and accessory shank for proper seating and retention.
Overall length can mislead: a long handle doesn’t make up for a short working section. If usable length is insufficient, the pin may not seat fully, the connection may have excessive play, or you may not install the clip or lock securely. Confirm the pin seats fully and the retainer engages completely as designed before towing.
Measuring Pin Reach
To check pin reach, compare the pin’s straight, load-bearing usable length—not its handle or overall length—with the receiver’s inside width, measured from one inner edge to the other. Then measure the pin’s straight section against that span with the shank aligned in the receiver.
For common 2-by-2-inch Class 3 or 4 receivers, choose a 5/8-inch pin with at least 3 inches of usable length. This lets the pin pass through the receiver tube wall and accessory shank so the clip or lock can seat fully. Check product specs and packaging for usable length separately; the bent handle reduces insertion distance.
A pin’s stated overall length can mislead: a 3-inch pin with only about 1.5 inches of usable shaft may not reach the locking position. Don’t rely on overall length alone.
Receiver Width Considerations
Receiver width determines how much straight pin length must pass through the hitch and accessory.
Measure the receiver’s inside width, edge to edge, with a tape measure. This gives you a practical estimate of usable length for your hitch. Usable length is the straight pin section that passes through both receiver walls and into the accessory shank.
For a 2-inch Class III or IV receiver, typically use a 5/8-inch pin with at least 3 inches of usable length. Overall length can mislead: a long handle or bent portion may reduce the straight length that inserts.
If usable length falls short, the retaining clip or lock may not seat fully, allowing excessive movement and creating unsafe towing conditions. Check fit before you tow, and confirm secure retention.
Pin Length and Adapters
When checking hitch-pin fit, measure the straight usable length, not the overall length that includes a bent or handled end. Usable length is the load-bearing section that passes through the receiver tube and exits the opposite side. For a 2-inch Class III or IV receiver, choose a 5/8-inch-diameter pin with at least 3 inches of usable length.
Compare that measurement with your receiver’s inside width, from inside edge to inside edge; don’t rely on a product’s overall-length listing alone. Some pins come with an adapter sleeve so one pin can fit more than one receiver size. The sleeve changes the fit at the receiver opening, but it doesn’t replace the length requirement.
Before purchase, verify the pin’s usable length matches the receiver and accessory configuration.
Avoiding Short Pin Fit
A pin’s overall length can be misleading, so measure the straight section that passes through both the receiver wall and accessory shank. For a 2-inch (Class III/IV) receiver, you typically need a 5/8-inch-diameter pin with at least 3 inches of usable length, allowing full insertion and clip or lock engagement.
Don’t assume a pin labeled 3 inches provides reach: if its bent handle takes up 1.5 inches, only 1.5 inches may pass through the assembly, which can be too short. Before you buy, measure your receiver’s opening from wall to wall, then verify the pin’s minimum usable length meets or exceeds that dimension. A short pin can leave your accessory loose, create play, and stop the retaining clip or locking mechanism from engaging securely.
How Pin Fit Affects Security
For a 2-inch receiver, use a pin that matches the receiver’s hole—commonly 5/8 inch—and has enough usable length to pass fully through the receiver and engage its clip or lock. Check that the pin slides through both receiver walls and the accessory’s holes without force, then verify the retaining clip or lock closes completely.
A pin that’s undersized can leave excess clearance, allowing the accessory to move; inadequate usable length may prevent the locking end from capturing the receiver securely. Either condition can increase separation risk under towing vibration.
Before a trip, confirm the pin is fully seated and its retainer is engaged, not resting partly on the receiver. Correct fit limits rattle and movement, helping reduce wear that could weaken retention over time.
Adapter Sleeve Compatibility
If your hitch pin uses an adapter sleeve, make sure it matches the receiver’s pin-hole size and doesn’t reduce the usable length needed for secure engagement.
For a 2-inch receiver, use a 5/8-inch pin as the baseline, with at least 3 inches of usable length. If the pin has a smaller shank, fit the sleeve over it to create the snug 5/8-inch diameter; remove the sleeve only when the smaller pin matches a smaller receiver’s hole.
Before inserting the pin, verify that the sleeved diameter matches the receiver’s pin holes. Then confirm the pin passes through both receiver walls and leaves enough exposed length for the clip or lock to engage. An incorrect or poorly seated sleeve can leave excess play or prevent secure installation.
Don’t tow if the pin shifts noticeably or the retainer can’t lock; correct the fit or choose a compatible pin.
Class III Hitch Applications
On a Class III hitch, use a 5/8-inch-diameter pin with at least 3 inches of usable length. Class III receivers measure 2 inches by 2 inches and appear on midsize and full-size trucks and SUVs. Match the pin to the receiver hole: it must measure 5/8 inch in diameter.
Usable length means the straight load-bearing section that passes through the receiver, not the pin’s overall length. Check this dimension before you buy or install a pin. A bent or handled section can shorten the insertion depth, even when the pin looks long enough. Confirm at least 3 inches of usable length, then insert the pin and secure its retaining clip. Use a pin designed for Class 3, 4 or 5 hitches and follow the hitch and accessory manufacturers’ instructions.
Oversized Pin Hole Wear
Because a 2-inch receiver typically uses a 5/8-inch pin, an oversized pin can leave extra clearance that lets the accessory shift and wear the hole. That movement can accelerate wear along the receiver wall, especially when vibration repeatedly drives the pin against the hole edges.
- Use a correctly sized 5/8-inch pin; a larger diameter can increase clearance and promote an oval hole.
- Choose enough usable length to pass fully through the receiver and accessory; partial seating can let parts shift.
- Confirm the accessory sits squarely and the pin inserts completely before towing; don’t rely on pin diameter to correct wobble.
- If you see elongation or cracking, stop using the setup, replace the correct-size pin, and address the loose fit before towing safely under load.
Corrosion Inspection Steps
Even a properly sized 5/8-inch hitch pin can become unsafe if corrosion weakens it or stops secure installation. Before each towing season, inspect the pin for rust, pitting, or chipped chrome, especially around the handle and clip-contact area. Verify its diameter suits your 2-inch receiver; typically, Class III/IV/V receivers use a 5/8-inch pin. Check the full length, often listed as 2-7/8 inches, and ensure corrosion hasn’t shortened the straight section needed to pass through and accept the clip.
- Inspect for pitting or finish loss at handle and clip contact points before towing.
- Move the pin gently; it should slide without force.
- Replace a binding pin or one with heavy clip-seat corrosion.
- Dry it, coat it lightly, and store it away from moisture before towing.
Conclusion
For most 2-inch receivers, choose a 5/8-inch-diameter hitch pin, then confirm your receiver and accessory hole sizes before buying. Measure usable length across the receiver and any sleeve or spacer; the pin must pass through and accept its clip without binding.
Don’t substitute a 1/2-inch pin unless the manufacturer specifies it. Inspect for wear and corrosion, and replace damaged hardware. A correctly sized, secured pin helps keep your trailer connection in place; check it before each trip.