How to Attach Trailer Safety Chains Correctly: Length, Hooks and Slack
Park your trailer level, set the brake, and chock both sides of its wheels.
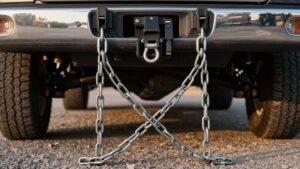
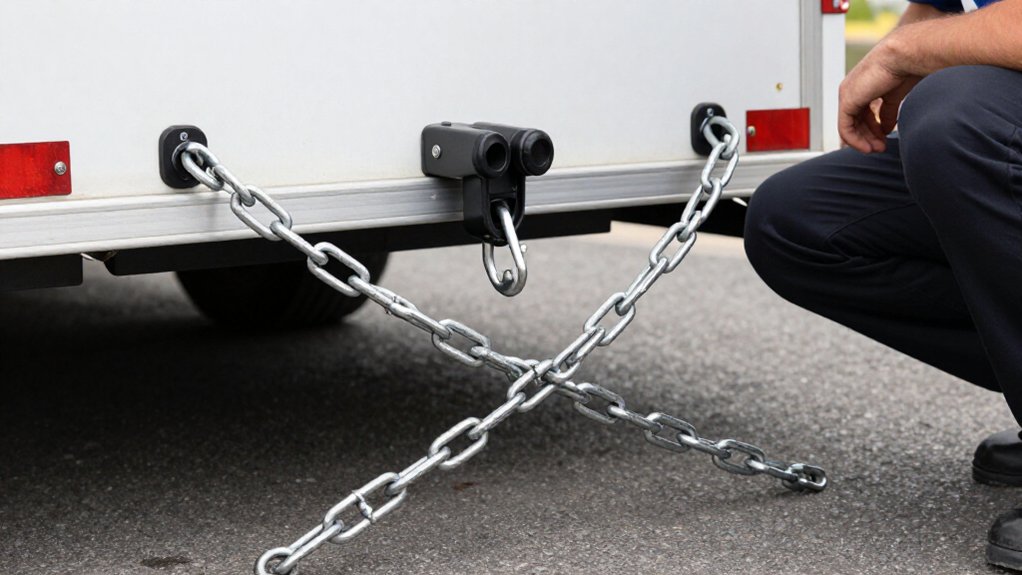
Cross two rated chains beneath the coupler, attaching each to the opposite frame-mounted point. Set 6–12 inches of slack straight, with the X about 4–6 inches above pavement.
Use sound, latched hooks rated for the trailer; lock the coupler and route the breakaway cable independently.
Test full turns both ways; chains mustn’t bind or drag.
These checks help protect your connection.
Length, Hooks, and Slack
Set chain length to allow full left and right turns without letting the chains drag: with the trailer and tow vehicle straight, aim for about 6–12 inches of slack, then verify in a parking lot that near-jackknife turns don’t bind the chains or pull them low. Use two rated chains, crossed beneath the coupler in an X cradle to control separation if the trailer disconnects. Measure the longest extension at a near-jackknife angle in both directions; don’t size chains only for straight travel.
Keep chains clear of pavement in turns. If excess slack hangs low, move to a later link or secure it with a hanger or tie. Never twist links or stretch chains to force a fit. Recheck slack and clearance before towing; repeat the turn check after adjustment.
Hook Type and Condition
After setting chain length, check that each hook has a functional safety latch, such as a latched clevis grab hook or S-hook. An open hook can bounce free on rough roads and may trigger a violation. Before every trip, inspect hooks and links; replace damaged components before towing.
- Reject cracks, rust pitting, bent links, worn parts, or missing/nonworking latches.
- Orient each hook from the backside/upward so it seats positively against vibration.
- Match connectors to trailer GVWR; verify combined chain working load limit, and avoid twists or forced fits on undersized hardware.
A mismatch or substandard connector can weaken the system under separation forces. Don’t judge suitability by break strength alone; use rated hardware throughout, since a component can reduce capacity and create an out-of-service risk.
Step 1: Park on Level Ground
Park on level ground before attaching the chains so you can assess slack and clearance accurately without the coupler shifting from side-to-side tilt. Keep the trailer straight and level while you connect them; this preserves coupler geometry and gives you a reliable measurement. Aim for 6–12 inches of slack with the rig aligned, enough for full turns without letting the chains drag.
Arrange the crossed chains so the lowest point of the X beneath the tongue sits about 4–6 inches above the pavement. After hooking, turn the vehicle and trailer left and right in a parking area. Confirm the chains neither bind nor become fully taut before a tight turn.
Verify both hooks are latched, chains aren’t twisted, and recheck slack after any adjustment.
Step 2: Chock the Trailer Wheels
Before handling or routing the safety chains, apply the parking brake and chock the trailer wheels on both sides to prevent movement during hookup.
Park on level ground. Place chocks ahead of and behind the tires as needed, blocking movement in either direction. Don’t rely on the coupler, jack, or tow vehicle alone; a shift can misalign chain routing, bind slack, or affect hook seating.
Once chocked, check that the trailer remains stable before you begin routing the chains in a crossed X beneath the coupler and adjusting slack. If the trailer creeps, stop and reposition the chocks before continuing. After you finish adjusting chain length and slack and positioning the hooks and latches, recheck the chocks.
Keep them in place through your pre-trip walk-around so the trailer can’t roll while you inspect the hookup.
Step 3: Secure Chains to Towbar
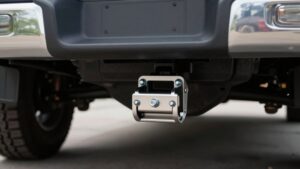
With the trailer still chocked, attach two separate safety chains to the tow vehicle’s frame-mounted loops or manufacturer-rated tow points, never to the hitch ball, bumper, or other removable parts.
Secure each chain to its own structural attachment point; don’t share one point or rely on removable hardware. Check that every chain, hook, shackle, and quick link carries a working load limit appropriate to your trailer’s GVWR, with combined chain capacity exceeding that rating.
Hook upward into each attachment point from below, then verify the latch closes and can’t open unintentionally. With the trailer straight, leave about 6–12 inches of slack while keeping the chains clear of the ground. Turn fully left and right to confirm they neither bind nor drag. Recheck connections before towing.
Step 4: Cross Chains Beneath Coupler
Cross the driver-side chain to the passenger-side tow point and the passenger-side chain to the driver-side point, forming an X beneath the tongue and coupler. This crossed routing creates a cradle that can help support the coupler area if separation occurs; parallel chains don’t provide the same arrangement. Keep the crossing directly beneath the coupler, not off to one side.
Attach each chain to its designated tow point with a correctly rated hook. Before travel, verify every hook is fully seated and its latch is locked; vibration on rough roads can otherwise let a hook bounce open. Inspect the chain links and attachment points for damage, and replace any component that’s bent, cracked, or worn.
After connecting both chains, make sure they remain crossed and untwisted. Follow your trailer and tow-vehicle manufacturers’ instructions for chain routing and attachment, since designated points and requirements can vary between models.
Step 5: Set Coupler Clearance
Set coupler clearance with the trailer level and hitched, keeping the lowest point of the crossed chains about 4–6 inches above the ground when aligned straight. Use the X beneath the coupler to help catch it if separation occurs, while keeping chains off the pavement.
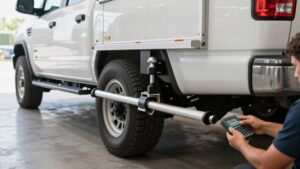
Allow enough slack for full left and right turns; 6–12 inches in the straight-ahead position is a common starting point, not a substitute for a turning check. Make full parking-lot turns and confirm neither chain drags nor pulls taut enough to restrict steering. If clearance is inadequate, your chains may be too short. Measure the required reach with a rope between attachment points while the trailer is near jackknife, then choose the next available chain length upward.
Step 6: Lock the Coupler Latch
Close the coupler latch fully and secure it with its locking pin, if equipped; safety chains are only a backup, not a substitute for a locked coupler. After coupling, inspect the latch indicator: it must show “locked,” with the lever fully seated in the correct notch. Check for partial engagement; vibration or road impacts could release the latch.
Tug-test the latch and pin to confirm neither can move or open. If either shifts, correct the alignment, relatch, and test again before towing. After a short drive, stop and recheck; verify the latch remains locked and the coupler hasn’t crept before highway speeds.
Cross chains beneath the coupler. Together, the locked coupler and properly attached chains provide a fail-safe if the hitch separates; chains don’t compensate for an unsecured latch unexpectedly.
Confirm Breakaway Cable Routing
Before towing, attach the breakaway cable independently of the safety chains so it can activate if the coupler disconnects.
Keep the cable shorter than the safety chains so the trailer brakes engage before the trailer fully separates. Route it with enough slack for turns and suspension movement, but prevent dragging, snagging, or contact with moving parts. Don’t pass it through chain hooks or other safety-chain hardware; an independent attachment preserves its function if the coupler disconnects.
Before a trip, visually confirm that the connection is secure and functional. Check that the pin or loop will pull free easily, then make slow left-right turns and verify the cable doesn’t chafe against the hitch or chain.
Recheck its routing with your safety-chain hookups and lengths during every pre-trip inspection.
Hook Won’t Latch Properly
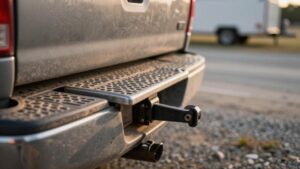
If a safety-chain hook won’t latch fully, stop and replace it; an open or non-locking hook can bounce loose on rough roads. Use only positive-lock connectors: a latched clevis grab hook, safety-latched S-hook, or screw-pin shackle with its pin fully secured. Confirm the latch closes and it has no wiggle. Attach only to the frame-mounted tow or chain loop, not the hitch ball, bumper, or removable parts; geometry can block engagement.
| Check | Action |
|---|---|
| Hook | Replace if it won’t close |
| Routing | Untwist; adjust slack |
Never twist the chain to align the latch; twisting can reduce strength by up to 75%, even if the hook clicks. If tension or misrouting prevents seating, adjust slack so the latch closes freely. Allow turn slack, then tug-test and recheck closure.
Replace Chains After Impact
After an impact, replace safety chains that are bent, stretched, cracked, or deeply pitted by rust before towing; the damage can reduce their integrity below the Working Load Limit required for your trailer’s GVWR. Replace damaged hooks, latches, and quick-links too; a weak connector can fail if the coupler separates and may trigger an out-of-service inspection.
Don’t straighten a deformed chain or reuse one with elongated links or mismatched geometry; twisting or altering links can weaken the assembly. After replacement, check length and slack: your chains must allow full turns without dragging, which can create fire hazards and violations.
Confirm they still cross beneath the coupler, and keep the breakaway cable, if fitted, independently attached and shorter than the chains before every towing trip.
Conclusion
Before you tow, confirm each safety chain is rated for your trailer and secured to the towbar at designated points. Set chain length so it supports the coupler if separation occurs while keeping enough slack for turns without dragging.
Use undamaged hooks that latch fully, and cross chains when your setup requires it. Don’t tow with a faulty latch, misrouted breakaway cable, or impact-damaged chain; replace parts before moving the trailer. Stop and recheck connections.