How to Repack Trailer Wheel Bearings in Your Driveway
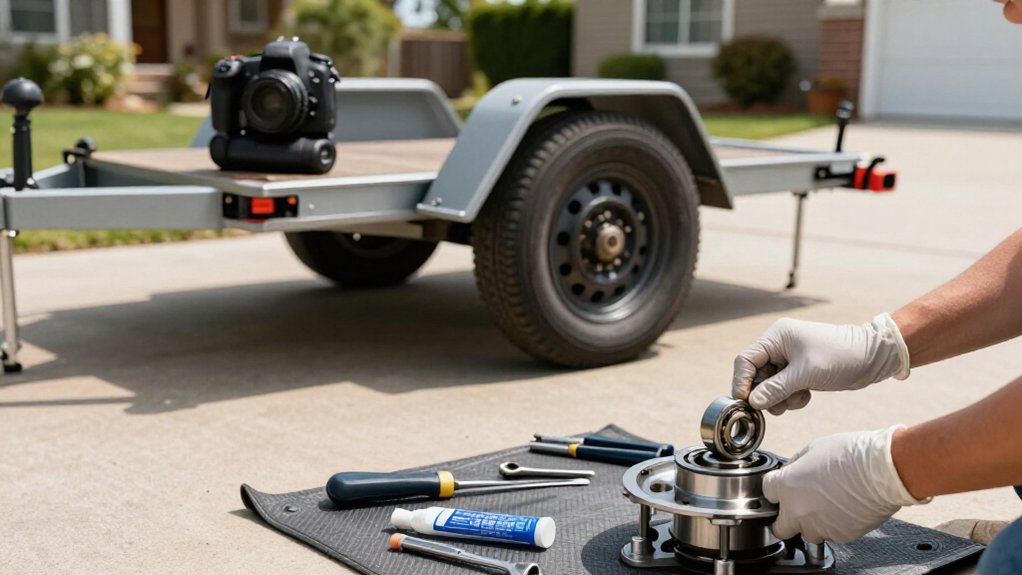
You can repack trailer wheel bearings by parking level, chocking wheels, and supporting one corner on a rated stand; never rely on the jack alone.
Remove the dust cap, cotter pin, nut, and washer, then pull the hub straight off.
Pack bearings until grease emerges through the rollers, inspect parts, and install a new seal.
Reassemble to manufacturer torque specs.
Stop for heat or roughness; service yearly or every 12,000 miles.
More details cover checks.
Typical Trailer Hub Assembly
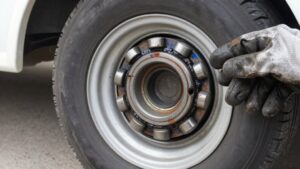
Before repacking trailer bearings, identify how the hub assembly fits together. A typical assembly centers on the hub, which rotates around the spindle. Inside, a larger outer bearing and smaller inner bearing support the hub; spacer and seal components separate and retain them.
At the spindle end, a washer and retaining nut secure the hub, while a cotter pin locks the nut. The dust cap encloses this hardware and helps keep contamination out.
Knowing this layout helps you plan service and keep bearing positions clear. During service, clean both bearings and the spindle before reassembly. Dexter-style schedules call for annual repacking or about every 12,000 miles; inspect and lubricate related brake components while the hub’s apart. Use the specified parts and adjustment procedure carefully.
Remove the Dust Cap
With the trailer secured on jack stands and the wheel removed, you can access the hub’s dust cap.
Use a flat-head screwdriver or similar prying tool. Set its tip beneath the cap’s outer lip, then work around the edge. Don’t lever hard against one spot; pressure helps protect both the cap and its seat.
- Move the tool a short distance each time, keeping it controlled.
- If the cap sticks, tap the screwdriver’s handle lightly to break it free.
- Don’t force the tool or strike the hub; damage can prevent a fit.
- Once released, remove the cap and set it aside where it won’t get lost or contaminated.
Keep track of the dust cap; you’ll need to reinstall it firmly after packing the bearings.
Step 1: Park on Level Ground
Park the trailer on level ground to keep the hub and spindle stable while you loosen the lug nuts, remove the wheel, and disassemble the hub.
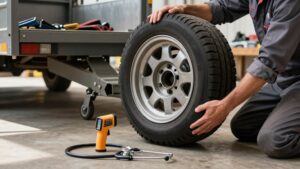
Set the trailer’s normal side-to-side support points, and chock the opposite wheel or wheels before lifting; chocks help prevent movement. Raise only one axle corner at a time, using a jack at the lifting point. Place a jack stand under the trailer before you spin the wheel to assess bearing condition. Never rely on the jack alone to support the trailer.
If the wheel won’t spin freely or makes a growling sound, stop and arrange service; don’t continue repacking.
Once support is secure on flat ground, follow the recommended service interval, typically every 12 months or about 12,000 miles.
Step 2: Remove the Cotter Pin
Once the trailer is stable on jack stands and the opposite wheel is blocked, straighten the cotter pin’s two ends with needle-nose pliers.
Keep light pressure as you work, and avoid bending the pin back and forth; repeated flexing can distort it and make clean removal harder. Grip one end securely with the pliers and draw the pin straight out of the spindle. Don’t twist or lever against nearby parts, and stop if the trailer shifts or the support feels unstable.
Confirm the wheel remains secure before continuing. The pin must come out before you can remove the retaining nut and washer that hold the hub in place. Set the removed pin aside for disposal, not reuse. During reassembly, install a new cotter pin of the specified type and size. Never rely on a bent or fatigued pin to secure the retaining hardware during this maintenance procedure.
Step 3: Remove the Hub
After removing the retaining nut and washer, pull the hub straight off the spindle, keeping the bearings from falling onto the ground. Keep a tray beneath the assembly to catch any parts, and support the trailer securely on jack stands on a level surface; never rely on a jack alone.
With the wheel removed, pry off the dust cap with a flat-head screwdriver to expose the spindle. The cotter pin, nut, and washer should be removed; verify they’re clear before pulling. Grip the hub and slide it outward without tilting, so you retain control of the bearings.
If the seal or hub binds, apply penetrating spray around the seal, allow it to work, then try again; avoid damaging the spindle or seal.
Step 4: Pack Grease Into Bearings
Press the bearing’s widest end into a half-dollar-size pile of grease, then rotate it from roller to roller to force grease through the entire interior. Keep steady pressure as you move each roller across the grease pile; this motion drives lubricant into the spaces between them. Continue around the bearing until grease fills its interior completely, rather than leaving only a surface coating.
Inspect the opposite side and confirm grease has emerged through the rollers. If any roller or internal section remains dry, repeat the packing motion until grease reaches it. Keep the bearing supported in your hand as you rotate it. Check all roller gaps and interior surfaces before setting it aside for reinstallation. Manual repacking takes roughly 30 minutes per bearing, depending on your experience, on average.
Step 5: Check Bearing Play
With the trailer securely supported on jack stands, grasp the wheel at the 12 and 6 o’clock positions and gently rock it to check for bearing play. Keep the trailer stable, and don’t place any part of your body beneath an unsupported axle.
Noticeable movement isn’t normal; stop before disassembling the hub and inspect further, or have a service center assess it. Excessive clearance can signal worn bearings or a spindle problem, so don’t assume repacking will correct it.
Next, spin the wheel and listen: healthy bearings rotate freely and quietly; friction or growling indicates trouble. If the wheel turns roughly or grinds, don’t proceed until you identify the cause. Check signs now; they help you decide whether repacking is appropriate or service is needed.
Step 6: Install New Grease Seal
Once you’ve removed the hub, tap out the old grease seal with a block of wood to avoid scoring the hub. Don’t pry against the hub’s sealing surface; damage there can prevent the new seal from sealing properly.
Inspect the old seal, and replace it if it’s rusted to the hub or damaged. Remove all old grease, then clean and dry the hub and spindle mating surfaces. Brake cleaner works well; use it in a ventilated area and keep it away from flames.
Lightly coat the new seal’s sealing area with fresh Dexter grease. Position the seal squarely in the hub, then tap it evenly around its edge until it’s fully seated. Don’t strike the seal directly with a hard tool. Once seated, proceed with reassembly of the hub and bearings.
Spin the Wheel and Listen
Before opening the hub, jack up the wheel, support the trailer securely on jack stands, and remove the lug nuts. Keep the trailer stable; never rely on a jack alone. Grip the tire and rotate it by hand, listening at the hub and feeling for drag or roughness.
A wheel that turns freely and quietly suggests the bearings are likely in better condition, so you can proceed with repacking. Friction, growling, grinding, or rotation irregularities can indicate inadequate grease, a failing bearing, or possibly spindle damage. Don’t open the hub or continue repacking when you detect these signs. Have a service center inspect the hub and spindle before towing.
This check helps you decide whether repacking is appropriate or whether you should stop and get professional help.
Bearing Overheating Warning
A hot wheel or growling or grinding after you spin it is a warning to stop, not a reason to keep repacking. Stop towing if heat persists; lack of grease or failed bearings can quickly cause breakdown. During repacking, use a grease gun with a Universal/Handy Bearing Packer so grease works through every roller. After cleaning, confirm grease emerges through the rollers, then coat the bearing cup lightly before reinstalling.
Inspect brakes too: dragging brakes add heat and can damage bearings.
| Clue | Your response |
|---|---|
| Hot wheel | Stop and inspect |
| Rough spin | Check grease and bearings |
Skipping proper lubrication raises overheating risk, especially when rollers are worn or under-lubricated. Don’t dismiss heat as normal after a drive; let components cool before handling, and replace damaged parts.
Schedule Annual Bearing Inspection
Check your trailer wheel bearings at least once a year, repacking them and changing the grease; if you track mileage, use 12 months or 12,000 miles as your lubrication interval. At that service, clean and inspect the bearings and races for pitting, scoring, discoloration, or other damage; replace questionable components rather than returning them to service.
With the hub removed, inspect the brakes and complete any needed brake maintenance before reassembly. Follow the trailer manufacturer’s procedures and torque specifications, and secure the trailer on rated stands with the wheels chocked; never rely on a jack alone. If you aren’t comfortable doing the work, schedule the annual bearing and brake checks with a local service center. Consult Dexter’s Operation Maintenance Service Manual for additional annual safety checks. Keep a written service record.
Conclusion
Before you tow, confirm the hub sits securely, the cotter pin locks the spindle nut, and the dust cap seals out water and grit. Spin each wheel and listen for grinding; check for looseness or unusual heat after a drive.
If you hear noise, feel play, or suspect overheating, stop and inspect the assembly before continuing. Repack serviceable bearings with the correct grease, replace damaged seals, and schedule an annual inspection to protect your trailer.