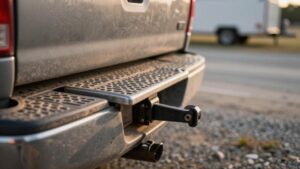
How to Stop Hitch Rattle and Wobble for a Quieter Tow
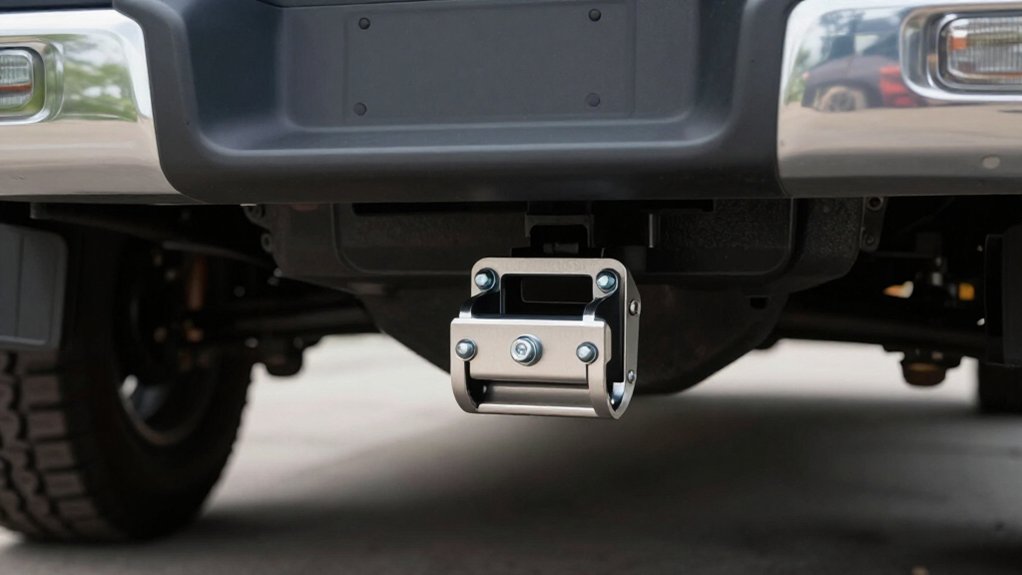
To stop hitch rattle and wobble, secure the ball mount inside a sized receiver and fit an anti-rattle stabilizer for its size.
Inspect the pin and shank for wear, then center the clamp over the receiver seam. Tighten its nuts evenly to the torque listed for the kit.
Test the connection with a wiggle check and drive over bumps.
Rinse salt from the receiver, let it dry, and recheck for clunks and looseness afterward.
Find the remaining hitch checks below.
Identify Hitch Rattle Sources
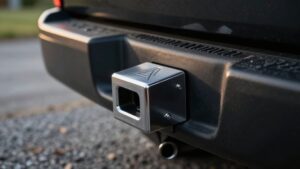
Hitch rattle often starts with the small clearance between the hitch shank and receiver tube, a gap manufacturers leave so the shank slides in easily. To locate the source, grasp the ball mount or drawbar and check for movement inside the receiver. Slack near the hitch pin lets the accessory shift side to side or up and down, especially when bumps and road vibration act on the connection.
That metal-on-metal contact can produce rattling, clunking, or a whining sound while you drive. Ball mount-to-receiver play is common: the drawbar may shift instead of staying seated. Note whether noise increases over bumps, then check the receiver and pin area for visible slack. Movement at this interface also places added stress on the hitch pin, which can make the sound persist during towing.
Choose a Hitch Stabilizer
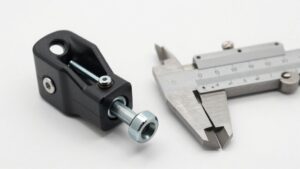
To stop receiver play, choose an anti-rattle stabilizer sized for your receiver and hitch class, such as a model made for a 1.25-inch or 2-inch receiver. Choose a heavy-duty, solid forged-steel unit with an anti-rust coating to support durable, quieter stability. Before you buy, confirm how the device mounts and tightens.
- A U-bolt typically passes over the ball mount, while a plate sits beneath the receiver tube.
- Tighten the bolts evenly until snug; the clamp locks the shank in place.
- That pressure limits up-and-down and side-to-side movement, reducing metal-on-metal clunks, rattles, and whining.
Follow the maker’s torque guidance, and recheck the fasteners as directed to keep the clamp secure during use on the road over time.
Step 1: Inspect Hitch Receiver Fit
Before adding a stabilizer, check that the hitch shank fits the receiver and that the components match your receiver size and hitch class. Check whether you have a 1.25-inch or 2-inch receiver, then match the hitch pin and anti-rattle hardware to that size and your Class I–IV hitch. A snug fit limits side-to-side and vertical movement under towing loads; a loose fit can let metal parts clunk together. Inspect the clearance between the ball mount or drawbar and receiver tube, since manufacturers allow insertion space that may contribute to noise.
Confirm the ball mount sits fully inside the receiver and is secured with appropriate stabilizer pressure, reducing looseness and stress on the pin. Examine receiver walls and hitch parts for wear or deformation. Replace damaged components, and correct mismatches such as an incorrectly sized 2-, 2.5-, or 3-inch pin setup; small dimensional differences can prevent secure contact.
Step 2: Align Clamp Over Seam
For effective clamping, position the U-bolt directly over the seam where the receiver meets the ball mount, then place the metal plate beneath the receiver tube. Slide the clamp around the receiver with the U-bolt centered on the joint between the receiver opening and the inserted shank. This location lets the clamp bridge the gap that allows side-to-side movement.
Align the plate under the tube so it sits squarely beneath the U-bolt; the parts should contact the receiver without rocking or sitting at an angle. Check that the clamp is centered across the seam, not shifted toward either end of the receiver. A misplaced clamp can leave slack between the receiver and ball mount, even when the hardware appears to fit.
If the U-bolt or plate misses the seam, remove the assembly and reposition it before securing the clamp. Correct alignment helps limit metal-on-metal play and reduces clunks and rattling.
Step 3: Evenly Tighten Clamp Nuts
Tighten both clamp nuts evenly, alternating in small increments so the U-bolt applies uniform pressure around the receiver. Confirm the clamp remains aligned: the U-bolt legs should sit, and the metal plate should rest beneath the receiver tube.
Then turn each nut a few rotations at a time, switching sides rather than tightening one nut first. This keeps one side from staying loose and helps the clamp hold the ball mount securely. Stop when the assembly feels snug; excessive force can deform the receiver tube.
Once tightened, move the hitch accessory to check for play. If you feel movement, alternate between the nuts in increments again, then repeat the check. Even pressure helps limit side-to-side wobble and the noise it creates while towing.
Step 4: Torque Nuts to Spec
With the clamp aligned and both nuts snugged evenly, use a torque wrench to tighten them to the specification for your Rhino USA anti-rattle tightener or clamp kit.
Confirm the U-bolt sits over the ball mount and the metal plate rests beneath the receiver tube before applying torque. Misalignment can prevent the clamp from gripping and leave room for movement.
Work, alternating between nuts, so the plate stays square and neither side receives uneven preload.
Tighten only until the accessory is immobilized in the receiver.
Don’t exceed the specified torque: excessive force can stress the bolts or plate and undermine reliability. Avoid judging tightness by hand feel alone. Check the fastener torque periodically, since components can settle and clamping force may decrease.
Step 5: Test-Drive Over Bumps
After installing the anti-rattle pin or clamp, take a slow test drive over familiar speed bumps or potholes. Drive over them at normal towing speeds and listen for metal-on-metal clunks from the ball mount-to-receiver gap. This joint allows hitch rattle when the mount shifts under vibration.
If you still hear noise, stop and check the tightener again. Confirm clamp bolts remain snug and evenly tightened, since loose receiver play may become audible only after the first bump load. If you’re towing a loaded trailer accessory, repeat the test with its normal load; extra weight can shift clearances and expose residual wobble. Re-test after a few short drives because parts can settle. Persistent bump-related noise usually signals remaining slack that the anti-rattle fit should remove.
Step 6: Stow Tools and Lubricant
Keep your hitch tools and supplies together in an easy-access spot so you can remove or reinstall the anti-rattle hardware without leaving loose parts in the truck or trailer. Before towing, pack a small rag, the correct lubricant, and any anti-rattle pin or tightener inserts with your tools.
Wipe the receiver and ball mount mating surfaces before installing the hardware; clean contact helps the assembly fit snugly and reduces noise. Apply only the lubricant type specified by the tightener manufacturer, typically a light anti-corrosion lubricant, to bolts, U-bolts, and moving surfaces. It keeps tightening smooth and can prevent squeaks. After tightening, check clamp plates and bolts for kit-specified snugness, then wipe off excess lubricant so it won’t collect dirt or grit over time.
Listen for Residual Clunks
On a short test drive, listen for clunks as the hitch moves side to side or up and down in the receiver. If you still hear movement, check the connection between the ball mount and receiver. Manufacturers leave clearance for easier insertion, but that gap can allow metal-on-metal contact.
Confirm the pin or clamp matches your receiver class and diameter; a two-inch model won’t fit a 2.5-inch Class 5 receiver snugly.
Do a wiggle test by pushing and pulling the insert. This helps you tell whether leftover slack causes the noise or the connection remains unsecured. If you find play, adjust the tightener and retighten its U-bolt or bolts evenly. Keep pressure balanced, not unevenly torqued, and verify the insert feels locked before towing again.
Pin Wear and Replacement
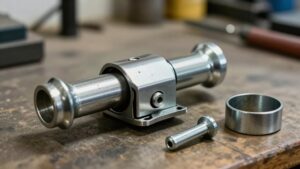
If looseness persists after you’ve checked the fit, inspect the hitch pin for wear from repeated metal-on-metal movement and vibration. If the pin or its pressure insert looks flattened, cracked, or loose, replace it rather than adding temporary padding. Match the pin to your receiver’s size and class; a pin that’s too small leaves clearance for movement. Anti-rattle designs use spring pressure or rubber, silicone, or spring inserts to press the accessory tube against the receiver wall.
| Receiver | Check | Choice |
|---|---|---|
| 1.25-inch | Class I-II | Sized pin |
| 2-inch | Class III-IV | Sized pin |
| Worn insert | Cracked or loose | Replace |
For frequent towing or repeated installation, consider stainless steel or a solid spring-style pin; loads and handling accelerate wear. Verify engagement before towing and before departure.
Rinse Salt From Receiver
After towing on wet roads or near the coast, rinse the receiver with clean water to remove salt that can accelerate corrosion and contribute to looseness. Direct water into the receiver opening, especially around pin and tightener contact points, and flush around the insert or ball-mount shank. Salt crystals trapped there can increase metal-on-metal movement and create noise. If buildup is heavy, use a hose until runoff runs clear.
Let the receiver dry fully before you reinstall or tighten an anti-rattle pin or hitch tightener; fitting one to a salty, wet surface can trap corrosive residue.
Repeat the rinse whenever road spray reaches the hitch. A clean, dry receiver helps the accessory tubing fit snugly against the receiver wall, limiting movement that causes rattle and wobble. Inspect the opening and shank after washing; residue can linger in corners. Clean contact surfaces before tightening, and follow the accessory instructions to reduce play.
Conclusion
You can quiet hitch noise by tracing clunks to receiver clearance, worn pins, or loose hardware before choosing a stabilizer. Check the receiver fit, position the clamp across the seam, and tighten its nuts evenly.
Stow your tools and lubricant, then tow and listen for remaining movement. Replace worn pins rather than masking them with extra pressure. After trips on salted roads, rinse the receiver to limit corrosion and keep your next tow quieter.