Pre-Trip Towing Checklist: What to Check Before Every Tow
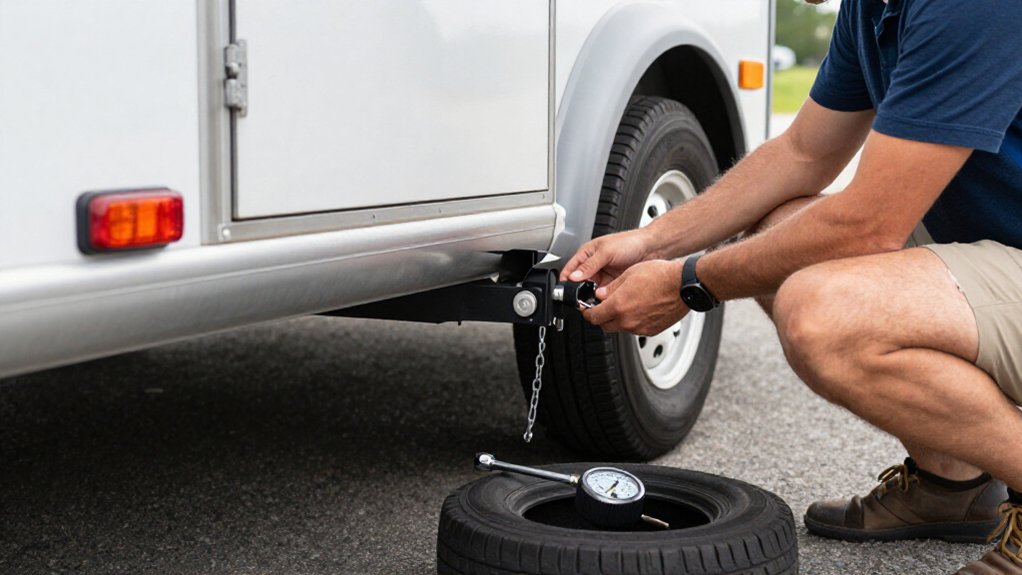
Before every tow, inspect cold tire pressure against the sidewall, check both sidewalls for damage, and secure cargo with proper tongue weight.
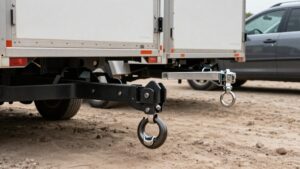
Confirm the coupler matches the ball, latch and pin it, cross safety chains, and test running, brake, and turn lights.
Check brake connections and the charged breakaway battery; attach its cable to your tow vehicle.
Use chocks, recheck lug torque, and stop for hot hubs or smoke.
Keep checking to travel more safely.
Who Needs This Checklist?
Who Needs This Checklist?
If you tow a trailer, use this checklist before every trip, regardless of its GVWR. It applies to light utility trailers and heavy 15,500–24,000 lb rigs: visible faults can cause failures at any size.
Inspect the coupler: confirm it’s seated on the ball and pinned or locked against vibration. If your trailer uses a four-, five-, or seven-pin connector, test running lights, brake lights, and both turn signals; vibration or corrosion can interrupt them.
For electric brakes, verify the breakaway cable attaches to the truck, not the hitch, and confirm its battery is charged and system is ready. If cargo changes each trip, recheck tongue weight, targeting 10–15% of loaded weight. Check tires cold and inflate them to the sidewall specification or maximum PSI.
Wheel Chocks and Flashlight
Before hitching or unhitching, secure the trailer with a chock in front of and behind a tire on the side you’re working on; chock both sides if you’ll be near the trailer bed. Set the chocks only after the trailer is fully secured, even on flat ground or a grade that seems almost level.
- Seat each chock firmly; test that it won’t shift on pavement, gravel, or uneven ground.
- Use your flashlight to inspect lug nuts and beneath the hub for missing fasteners or rust streaks.
- Check tire sidewalls in good light for cuts, bulges, or other damage before each tow.
- If you remove chocks to move, track them and remove them before driving; pull forward slowly to confirm stability. Watch trailer movement during the pull.
Breakaway Battery Check
A charged, functional breakaway battery is essential because it powers the trailer brakes if the trailer disconnects.
Before departure, inspect the battery and wiring; a dead battery can leave you with no braking in a runaway.
| Check | What you inspect | Action |
|---|---|---|
| Battery charge | Charge indicator or test result | Confirm adequate charge |
| Cable attachment | Securely attached to tow vehicle, not hitch | Reposition if needed |
| Cable routing | Slack, snags, and chafing | Route to avoid pull or failure |
| Connector/function | Tight, clean connection; brake activation | Test per trailer instructions |
Check electric-brake connections for looseness or corrosion, which can interrupt the circuit.
Keep the cable routed with slack for turns, but away from snagging points.
Pull-test only as directed; verify the brakes activate, reset the system before moving.
Check Tire Sidewalls
Inspect both visible sidewalls for cracks, dry rot, cuts, gouges, embedded objects, or exposed cords. Check for bulges, which can signal internal tire damage, and replace any damaged tire before towing.
Verify the DOT date code and confirm the tire’s markings and pressure guidance match your trailer, not your tow vehicle.
Look for Cracks
Even when the tread looks fine, check every trailer tire’s sidewalls for cracks, dry rot, and checking; trailer tires often age out before they wear out.
Look along both sidewalls in good light, rotating each tire as needed to check the circumference. Fine branching lines, deeper cracks, or widespread checking can signal rubber deterioration even when tread depth remains adequate. Note the tire’s age and follow its manufacturer’s replacement guidance.
If you find cracking or dry rot, have the tire assessed and replace it if deterioration compromises its condition; don’t tow on a tire you can’t trust. Before departure, set each cold tire to the pressure molded on its sidewall; follow the maximum cold PSI specified for ST tires. Recheck after storage; aging can progress.
Check for Bulges
Check each trailer tire’s sidewall for outward bulges, blisters, or uneven bumps; these can signal internal damage and risk of sudden failure, even when the tread looks normal. Walk around each tire and inspect the full circumference of both visible sidewalls. Check the inner sidewall only when you can reach it safely; a bulge may sit out of sight. Look for uneven bumps or soft spots.
Replace any tire with a bulge; don’t patch it, because internal damage can make failure unpredictable. Before driving, check cold pressure against the tire’s molded or label specification, not just your tow vehicle’s placard. Underinflation can worsen bulging. Also note nearby weather cracking or uneven wear, which may reflect pressure or loading problems and accelerate sidewall failure.
Spot Cuts and Gouges
During your walk-around, look for shallow nicks and deeper gouges on both visible sidewalls of each trailer tire. Don’t ignore damage just because the tire still holds pressure. Examine each cut closely for trapped rocks, nails, or sharp metal; an embedded object can puncture the casing later when towing under load. Check for weather cracking or dry rot around the damaged area, since aged rubber can split more readily there.
If you see exposed cords, a bulge, or a cut deep enough to distort the sidewall, consider the tire unsafe and replace it before towing. Don’t rely on monitoring a damaged tire. Even minor surface damage deserves attention; remove debris only when safe, and have uncertain damage assessed before you tow the trailer.
Inspect Both Sidewalls
Inspect both visible sidewalls of every trailer tire before each tow, including the inner sidewall if you can view it safely, during every pre-trip inspection.
Look for cuts, cracks or dry rot, bulges, and impact marks; check for exposed cords, punctures, or embedded objects. Any of these defects makes the tire unsafe for towing, so don’t proceed until a qualified tire professional addresses it.
Check sidewalls for chafing, flat spots, and weather-checking; these patterns can signal alignment or inflation problems that need attention.
Confirm each tire is ST-designated when required and carries the load range or capacity your trailer configuration needs. Use the tire’s sidewall information and certification markings to determine inflation targets. Don’t use the tow vehicle’s placard as your trailer-tire pressure guide.
Replace Damaged Tires
Sidewall damage can make a trailer tire unsafe even when its tread looks usable. Before each tow, inspect both visible sidewalls; view the inner sidewall only if safe. Look for dry rot, weather cracks, cuts, punctures, bulges, objects, or exposed cords or steel. A bulge can signal cord damage; an embedded object or exposed reinforcement means replace the tire immediately.
Replace an ST trailer tire for sidewall cracks or damage, even with deep tread. Impacts and age weaken sidewalls before tread wears out; don’t tow on temporary repairs. Set pressure when cold to the pressure molded on the tire sidewall, not merely the truck’s placard alone. If a tire is five or more years old and cracked, plan replacement regardless of tread depth.
Towing in Crosswinds
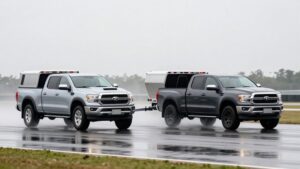
In strong crosswinds, reduce your speed and increase your following distance to maintain control and allow more room to stop. If your trailer starts to sway, hold the steering wheel steady and ease off the accelerator; don’t brake or make abrupt steering corrections.
Before setting out, check tongue weight, cargo placement, and tire pressure to reduce sway risk.
Reduce Your Speed
When crosswinds hit, slow down immediately: lighter tow rigs can catch the wind like a sail, and lateral force, and trailer sway, can increase with speed. Reduce your speed and maintain a pace that lets you respond smoothly. Keep both hands on the wheel; make gradual steering corrections rather than quick jerks, which can amplify instability.
If sway begins, ease off the accelerator and let speed fall gently. Avoid abrupt acceleration or braking until the trailer settles, since inputs can worsen its movement. Once stable, pull over somewhere safe and reassess your hitch and sway-control settings before continuing.
Check trailer tire pressures against the maximum pressure listed on each sidewall, including the spare; underinflated tires generate heat and can undermine stability in gusty conditions.
Increase Following Distance
Because crosswinds can push a trailer sideways faster than you can correct it, leave more space ahead so you can respond smoothly without hard braking. Crosswinds reduce your effective control, particularly at highway speeds, because steering inputs and trailer yaw can lag behind your tow vehicle.
Slow down and increase the gap; extra room gives you time to make gentle, gradual steering or throttle adjustments if a gust shifts the trailer, rather than reacting abruptly or braking hard. Keep scanning nearby rigs: if other trailers oscillate or ride gusts, assume your combination may face the same push and add more space. Reassess your buffer whenever speed or exposure changes.
Bridges, open stretches, and areas beside tall structures can intensify gusts, so leave additional room before entering them and check spacing again afterward. Don’t rely on a fixed gap; adjust it to conditions and maintain enough distance to respond smoothly.
Correct Trailer Sway
Crosswinds can trigger trailer sway, but correct loading and setup reduce the risk before you leave. Check tongue weight: target 10–15% of the loaded trailer’s weight. Too little encourages sway; too much overloads the hitch. Place about 60% of cargo weight in the trailer’s front half, and secure heavy items low to limit side-to-side movement.
Set up your anti-sway and weight-distribution hitch as specified. With proper tension, your truck’s front end should sit near its unloaded height, without dramatic rear squat.
Inspect tires; weak sidewalls amplify sway. Use ST tires when specified, and set cold pressures to sidewall maximum PSI. If gusts hit, slow smoothly and hold lane. Avoid abrupt steering or braking, which can worsen sway. Check loading, hitch, and pressures before departure.
Consistent 10-Minute Inspections
Before every departure, follow the same 10-minute inspection order: check lights, tires, coupler, chains, then brakes and electrical connections.
Use the routine every time; a fixed sequence helps you avoid missing an obvious defect. Check trailer tires cold against the tire sidewall’s maximum PSI or its information label, not your tow vehicle’s placard, and include the spare. Test every running, brake, and turn light. If you’re alone, record phone video or use a reflective surface; confirm tail and brake response with multiple flashes.
Match the coupler to the ball size—1-7/8, 2, or 2-5/16 inches—then seat, latch, and pin it. Cross chains beneath the tongue in an X, allowing turn clearance without dragging. Attach the breakaway cable to your truck and verify its battery is charged. Inspect brakes.
Wheel Hub Smoke
After checking the trailer’s lights, tires, and connections, watch for smoke or excessive heat at the wheel hubs. After your first few miles, stop and check the hubs. If one feels too hot to touch or you smell burning grease, assume bearing trouble. Growling, grinding, or rumbling can warn you before smoke appears.
Smoke means don’t drive. Overheating bearings can lose lubrication and seize quickly. Let the hub cool and arrange an inspection. Look for grease on the wheel’s back or around the hub; it may indicate a failed seal and lost lubrication.
Have a technician inspect the bearings and hub, replace worn seals or bearings, and grease components according to schedule—not merely top them off. Service bearings annually or every 12,000 miles.
Recheck Loose Lug Nuts
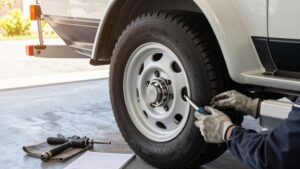
Check the trailer’s lug nuts before each trip with a calibrated torque wrench, tightening them to the manufacturer’s specification in the correct sequence. After any tire change, verify torque again after roughly 50 miles, when wheel seating can settle.
- Inspect for rust streaks radiating from lug holes; they can signal loose or improperly torqued fasteners.
- Shake each wheel firmly and check for play before you move the trailer.
- Confirm no lug nuts are missing, cracked, or damaged; check threads for stripping.
- If anything feels loose or looks damaged, don’t tow; correct it or get service.
Loose lugs can let a wheel separate, so don’t rely on visual checks alone. Use the wrench, follow the specified value, and stop if you can’t confirm secure mounting.
Record Inspection Dates
Record each pre-trip inspection’s date and before-departure time in your log or app, along with the trailer ID and key items checked. Use a consistent timestamp, such as the moment you leave the yard, so the entry reflects the rig’s condition before it rolls. List lights, cold tire pressure, coupler lock and pin, crossed safety chains, breakaway connection, and brake test results.
This DVIR-style history helps you identify recurring problems by week, trailer, or trip.
Record defects, when found, and whether repaired or deferred; correct safety-related defects before operation and retain required records. Date fuel-stop checks too, noting mileage or time. Compare them with departure checks to spot changing tire pressure or loose light connectors before continuing. Use the same format for every inspection.
Conclusion
Before every tow, take ten minutes to inspect your trailer, tires, hitch, lights, and breakaway system. Carry wheel chocks and a flashlight so you can check safely, and watch for tire damage, loose lug nuts, or hot, smoking hubs.
Reduce speed and allow extra room in crosswinds. Record each inspection and fix problems before departure. If anything seems unsafe, don’t tow until you’ve resolved it. A careful routine helps protect you, your passengers, and everyone sharing the road.