How Often Should Trailer Bearings Be Greased? Mileage and Season Schedule
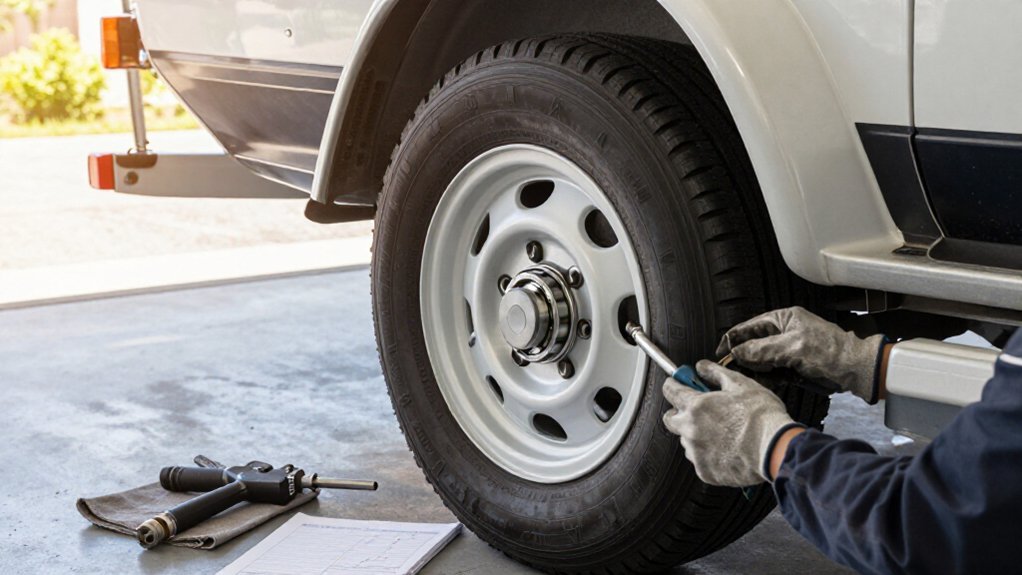
Grease and inspect trailer bearings every 12 months or 12,000 miles, whichever comes first, and record both limits after service. If you tow weekends, shorten the interval to about six months.
For seasonal use, inspect hubs every three months or 3,000 miles for pitting, heat, and excess end play; still service at the annual or mileage limit.
After any water immersion, check promptly and repack standard bearings.
The checks below cover warning signs and service.
Weekend Tow Frequency
If you tow only on weekends, grease and inspect your trailer bearings about every six months; for roughly 3,000 miles of seasonal use, also check the hubs every three months or at those mileage marks for pitting, overheating, and excess end play.
If your seasonal mileage reaches 12,000 miles, or a year passes, whichever comes first, use that standard service interval. After water-heavy towing or submersion, repack standard hubs after each immersion; water can contaminate grease and speed its breakdown.
Follow the manufacturer’s instructions for E-Z Lube hubs. After each tow, a brief heat check near the bearing area can flag a need to grease sooner. Track both time and mileage, and service before either limit is exceeded, even during low-mileage seasonal operation.
Bearing Condition Check
At every 3,000 miles or about every three months, inspect the hub and spindle for gouges, pitting, spalling, and metal flakes in the old grease.
After each use, touch the back of your hand to the wheel/hub; if it’s uncomfortably hot, investigate overheating before towing again.
Check these warning signs:
- Grinding or humming means stop and inspect; don’t wait for routine service.
- Blue discoloration, a damaged cage, or persistent end-play after adjustment points to replacement, not extra grease.
- Rough rotation, water intrusion, or contaminated grease requires prompt bearing service to protect the seal.
- Inspect bearing races too; pitting or spalling can prevent smooth contact and accelerate wear.
When damage appears, secure the trailer and ask a qualified technician to confirm the repair before you tow again.
Mileage and Seasonal Intervals
For most trailer wheel bearings, grease and inspect them every 12 months or 12,000 miles, whichever comes first; also check the hubs every 3,000 miles or three months for heat, noise, or roughness.
Track the date and odometer reading at each service; whichever limit arrives first controls your next interval. Salt, dust, mud, and water exposure can contaminate grease, so shorten your visual-check cycle and respond to changes.
For seasonal use, treat spring start-up as a mileage reset: base service on the last service date, then maintain the annual target. If history’s unknown or the trailer has sat, grease and inspect before use.
| Trigger | Check | Action |
|---|---|---|
| Annual/mileage | 12 months/12,000 miles | Grease/inspect |
| Hub checks | 3,000 miles/3 months | Look/listen/feel |
| Exposure/season | Salt, mud, water | Check sooner |
Remove Hub, Repack Bearings
Gather the required tools, then jack up your trailer and support its frame on jack stands before removing the wheel and hub assembly. Clean out the old grease and inspect the spindle and bearings for pitting, heat discoloration, cage damage, metal flakes, or roughness; replace damaged bearings.
Pack serviceable bearings with fresh NLGI No. 2 high-temperature grease, then reinstall the hub using the correct torque and a new cotter pin.
Gather Necessary Tools
Before removing the hub, park the trailer on level ground, chock the wheels, raise the axle, and support it securely on jack stands; never rely on a floor jack alone. Gather a socket set, pliers, torque wrench, bearing packer, lint-free rags, clean gloves, and a clean work surface. Use compatible NLGI #2 lithium-complex, high-temperature wheel-bearing grease; don’t mix products.
Keep a seal puller, replacement seal, and new cotter pin ready. As you remove the cap and hub, keep small parts clean and in order. A manual grease gun suits a spindle zerk; use it only with compatible grease. You’ll need room to wipe old grease and check for damage before repacking; don’t reuse visibly damaged bearings. Follow the exact specified torque and adjustment procedure.
Secure and Lift Trailer
With your tools ready, park the trailer on level ground, chock the wheels, and use a floor jack to lift the axle; support the trailer securely on jack stands under the frame, never on the jack alone. Keep the opposite wheels chocked and set the tow vehicle’s parking brake; disconnect the trailer only when it can’t shift.
Before lifting, loosen the wheel’s lug nuts slightly while the tire still contacts the ground. Raise the axle at the manufacturer-approved lift point, keeping your hands and feet clear of pinch zones. Place rated jack stands beneath solid frame points, then lower the trailer onto them and verify stable contact. Give the frame a careful push; if it rocks, reposition the stands before proceeding. Remove the wheel and keep its hardware together.
Remove Hub Assembly
Once the trailer is securely supported on jack stands and the wheel is off, remove the grease cap, then the cotter pin and castle nut, keeping the hardware together for reassembly.
Pull the hub off the spindle, supporting its weight so it doesn’t drop. Keep washers and spacers in order. Wipe out old grease, then pack each bearing with correct wheel-bearing grease; use existing grease type unless fully cleaned out.
Press grease through rollers until it emerges around them. Seat bearings and reinstall hub without forcing it onto spindle. Tighten castle nut to manufacturer’s specification and set bearing adjustment and end-play precisely; don’t guess, since incorrect preload can cause premature failure.
Install a new cotter pin, bend its ends, and refit grease cap before mounting wheel.
Clean and Inspect Bearings
After securely supporting the trailer on jack stands and removing the wheel, pull the hub and wipe away the old grease so you can inspect the bearings and races. Look for pitting, spalling, blue heat discoloration, or a damaged cage; any of these defects can signal bearing failure. Check the old grease for metal flakes, and examine the spindle for scoring.
Grinding or humming while towing, or a hub too hot to touch, also calls for bearing replacement, not merely adding grease. After assembly and adjustment, check for end-play; if it remains after correct adjustment, replace the bearings.
Even with E-Z Lube hubs, periodic hub removal and inspection remain necessary; a grease fitting doesn’t reveal bearing or race damage. Follow the 12-month/12,000-mile service interval.
Repack and Reinstall Bearings
Pack each clean, serviceable bearing with fresh NLGI #2 lithium-complex, high-temperature wheel-bearing grease that includes compatible EP and corrosion inhibitors; work grease through the rollers until it emerges from the opposite side.
Support the trailer on jack stands, remove the wheel, pull the hub, and wipe old grease from the hub. Inspect bearings, races, and spindle: pitting, spalling, blue discoloration, a damaged cage, or spindle grooves or scoring means you must replace parts, not regrease them. Seat a seal cleanly, then reinstall the hub and bearings.
Use cotter-pin hardware as needed; tighten the castle nut to specification and set correct end-play. Refit the dust or grease cap and wheel. Don’t repack a sealed cartridge; standard or E-Z Lube hubs require remove-hub service when opened.
Greasing After Water Immersion
After any water immersion, including boat-ramp use—repack non–E-Z Lube bearings, and inspect E-Z Lube hubs and add grease as their procedure requires. Check for water or mud contamination, which can increase friction and damage seals; regularly submerged hubs need fresh grease after each season or extended submersion.
Inspect bearings for damage, then check for persistent heat or humming on your next tow and stop if you detect either.
Grease After Immersion
Even if your mileage-based schedule says service isn’t due, water exposure can compromise bearing grease and accelerate corrosion.
For standard hubs without E-Z Lube fittings, repack the bearings after every immersion, including routine boat-ramp launches; don’t rely on an annual interval alone. For boat trailers, treat extended submersion and seasonal wet use as immersion events, then repack after the season or sooner after significant exposure.
With E-Z Lube hubs, retain the base service interval of 12 months or 12,000 miles, but refresh grease after immersion because water can dilute its protective film. Saltwater, mud, and repeated dunking raise corrosion and lubrication risks; plan service sooner than your mileage-based schedule. Use the hub manufacturer’s procedure and specified grease, and secure the trailer before you work.
Check for Water Intrusion
When a hub has been submerged, check for water intrusion rather than waiting for the next service interval.
For non-E-Z Lube hubs, repack the bearings after immersion, including boat-ramp use; water can enter and wash grease out. Treat Nev-R-Lube sealed cartridge hubs differently: they’re intended for inspection, not immersion, so arrange a system check after submersion instead of attempting repacking.
After the trip, check hub temperature by touching the back of your hand to the wheel. Warmth can signal that water exposure has exceeded the bearings’ tolerance and warrants prompt attention. If service is needed, use NLGI No. 2 lithium-complex, high-temperature wheel-bearing grease with EP and corrosion inhibitors. Don’t mix grease chemistries; if you’re changing products, clean the hub completely first. Don’t postpone this response until your mileage or seasonal schedule calls for scheduled service.
Inspect Bearings for Damage
Inspect bearings and the hub after any water immersion, including boat-ramp launches, because salt, mud, and water can contaminate grease and damage seals. After submersion, repack non-EZ Lube hubs as soon as practical; don’t wait for the annual or 12,000-mile interval.
Listen for grinding or humming, check for a hub too hot to touch, and rotate it to detect roughness or uneven movement. These signs can indicate water-related bearing damage.
Remove the hub and inspect old grease for metal flakes; examine bearings for pitting, spalling, blue heat discoloration, or a damaged cage before repacking. If correct adjustment won’t eliminate end-play, replace the bearings rather than adding grease; water-related wear can alter clearances and compromise safe towing. Recheck carefully before returning your trailer to service.
Even Hub Temperature After Towing
After towing, carefully touch the back of your hand to each hub to compare temperatures; warm is usually normal, but a hub too hot to touch signals a problem. Compare hubs on the same axle; a noticeable temperature difference deserves attention.
Excessive heat can indicate insufficient grease, damaged bearings, or seal contamination. Let the hub cool, then inspect and service bearings before towing again. Check for roughness, humming or grinding, and unusual end-play; heat paired with these signs strongly suggests bearing failure. Don’t keep towing and risk metal damage.
Use this check as an early warning, not a replacement for scheduled inspection and repacking. Follow mileage and seasonal intervals; don’t wait for severe heat. Have a technician inspect uncertain bearings before your next trip.
Smoke From a Hub
Smoke from a trailer hub usually signals severe bearing overheating caused by low grease, seal failure, or contamination. If you smell hot brakes or burning grease and see smoke, stop immediately; temperatures can exceed 200°F in normal use, and overheating will be far higher. After stopping safely, check for grease leaking from the hub or front cap and water intrusion, especially after immersion.
Don’t tow after smoke; friction may have damaged the bearings. Inspect the hub and spindle for blue heat discoloration, pitting, spalling, a damaged cage, or metal flakes. Any of these signs calls for replacement, not simply more grease.
Have the bearings serviced immediately with the correct grease; the service may require seal or cap replacement. Continued driving can end in wheel separation.
Grease Seal Damage During Repacking
Overpacking a trailer hub during repacking can force the grease seal out of position, deform it, or blow it out as highway heat expands the grease. When you repack, stop as soon as fresh grease reaches the correct exit point: at the hub’s front or cap, depending on design. Don’t keep pumping until the cavity seems full; excess pressure can displace the seal and cause grease loss.
- Check wet, muddy hub interiors for contamination entering past a failed seal after repacking.
- Look for grease sling-out around the wheel after service, especially at the hub.
- Grinding or humming may indicate accelerated bearing wear and heat.
- Replace failed seals; inspect bearings and spindle surfaces for scoring.
- Don’t add grease to mask damage; verify safe operation before towing.
Log Your Greasing Dates
A simple service log helps you catch missed intervals before they become a bearing problem.
Record the date and mileage, or operating hours, each time you grease the bearings. Those entries let you calculate the next interval. Use 12 months or 12,000 miles, whichever comes first, as your standard maximum between grease service or top-offs.
Adjust your log to usage regularly. For rental or heavily used trailers, note service every two weeks to monthly. If you use yours infrequently, start with a six-month check, then shorten the interval when your notes show exposure to salt, mud, or water.
After each grease date, record an after-use temperature check: a warm, not hot, bearing is reassuring. Rising heat warrants prompt inspection and may mean you should service sooner, before the next planned interval arrives.
Conclusion
Grease your trailer bearings on a schedule matched to mileage, season, and use, not just when a problem appears. Check for leaks, roughness, uneven hub temperatures, or smoke, and inspect bearings and seals whenever you remove a hub.
After water immersion, service them promptly. Record each inspection and repacking date so you can track intervals and catch overdue maintenance. If you find damage, excessive heat, or uncertainty about condition, stop towing and have the hub serviced before your next trip.
Trailer Axle, Hub & Wheel Bearing Size Chart
Find sourced Dexter hub rows, bearing cones, races, bore dimensions and applicable seal kits by capacity, brake size, bolt count or part number.