Boat Trailer Maintenance Checklist: Bearings, Rollers, Winch and Lights
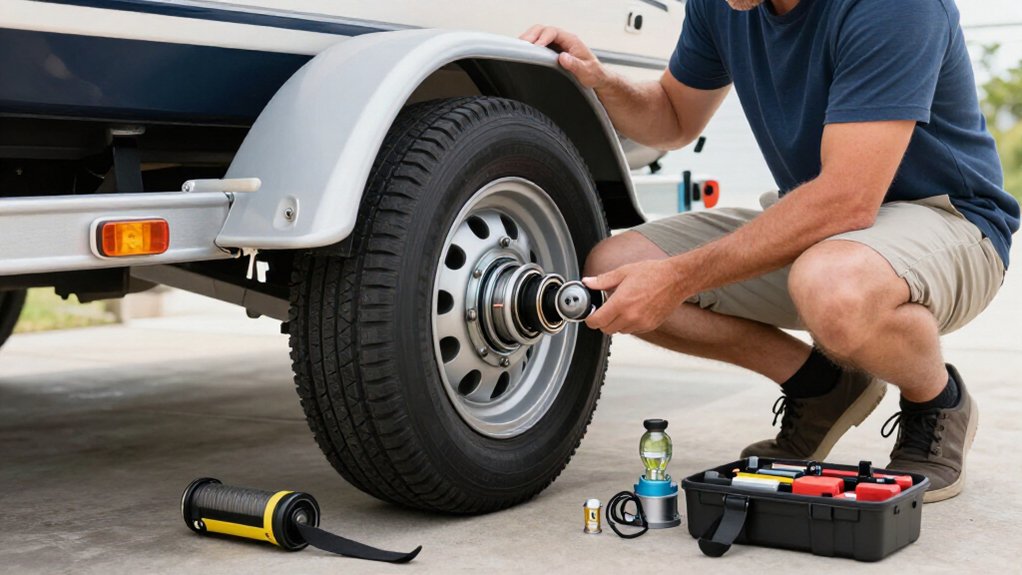
Before each saltwater launch, rinse hubs, bearing areas, wiring, and winch hardware with fresh water; let parts dry.
Check monthly for amber grease, hub heat, burning odors, bearing play, and grinding; service wet or rough bearings.
Spin rollers and tighten brackets; replace cracked or flat-spotted parts.
Inspect strap stitching, hook latch, coupler, lights, and connectors.
Check tire wear and DOT dates before storage. Log repairs, and choose level, sheltered parking.
Continue for checks that keep towing safer.
For Frequent Saltwater Launches
For frequent saltwater launches, inspect wheel bearings for milky or gray grease or water beads, which can indicate moisture past the seals. If you find either sign, plan to remove and service the hubs; don’t assume the seals have kept water out. Saltwater use calls for shorter bearing intervals: repack with marine-grade grease every three to six months, or follow the manufacturer’s tighter guidance.
The grease resists corrosion from immersion and hot-to-cold swings.
Each trip, spin rollers by hand; replace cracked or flat-spotted rollers, or those leaving hull streaks. Test the winch and coupler after launching and before retrieval: confirm smooth latching, working safety functions, and a flexible, unfrayed cable or strap. Before towing, verify every light and clean corroded connectors; apply dielectric grease.
Saltwater Rinse Supplies
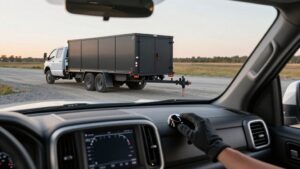
After every saltwater dunk, rinse the trailer with fresh water, focusing on hubs, bearing areas, and wiring connections, then let it dry to limit corrosion. Keep a rinse kit in your tow vehicle so you can clean the frame at home or the ramp.
- A garden hose with a spray nozzle lets you flush salt from hubs, bearing areas, winch hardware, and exposed wiring.
- Use a freshwater bucket and sponge to remove residue from low spots the nozzle misses; avoid forcing water past seals.
- If lights act up, apply dielectric-safe contact cleaner to green or white connector corrosion, then pack the dry connection with dielectric grease before launch.
Recheck after heavy spray or long ramp parking; salt rusts hardware.
Monthly Bearing Grease Check
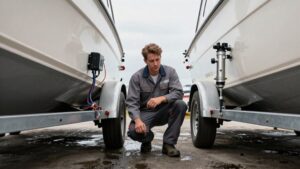
Check the bearings monthly: after a short drive, carefully feel each hub for unusual heat and watch for a burning odor; either can signal a problem that needs service. Park safely on level ground before checking.
If your hub has a zerk, follow the manufacturer’s guidance when adding marine-grade grease; stop when fresh grease purges evenly from the hub or inspection area. Check its color and texture:
| Grease check | What it means |
|---|---|
| Tan/amber, uniform | Typical condition |
| Gray/milky, water beads | Possible seal leak |
| Water intrusion | Clean, repack, inspect bearings |
If you see water, don’t simply top off grease: clean and repack the bearings, then inspect them closely for damage. Schedule full bearing service about every six months or 12,000 miles, whichever comes first, even when monthly checks look normal.
Check Winch Strap Condition
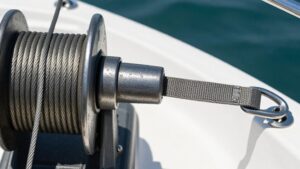
Before each trip, inspect your winch strap for fraying, thinning, sun damage, and damaged stitching, especially near load-bearing points.
Check the hook and strap attachment for wear, and confirm the hook latch closes securely. Replace any worn or damaged strap immediately, and spool it flat without twists or knots.
Inspect for Fraying
A winch strap can fail without warning, so inspect its full length for frayed or broken fibers, kinks, and cracks from sun or heat. Pay particular attention to areas that rub or flex during winching: near the hook, fairlead, and drum. Look for abrasion where the strap contacts metal, and check that the hook isn’t distorted or rusted through. If the strap slips under load, replace it and any worn hardware.
UV-dried, stiff, or fuzzy fibers signal weakening, even if the strap holds. Replace cracked material near the hook or separating fibers immediately. Don’t tow with a questionable strap; install a sound replacement before launch. A compromised strap can fail during retrieval. Check cable for kinks or abrasion before launch too.
Check Strap Stitching
Even when the strap appears intact, inspect the load-bearing stitching near the hook or eye for cracked seams, separating fibers, or other damage. Look along the seam for loose, broken, or pulled threads, and check the surrounding webbing for abrasion, fraying, or sun damage. Separating fibers or weakened stitching can let the strap fail under winching load, even if the rest appears usable.
Don’t attempt to mend a damaged load-bearing seam; replace the strap immediately, using a rated replacement. Before operation, ensure the strap and its attachment hardware are clean and free of corrosion, so the webbing lies and won’t wear prematurely. Then wind and unwind the winch smoothly, checking for binding. Use it only when the strap’s stitching and condition remain sound.
Examine the Hook
Where should you focus when checking the winch strap? Start near the hook, where abrasion and strain can damage fibers. Look for fraying, sun-cracked webbing, worn spots, thinning, or separated fibers. Replace the strap immediately if you find damage; don’t rely on a compromised strap to secure your boat.
Pull the strap out by hand and inspect its full length, including sections that normally remain on the drum. Check any sleeve or covering for peeling or other damage, since moisture can weaken the fibers. Examine the hook, latch, and fairlead for rust or kinks; seized or misaligned hardware can place extra load on the strap.
Before launch, winch a few inches in and out. The mechanism should engage smoothly, without grinding or sticking. Stop and correct problems before loading.
Verify Strap Attachment
Before loading, verify that the strap lies flat under the winch drum, without twists that could cause uneven winding or chafing against the trailer frame. Inspect the strap and safety webbing for fraying, cuts, sun-bleaching, or abrasion, especially near the hook and connection points. Damaged or separated fibers compromise load control; don’t load until you correct the condition.
Check the hook-end hardware for corrosion or pitting; weakened metal can fail even when the strap appears intact. Seat the strap fully on the hook and confirm the latch closes securely so it can’t bounce loose during loading or trailering.
Before use, pull the strap through by hand. It should move smoothly without binding; stiffness may signal debris or wear in the winch mechanism.
Replace Worn Straps
Replace the winch strap or cable at the first sign of load-bearing damage. Inspect it for fraying, worn fibers, kinks, birdcaging, sun-bleached areas, and cracked stitching near the hook or pulley contact points.
If abrasion exposes inner strands, fibers separate, or a crack appears anywhere on the load-bearing section, replace it immediately; don’t try to work it loose.
Check for rust scaling or stiff, uneven spots, which may signal internal damage and uneven loading. Confirm the hook and attachment points sit firmly and aren’t bent or deformed; damaged fittings concentrate force and speed wear.
After installing a replacement, operate the winch and check for binding in its locking or reverse mechanisms. Make sure the strap spools evenly without twisting to limit premature strap wear.
Cold-Weather Storage Steps
Before storage, rinse off road salt and debris, then dry the trailer thoroughly to limit corrosion. Protect bearings and moving parts with suitable marine-grade grease, and check tires and rollers before long-term parking.
Choose a secure, level storage spot, set the actuator to neutral, and confirm the brakes aren’t seized.
Clean and Dry the Trailer
After cold-weather storage, rinse away salt and grime, then let the trailer dry completely, including inside the frame and around connectors, before inspecting it. Position the trailer so water drains from rollers and bunks; standing water can corrode steel brackets and roller hardware. Use a safe, stable setup, and don’t crawl beneath an unsupported trailer.
Once dry, check the hub and brake-actuator areas for lingering moisture. Water from the final dunking cycle may have passed seals and reached wiring, so don’t assume these zones are dry because their exteriors look clean. Before your first spring tow, inspect connectors for green or white residue and follow light wiring for water stains. Clean and dry the harness, then confirm each connection is secure and each lamp works.
Protect Bearings and Moving Parts
Once the trailer is clean and dry, check its bearings for signs of water intrusion or corrosion, such as gray or milky grease or water beads.
If you haven’t serviced them since last fall, clean and repack them with fresh marine-grade grease. Reassemble with intact, properly seated grease caps to limit water entry around seals during ramp dunking.
Before your first tow, jack each wheel; rock the tire at 12 and 6 o’clock to check bearing play, then spin it and listen for grinding or rumbling.
After freezing temperatures, push a surge-actuator coupler forward by hand; it should resist smoothly and spring back. Wet, cold storage can seize pads.
Check grease routinely, typically every three months or 1,000 miles; replace bearings at least every 12 months.
Choose Secure Storage Location
Choose level, sheltered ground for cold-weather storage, then lock and cover the coupler to keep moisture and road salt off the hitch connection. Before winterizing and before your first cold-weather launch, check tire DOT date codes; the last four digits show the week and year. Plan replacement when tires reach six years old, even if tread looks good.
Inspect hub grease for gray or milky traces that suggest water intrusion through failed seals. Temperature swings from hot hubs into cold water can worsen leakage.
Remove water around bunks and rollers, then clean contact points to limit saltwater corrosion.
Keep the winch handle and accessories dry and covered. Wipe salt film from parts so rust won’t form inside mechanisms before you test lights and brakes reliably in spring.
Even Tire Wear Patterns
Check each trailer tire for even tread wear across its width and around its full circumference; faster wear along one edge, feathering, or scallops can signal misalignment, a bent axle or bracket, or uneven load distribution. Use a tread-depth gauge at several points across each tire and around its circumference; replace any tire below 2/32 inch, and investigate uneven readings rather than blaming age.
Check pressure with tires cold and inflate to the maximum PSI marked on the sidewall. Chronic underinflation or overinflation can accelerate irregular wear. If your wheels use lug nuts, verify they’re tight to the trailer maker’s torque specification; looseness may cause irregular wear before depth differences become obvious.
Correct loading and have alignment, axle, and brackets inspected before towing. Recheck tread and pressure regularly before departure.
Cracked Bearing Races
After checking tire wear, inspect the hubs for cracked bearing races, the hardened steel rings that support the bearings. When you spin each wheel by hand, listen for abnormal grinding or rumbling and feel for roughness or play at the 12- and 6-o’clock positions. These signs don’t confirm a cracked race, but they warrant closer inspection.
Remove the bearings as needed to examine each race; look for thin fissures or flaking pits, not merely ordinary wear. Water entering past hub seals during dunking can cause pitting and cracking, so treat a damaged race as a possible sign of moisture intrusion. Don’t just add grease: a cracked race can’t support rolling loads safely, and damaged contact surfaces will keep accelerating bearing wear. Replace the bearing set promptly.
Loose Roller Bracket Bolts
Loose roller bracket bolts can let a roller shift under load, leaving the boat unevenly supported and increasing wear on the rollers and bunks during launches and retrievals. Before each trip, check every roller carefully by hand; don’t rely on a visual scan alone. Look for lateral movement or a gap where bolts pass through the bracket. If you find looseness, secure the trailer and inspect the mounting points before towing.
- After seasonal storage, re-torque bolts and check for corrosion or flaking rust; saltwater can loosen hardware even without visible damage.
- Confirm the bracket sits firmly against the frame before tightening, preventing misalignment and stress on the roller assembly.
- Replace stripped bolts or hardware, and address elongated holes; tightening worn mounts won’t properly restore reliable roller alignment again.
Log Completed Repairs
Log each repair with the date, trailer ID, axle count, service performed, and exact parts and quantities used. You should record bearing removal and inspection, marine-grade grease type, and any water intrusion, such as gray or milky grease or bead-like moisture. For rollers or bunks, identify keel, bow, side, spool, or wobble locations; note flat spots, cracks, or hull black streaks, and list replacement quantity and cost (typically $15–$40 each).
Document winch, coupler, or light faults and repairs, including chafed harnesses, corroded connectors, dielectric grease, latch lubrication, or lens replacement; record each post-repair test. Finish with cold tire pressure set to sidewall maximum PSI, brake-wheel free rotation after freeing lot lock, and a walk-around test of running, brake, turn, and reverse lights, if equipped.
Conclusion
Before your next launch, rinse away salt with fresh water and dry the trailer. Check bearing grease monthly, inspect the winch strap for fraying, and confirm lights work.
Watch tire wear for alignment problems; replace cracked bearing races and tighten loose roller bracket bolts. Before cold-weather storage, protect bearings and tires from moisture and load stress.
Record every repair, then verify fasteners and safety chains before towing. You’ll reduce roadside failures when you maintain consistently.
Boat Trailer Parts Selector & Rating Checker
Enter your boat plus gear weight and the rating printed on each trailer part to see which parts are rated below your loaded weight.
Trailer Light Wire Gauge Calculator
Find the minimum AWG wire for trailer lights, electric brakes, charge line or reverse circuits from current draw, run length and allowed voltage drop.
Trailer Axle, Hub & Wheel Bearing Size Chart
Find sourced Dexter hub rows, bearing cones, races, bore dimensions and applicable seal kits by capacity, brake size, bolt count or part number.