How to Set Up Boat Trailer Guide-Ons for Easy Crosswind Loading
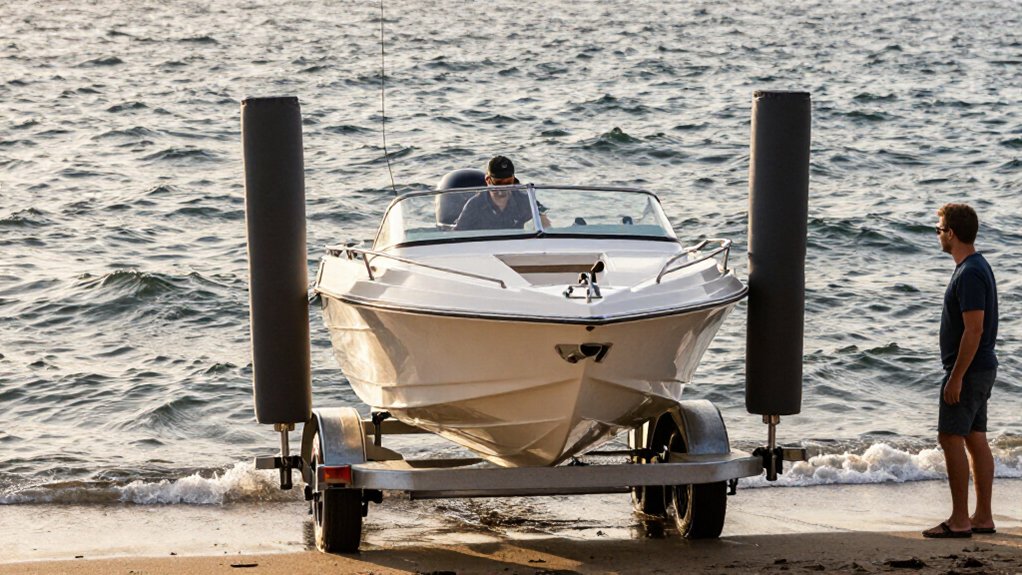
Mount guide-ons near the stern, just ahead of rear bunk ends, and align them with the bunks’ centerline. Set them high enough to control lateral drift without catching the pontoons, then secure brackets to trailer structure and torque fasteners.
Clear weeds, lines, and debris from the guide path.
Pin the coupler latch, check lights and wiring, and winch in stages.
If gusts prevent centering, stop; more setup guidance can help you refine the arrangement.
Wind-Speed Operating Limits
As crosswind or cross-current increases, your guide-ons must funnel the hull firmly enough to prevent sideways drift when you reduce throttle. Treat wind speed as a loading limit you establish through controlled winch-assisted approach near the guides. If you can’t keep the hull centered there, stop loading rather than attempt repeated last-second corrections.
At higher wind, require tighter centering before you commit, because the stern may drift off center even while the bow appears aligned if the trailer sits too shallow for rear contact. Position guide-ons to provide physical restraint, with enough height and spacing to capture the hull; bunk-style guides can help when wind dominates. A reported crosswind near 20 knots shows that gusts can defeat visual alignment alone. Keep your limit conservative.
Crosswind Ramp Conditions
At a crosswind ramp, wind can become the main force moving your boat when current or tide isn’t pushing it, and the stern may drift as soon as the hull loses steady support. Mount guide-ons near the stern to restrict lateral movement during slow, throttle-off loading. PVC-covered posts or carpeted bunks can provide contact, but keep their surfaces aligned with the hull. With a 25-foot tri-toon, use tighter, stiffer guides; its length makes small stern shifts more likely to produce off-center loading. Check rear contact before committing to the final pull.
- Keep trailer depth controlled so stern reaches guide surfaces.
- Winch steadily; don’t rely on front alignment alone.
- Avoid excess submersion that unloads rear supports.
- At winds near 20 knots, maintain deliberate loading pace.
Step 1: Clear Floating Ramp Debris
Before loading in a crosswind, clear floating debris from the ramp entrance and the last few feet of the trailer’s path. Remove weeds, dock lines, foam, and branches that could snag your guide-ons or bunks and push the boat off-center as the pontoons rise. Check PVC-covered guide poles and carpet-padded guide-ons for line or vegetation wrapped around their covers; buildup can prevent rotation or sliding.
Keep the water directly ahead of the guide-ons as clear as possible. When wind can move your boat sideways, debris there may deliver a lateral nudge during throttle-off moments. After clearing, back the trailer in and inspect the guide-on area from the driveway perspective. Confirm that no floating material is drifting into the guide path before you begin loading.
Step 2: Position Guides Near Stern
With the ramp entrance clear, place the guide-ons near the stern, typically just ahead of the axle or where the rear bunks begin, so they limit side-to-side drift as the boat settles into its final alignment. Keep guides tall enough to control lateral movement while letting the pontoons float over them without catching the hull.
Place a pair inside the bunks and close enough to contact the hull early in the pullout; if the stern sits too deep before contact, they won’t funnel it between bunks. On windy ramps, consider outside posts for added confinement as loading begins off-center.
If the stern still misses center, treat it as setup tuning: small fit or angle changes can shift the rear of a 25-foot tri-toon substantially.
Step 3: Mount Adjustable Guide Posts
Choose adjustable steel guide posts with enough range to fit your trailer, then mount them near the point where the boat needs centering control, often just ahead of the axle, to catch the pontoons or keel before crosswinds push the stern off line. Select a set that covers your frame and target height, such as options adjustable from 18.5 to 20.5 inches or 27.6 to 41.3 inches. Set each post high enough to limit sideways travel, but low enough for the hull to float over it without binding near the end of loading.
During test launches, back the trailer to your usual immersion depth and adjust post height and spacing until the boat centers reliably as you bring it to resistance. Check rear alignment, even when the bow appears straight. Add PVC sleeves over exposed guide hardware to reduce snagging in chop and protect the posts.
Confirm both posts stay secure under lateral load, and recheck fasteners after the first few outings, especially after rough launches too.
Step 4: Winch Boat Forward Against Bunks
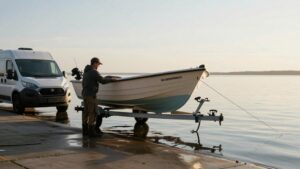
Back the trailer into the water only partway, then use the electric winch to pull the boat forward until the hull meets firm resistance from the bunks or guide-ons. Keep the pull line steady so the hull draws straight instead of drifting sideways. Crosswind can push the boat off-center when you lift throttle, so don’t try to finish loading in one pass.
Back in farther, then winch again in stages, maintaining contact with the bunks or guide-ons. During early attempts, adjust guide-on placement so they funnel the hull between the bunks quickly; use the winch to correct alignment while contact remains. Pull the hull tight against the guides, with minimal flex, to seat it securely.
If you’re using lubricated bunks, winch tight and secure the boat before driving up the ramp, because reduced friction can let it slide laterally. Don’t rely on ramp angle alone to complete seating under changing wind conditions.
Step 5: Verify Keel Tracks Bunk Centerline
Once the boat is winched snug against the bunks, verify that the guide-ons funnel its keel toward the bunks’ true centerline.
Mark the keel’s bottom-contact centerline on your bunks. Use a straightedge or chalk line across bunk tops at guide-on mounts and near the front quarter to third. A centered bow can hide rear offset.
First confirm bunks’ section supports; then check rear alignment, where crosswinds can magnify an offset. If possible, dry-fit: center the boat on bunk cradles and compare keel position with guide-on pole spacing. Seek tight, consistent contact; don’t count on post flex.
After any adjustment, reload and verify the boat follows the centerline. Even a quarter-inch offset signals keel track and guide-on centerline don’t match. Check during repeated loading under actual crosswind conditions to confirm alignment holds.
Step 6: Pin the Coupler Latch
Pin the coupler latch before loading so the trailer can’t shift as you set alignment. Lower the latch handle, then insert the safety pin through the coupler’s locking point. This keeps the hitch secured as you back down the ramp and the boat’s weight begins transferring onto the bunks and guide-ons. Don’t rely on the latch spring alone if your setup uses a removable pin; vibration and side load during winching can unseat an unpinned latch.
After pinning, tug the coupler to check for play. Slight movement can grow into a centering problem when cross-current drift loads the trailer. Recheck the pin before launch, not at home alone. A locked hitch gives you a stable reference as you guide the boat onto the trailer in wind.
Confirm Lights and Wiring
Check each guide-on’s mounting bolts and LED connection before heading to the ramp. Confirm each post sits firmly so its light resists vibration. Match the light plug to your trailer’s harness connector; a secure fit supports consistent alignment illumination during crosswind night loading.
Test the running lights, brake lights, and turn signals with your tow vehicle, and verify each guide-on responds on the correct circuit. Inspect cable runs beside tall steel posts, PVC covers, and moving parts for chafing or pinching. Recheck flex points as the trailer moves.
Route wiring clear of bunk scrape areas and likely saltwater spray. Secure connectors and add proper strain relief to limit water entry and cable pull. Before launch, test the complete lighting system again in every mode.
Guide Post Bracket Slippage
Under crosswind load, mount each guide-on bracket to solid, non-flexing trailer structure, not a thin fender or wiring bracket, so the post can’t shift as the boat slides onto the bunks.
Use correct bolt size and grade for your frame, then torque every fastener fully with a torque wrench. Even slight preload loss can let each retrieval move the bracket.
Add nylon-insert locknuts or compatible threadlocker to resist vibration and repeated lateral correction. For adjustable poles, verify vertical alignment after tightening; push each by hand to check for base movement.
| Check | Action |
|---|---|
| Fasteners | Torque and lock |
| Pole base | Hand-test; confirm vertical |
Before launching, back the trailer down the ramp and inspect alignment. Catching a shifted post helps keep your boat centered during crosswind retrievals.
Rinse Salt From Brackets
Once the brackets are secure, rinse them and their trailer-frame mounting points thoroughly with fresh water after each saltwater loading.
Steel posts and frame holes can corrode where brackets fasten. Flush the bracket base around PVC covers and carpeted guide components, where salt spray and grit collect.
Even galvanized or powder-coated steel needs rinsing: salt can reach seams, welds, and bolt interfaces where coating may be thin.
After rinsing, flush or wipe the hardware and bracket edges so salt doesn’t dry into crust around rollers or roller guides. Residue can interfere with smooth centering when you load in a crosswind. Let the parts dry with your trailer parked in a safe position before the next launch. This simple routine limits seized movement and mount weakening.
Conclusion
Before each launch, check your wind limit and assess the ramp crosswind. Clear floating debris from your approach and position guide-ons near the stern, where they can center the hull without pinching it. Set adjustable posts to your boat’s beam, then tighten brackets and verify they won’t slip.
Pin the coupler latch, test lights and wiring, and rinse salt from brackets after retrieval. If conditions exceed your limits, wait for safer weather before loading. Good.