How Many RV Leveling Blocks Do I Need? Count by Trailer Size and Site Slope
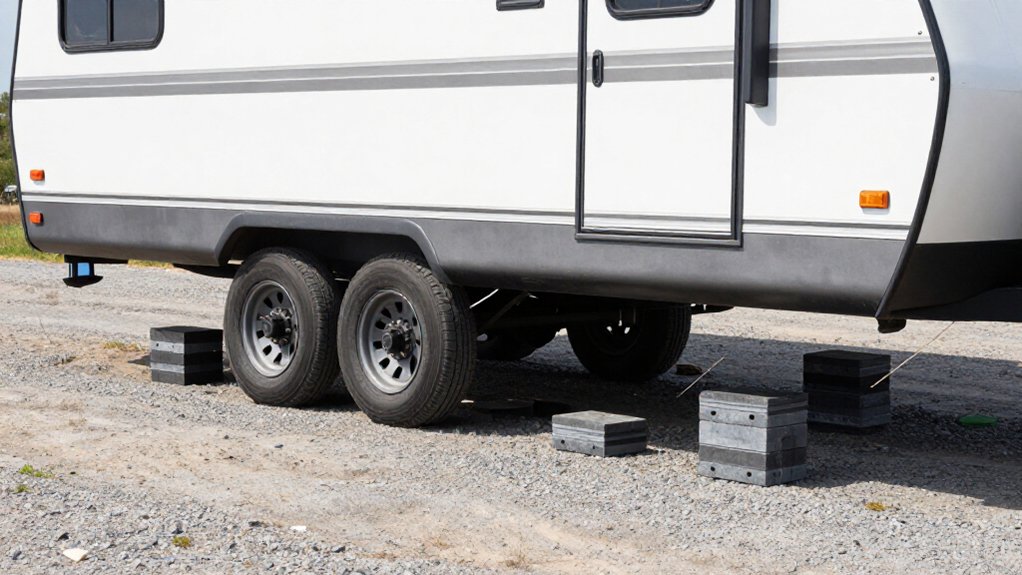
For trailers under 20 feet, start with one to three blocks per side; use two to four per corner for 20- to 30-foot trailers, and four or more under a side or end around 30 feet or longer. Treat these as estimates: measure the low corner’s rise, divide by block height, and round up.
Correct side-to-side and front-to-back independently, adding blocks gradually and rechecking level. Support tandem tires evenly, chock wheels, and check manufacturer ratings; details below can refine your setup.
Blocks by Trailer Length
Choose your starting block count by trailer length, but let the site slope determine the final stack.
For a trailer under 20 feet, begin with one to three blocks per side. For a 20- to 30-foot trailer, plan for roughly two to four blocks per corner; its longer wheelbase can require more lift for the same unevenness.
With a trailer around 30 feet or longer, you may need four or more blocks beneath one side or end. These are starting estimates, not fixed prescriptions.
You’ll need to correct left-to-right and front-to-back independently, so a corner may require multiple blocks. Build small stacks, then check the floor with a bubble level or digital level. Add blocks only as needed. Keep stacks stable, use compatible blocks, and secure the trailer before placing or adjusting them. Never rely on an unstable stack alone for support.
Site Slope Block Counts
Trailer length gives you a starting estimate, but site slope determines the block count at each corner. Use a bubble level or digital app at each tire’s touchdown point; measure left-to-right and front-to-back differences, then estimate lift separately for every wheel corner. A sloped campsite may demand more blocks on one side or end.
| Situation | Where to check | Practical count |
|---|---|---|
| Side slope | Driver/passenger corners | Count separately |
| End slope | Front/rear corners | Count separately |
With a Lippert-style stack or curved leveler, start at the corner needing the most lift and add blocks in small increments. Recheck level until it’s within tolerance for sleeping and slide operation. Set stabilizing jack pads, then chock wheels so the trailer can’t roll while you fine-tune. Verify level before moving onto the blocks.
Block Height and Rise per Layer
The key to estimating block layers is each piece’s height: divide the rise needed at the low corner by the block’s height, then round up.
If each block adds 2 inches, a 5-inch rise requires three layers: two provide only 4 inches. Measure the slope in inches at the corner needing lift; convert degrees to vertical rise before counting.
Include any jack pad in the effective stack height beneath the low tire or jack. Blocks can compress and tires may settle, so start with fewer layers for a quick check.
Add blocks gradually and recheck your bubble or digital level. Stop when the trailer reads level front-to-back and side-to-side. Don’t exceed the measured rise or rely on an unstable stack. This method helps you approach the target without overshooting and confirms your actual setup under the trailer’s loaded weight safely.
Tandem-Axle Block Placement
Identify which axle pair needs adjustment, then support both tires with blocks wide enough to cover each tire’s contact area. Build stable, even ramps and spread height across both axles rather than creating a tall stack under one wheel.
After positioning the blocks, chock the wheels and recheck side-to-side and front-to-back level before you adjust further.
Identify the Axle Pair
On a tandem-axle RV, place leveling blocks under the tire for each axle position in the close-set wheel pair, not under a neighboring single axle. To identify the pair, look on each side for the two wheels closest together, aligned with the tandem axle positions. Use those tires when deciding where to add blocks; don’t confuse them with a single wheel at an adjacent position.
Set each block on a solid, manufacturer-recommended surface, centered beneath the tire’s contact patch. Add blocks gradually, checking your dedicated RV bubble level or leveling app after each adjustment. Use smaller increments to fine-tune the height instead of making a large jump across the axle pair.
Once you’ve leveled the RV with the blocks, extend stabilizing jacks to steady it. Don’t rely on stabilizers to level the axles.
Support Both Tires
To level a tandem-axle trailer, support both tires on each side that carry the load, not just one axle.
Begin with a two-block stack per side, adding blocks in small increments. Recheck the left/right level bubble after adjustment so both tires settle evenly.
On a sloped site, the left and right stacks may need different heights; keep both tires on each side supported at the same height. Position each block solidly beneath the tire’s contact patch. Don’t let a tire sit off a block or leave its paired tire unsupported: that can keep the trailer off-level and stress suspension components.
After stacking, chock the tires that remain on the ground before fine-tuning each side’s stack height. Verify the bubble before you proceed.
Match Block Width
When placing tandem-axle leveling blocks, match each block’s top width to the tire’s tread so the tire sits fully supported without overhanging an edge.
On a tandem setup, place blocks beneath the tires in matching side-to-side positions, following the load path you’ll use when leveling. Check that each tread footprint rests entirely on a block; a narrow top can leave a tire partly unsupported and alter your level reading.
Don’t concentrate all added thickness beneath only one axle if that would lift one tire excessively. Distribute support across the tires on that side, then verify left-to-right and front-to-back readings. Choose wide, stable blocks, and use suitable jack pads where jacks need support, especially on soft or sloped ground. Chock the wheels after placement and recheck with a bubble or digital level; a small footprint mismatch can shift the reading by half a bubble or more during each check.
Build Even Ramps
Build an even ramp by placing blocks beneath both tires on the side that needs lifting, so the tandem wheels rise together instead of loading one axle on a tall stack.
Start with a short set of blocks at each tire’s path on the side needing lift. Place each stack where its tire contacts the blocks directly; don’t support thin trim. On soft ground, use jack pads beneath blocks to limit sinking.
This spreads the load across both axles.
Check level left to right, then add shorter blocks evenly at both wheel positions. Recheck after each adjustment. With a bubble level or app, raise in small increments from low to slightly high. If you overshoot, reduce the stack before proceeding.
Chock After Positioning
After you position the trailer, chock at least one wheel on each side that could roll before placing leveling blocks.
For a tandem-axle rig, confirm you’ve reached the correct fore/aft and left/right spot before blocking. Place dedicated leveling blocks at each wheel location on the axle or axles needing height. Raise the slope-side wheels in controlled, small increments; avoid tall stacks that make the suspension resist adjustment.
Check both left/right and front/back bubble levels, adding blocks as needed until the trailer’s level.
Once blocks are set, chock firmly so the tire can’t roll off its block, then lower stabilizing support. If you move blocks or re-level after lowering a jack, recheck tire contact and chock again. Tandem suspension can shift load between tires.
Measuring Your Trailer’s Axle Span
To estimate RV leveling-block height, measure the axle span from the center of one tire’s contact patch to the center of the opposite tire’s contact patch on the axle you’re leveling. For a repeatable reading, measure with the trailer unloaded on level ground. Mark both tire contact points, or measure from hub centers as consistent references.
On a tandem-axle trailer, measure the axle you’re leveling; consider measuring both because their spans and block requirements may differ on a sloped site. Use the span as the side-to-side slope run in your leveling calculation, then translate the measured slope into approximate block height. Recheck after changing tires, wheels, or suspension parts; tire diameter can shift contact points and affect the count. Use measured span.
Soft Ground Block Support
On soft ground, place wide leveling pads under each stabilizing jack and beneath any tire supporting stacked blocks to spread the load and reduce sinking.
If your site feels soft or sandy, choose broad pads rather than small, thin blocks; wider surfaces limit point loading. Place blocks only where weight bears: beneath jack feet and directly under tires that support stacks.
Estimate the number from the slope correction required, but favor added pad area over tall stacks. Fewer height changes can reduce instability as the soil compresses.
After positioning pads, apply downward pressure through the jacks without raising the RV. Check that the trailer doesn’t rock, then complete leveling. Wait minutes and inspect the supports again; soft ground may settle under load.
Leveling Beside a Curb
When you park beside a curb, measure both side-to-side and front-to-back slope with an RV bubble or digital level; the curb can create uneven tilt in both directions.
Place stackable blocks under the lower-side wheels or jacks as needed; keep higher-side jacks just snug. Aim to center the bubble, or stay within about half a bubble. Put blocks only on solid ground, and set jack pads beneath stabilizing jacks to limit sinking, especially at curb edges.
After each adjustment, recheck both axes; curbside sites may require balancing front-to-back and side-to-side. If you aren’t level after the first pass, add one block at a time and measure again. Confirm the position supports refrigerator and water-heater operation and allows slide-out travel; a level-looking RV doesn’t confirm proper operation.
Preventing Blocks From Shifting
Prevent block shifting by setting stackable blocks on firm, level ground and chocking the tire so it can’t roll. Before raising the jacks, double-check that each block sits fully and each pad lies flat beneath its stabilizing or leveling jack. A tilted pad or partly seated block can shift sideways as the load transfers.
- Center the vehicle weight over each block; don’t load an edge.
- Avoid half-block placement that can slide out or shift at a corner.
- Keep a wheel chock snug against the tire to stop rolling.
- After leveling, recheck the bubble level and confirm firm jack contact; movement may occur in the first seconds under load.
If anything shifts, lower the jacks, reseat the blocks, and repeat checks before continuing.
Checking Block Weight Ratings
Check each leveling block’s label for its maximum load in pounds, and make sure that rating exceeds the weight on the corner it supports. Estimate that corner’s load from actual scale-ticket corner weights; if unavailable, use tongue and axle ratings cautiously to identify the heaviest tire-side corner on the sloped site.
- Check the per-block rating, not the trailer’s total capacity.
- Confirm the maker’s safe stack height; ratings may assume one block.
- Use plastic blocks, including Lippert models, only on intended surfaces.
- Firm ground matters: unsuitable soil can sink and overload blocks.
Recheck after adding cargo, water, or gear; extra weight can raise corner pressure. If any rating or stack limit is unclear, choose a higher-rated setup before leveling, before anyone enters your parked RV.
Conclusion
Before you leave, measure your trailer’s axle span and estimate the site’s slope so you can choose enough blocks. Stack only to the height you need, keep each tire supported on a stable base, and confirm the blocks’ load rating exceeds the load they carry.
On soft ground, use a broad support pad; beside a curb, prevent edges from slipping. Recheck level and stability after setup. If anything shifts, reposition before travel.