How to Install Trailer Wheel Bearings, Races and Seals
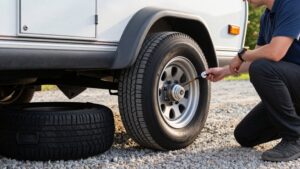
Keep the trailer hitched on level ground, set the brake, and support the frame on jack stands; never lift by the axle.
Remove the wheel and inspect the spindle, hub, and race seats for damage.
Drive races squarely into a hub, pack bearings with grease, and seat a seal squarely and flush.
Reassemble, set bearing preload while spinning the wheel, then secure the retainer.
After a test drive, check hub heat and play; the steps ahead can help prevent wear.
Trailer Hub Bearing Replacement
Before replacing trailer hub bearings, support the trailer frame securely on jack stands and remove the wheel. Pry off the dust cap; remove the cotter pin and castle nut. Slide the hub off the spindle, retaining the outer bearing.
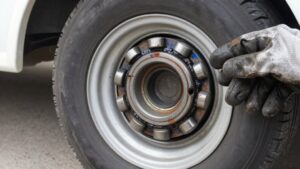
Remove the seal and bearings. Clean the hub and races completely; inspect for nicks, discoloration, and spindle damage that catches a fingernail.
Replace damaged races by driving them out and installing new cups. Pack bearings with suitable grease; seat the seal squarely, flush in the hub.
Clean the spindle, install the hub, outer bearing, washer, and castle nut. Adjust the nut until the wheel spins freely without looseness.
After reassembly, drive 5-10 minutes; check noise, hub heat, and tightness to confirm bearings and seal function correctly. Recheck adjustment afterward; correct play without restricting wheel rotation or compromising the seal.
Verify Trailer Is Securely Supported
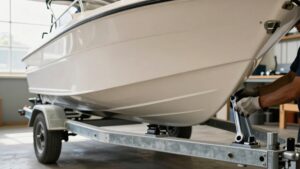
With bearing replacement ahead, park the trailer on level ground, set the parking brake, and keep it hitched to the towing vehicle to prevent movement.
Before you reach the hub, confirm the frame rests securely on a rated jack stand; never lift by the axle or suspension. Use an axle-area jack stand only as secondary protection against dropping or shifting.
- Raise the wheel clear of the ground, then give it a brief spin; listen for grumbling before disassembly.
- Check for side-to-side wheel play or unusual vibration, which can indicate loose support or axle strain.
- If anything shifts or feels unstable, lower the trailer and reset the supports before continuing.
Keep clear of pinch points; don’t rely on a hydraulic jack as the sole support.
Step 1: Inspect the Spindle and Hub
After removing the hub, clean the spindle’s bearing and seal seating surfaces, then run a fingernail over them; if it catches on a nick or gouge, replace the spindle.
Inspect the seal’s contact area closely: it must be smooth and even. A small defect can cut the new seal, leak grease, and lead to bearing failure.
Check the hub’s inner and outer race seats, along with any races you plan to reuse. Look for discoloration, pitting, or nicks. If your fingernail catches, replace the race; replace the bearings and seal as appropriate.
Examine the spindle for scoring, metal transfer, or pitting from a frozen bearing. Damage may require spindle replacement, not just new bearings.
Before reassembly, confirm the hub slides cleanly over the spindle; address roughness at the shoulder.
Step 2: Remove the Dust Cap
Pry the dust cap off the trailer hub with a flat-head screwdriver, working carefully around its edge and repositioning the tool to loosen it evenly. Keep pressure controlled to avoid nicking the hub surface, especially where the seal will ride during reassembly. Move the screwdriver a short distance at a time around the circumference, rather than forcing one section.
If the cap resists, tap it gently with a rubber mallet while you turn the hub. Alternate light taps and careful prying until the cap comes free; don’t strike it hard or bend its rim. Remove the cap completely and set it aside where dirt can’t enter the hub. You’ll now see the grease and cotter pin area, accessible before further disassembly.
Step 3: Remove Castle Nut
Before loosening the castle nut, straighten and remove its cotter pin, or bend back the tang washer tab, if fitted, to protect the spindle threads.
After removing the dust cap, locate the castle nut on the spindle. It clamps the hub and bearings in place. Use a correctly sized wrench to turn the nut counterclockwise until it comes free. Lift off the nut and the washer beneath it.
If the nut resists turning, wipe excess grease from the threads and apply steady pressure with the wrench. Don’t force it or let the tool slip and round the nut. With the nut removed, you’re ready to pull the hub assembly from the spindle to reach the bearings and seals.
Step 4: Seat Races, Grease Bearings
Drive each new bearing race into the clean hub with a seal/race driver, keeping it square and applying even blows until it sits firmly against the hub shoulder. Repeat for the second race, using controlled blows rather than random strikes. Confirm both sit flush against shoulders; incomplete seating can cause heat and early wear.
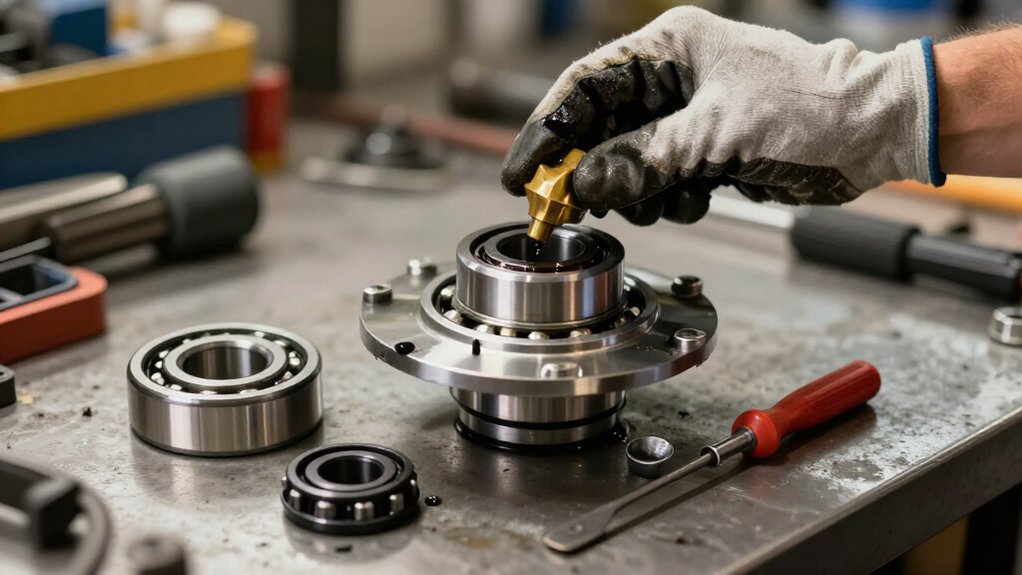
Before installation, pack both bearings thoroughly with high-quality wheel-bearing grease. Use a bearing packer or press grease through each bearing by hand, working it between the rollers until no dry spots remain. Apply a thin grease film inside the race bore, then wipe away excess to keep grit from being trapped. Place the inner bearing in its race first, then install the inner grease seal squarely and flush in the hub. A cocked seal can wear quickly.
Step 5: Set Castle Nut Preload
With the hub installed, tighten the castle nut while spinning the wheel to seat the bearings, then back it off until there’s no preload.
Then re-tighten the nut only enough to align the cotter pin with the spindle hole, or align the tang washer or tab notch as applicable. Before inserting the pin, verify the washer and any required spacers are correctly positioned; an incorrect stack-up can change bearing preload.
Don’t overtighten to force alignment, because excess preload can cause bearing overheating and failure. Insert the cotter pin and bend its ends securely so vibration can’t loosen the nut. After assembly, drive for five to ten minutes, then check the hub for heat or noise. Rapid overheating indicates you’ve likely set preload too tight.
Step 6: Reinstall the Dust Cap
Once the castle nut is secured, clean the hub and spindle, then slide the dust cap over the outer bearing until it seats evenly. The cap helps keep dirt and water away from the bearing assembly, so don’t force it into place or leave it cocked.
If your cap is designed for tapping, use a rubber mallet and strike lightly around its edge, not the center, to prevent deformation. Check that the cap sits flush all the way around; an uneven fit can admit contaminants to the bearing races and seal lip.
Then spin the wheel by hand and confirm it turns smoothly without the cap rubbing or interfering with the hub. Wipe grease off the perimeter to verify the seal and spot seepage.
Perform a Test Drive
Before the test drive, inflate the tires to the trailer manufacturer’s specified pressure. Finger-tighten the lug nuts in a star pattern until the wheel seats evenly. Lower the trailer until its wheels rest on the ground, then use a torque wrench to apply the specified value; don’t rely on feel.
Drive for five to ten minutes, then stop. Carefully touch each hub and compare its temperature with the other hubs; it shouldn’t be overheating or unusually hot. Give each wheel a firm shake to check for looseness, then spin it to confirm smooth rotation and listen for grinding or rubbing noises. If a hub gets hot, you hear grumbling, or a wheel feels loose, stop the test drive and recheck bearing preload and assembly immediately.
Inspect the Grease Seal
Inspect the grease seal for a rounded shape, intact rubber, and a clean, even sealing lip; replace it if it’s cracked, dry-rotted, flattened, nicked, or distorted, since defects can let grease escape and damage the bearings.
If its part number is missing or unreadable, check the stamped rubber number if present; otherwise, measure the inner and outer diameters to identify a replacement. Run a fingernail over the spindle sealing surface. If it catches on grooves or roughness, replace the spindle; a new seal can’t correct a damaged surface.
| Check | What you should see |
|---|---|
| Shape and lip | Round; smooth, even edge |
| Spindle | Smooth; no catching grooves |
| New seal | Square and flush in bore |
After fitting, confirm the seal sits square and flush; don’t run the trailer if it’s cocked.
Preventing Future Bearing Wear
Prevent future bearing wear by packing each bearing fully, removing all old grease, and correcting even minor nicks on the spindle’s seal surface before fitting the new seal. After installation, drive for 5–10 minutes, then check hub temperature. It shouldn’t feel excessively hot; unusual heat can signal poor packing or incorrect bearing preload, accelerating wear.
Keep tires at the correct pressure, and check for wheel side-to-side play. Correct alignment and uneven tire wear to reduce shock loads on the bearings. Avoid steering corrections that can cause trailer sway and heat, which breaks down grease and wears rollers and races faster.
If a hub overheats or has play, stop and inspect the bearing adjustment and lubrication. Don’t tow until you’ve corrected the cause.
Conclusion
Once you’ve replaced the bearings, races, and seal, confirm the hub turns smoothly without looseness or unusual noise. Reinstall the castle nut and dust cap securely, then verify the trailer remains properly supported until all work is complete.
Inspect the spindle, seal, and grease regularly, and correct any damage before towing. After a cautious test drive, check for heat or play. Stop immediately if anything seems abnormal; bearing failure can cause serious loss of control.