How to Adjust Boat Trailer Rollers for a Perfect Hull Fit
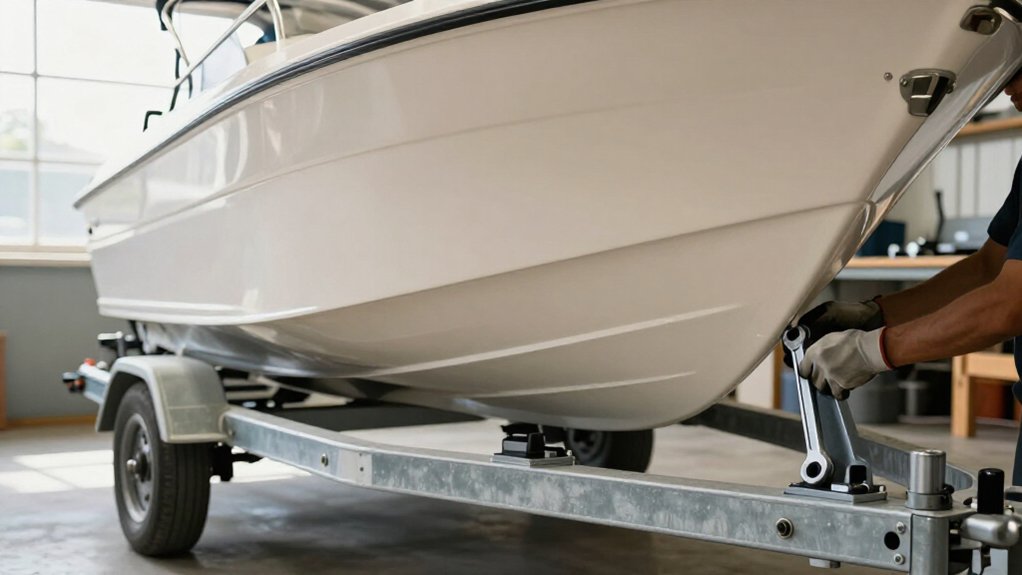
To get a hull fit, let the bunks carry most of the boat’s weight while keel rollers guide and center it. First inspect contact with the boat loaded, then clean and dry the frame and brackets.
Support the hull on stands, loosen bolts, and set rollers without forcing contact. Tighten to the manufacturer’s torque, then test-load.
Check tracking, bow clearance, and roller play; grease pivot points as permitted. These checks can help you refine the fit.
Hull Contact Pattern
Once the boat is fully loaded and launches and tracks normally, inspect how the hull contacts the trailer. Check contact along the hull. You want bunks under stringers to provide even primary support, while keel rollers guide and center the boat.
This keeps the keel from carrying the load and limits deep scratches. Avoid pressure points where one roller concentrates weight and crushes gelcoat. If the keel rests on a narrow roller edge or the hull rides high on one side, adjust placement to spread support.
Compare patches across the hull: roller ends touching first may indicate insufficient roller length or incorrect spacing between bracket inside edges; an overly wide patch may indicate cramming. Adjust rollers up or down in small increments, if your design allows, and recheck. Fixed packages may suit only specific deadrise angles and won’t create even contact on every hull.
Clean, Dry Trailer Frame
Before adjusting roller position to correct the hull contact pattern, clean the trailer frame and mounting brackets so buildup can’t distort the fit. You’ll need to remove assemblies when grime blocks access; scrub away grease, barnacles, and old mud from frames and brackets.
- Inspect roller shafts and bracket bores; keep them straight, dry, and free of corrosion so each roller can turn and seat evenly.
- Flatten each bracket’s frame contact surface by removing rust scale and flakes; wipe away penetrating oil that could tilt the bracket or form a pressure point.
- Check clean, dry measurement locations, including inside edges used for roller length, before recording gaps.
Dry all surfaces fully before greasing shafts and points; trapped water accelerates rust at adjustment locations there.
Step 1: Support Hull With Stands
With the trailer frame clean and dry, support the boat on solid stands before changing any rollers. Place each stand beneath a strong load-bearing area, usually near a stringer or keel-support zone, and confirm the hull is stable. This lets the hull rest naturally and prevents flex from distorting measurements or creating accidental pressure points.
Match the boat’s normal trailer trim: don’t raise the bow or lower it beyond its usual attitude. Once stable, measure bracket-to-bracket spacing and roller-shaft diameter; common shafts measure 1/2, 5/8, or 3/4 inch. Check the intended roller gap against the bracket’s inside edges. It should fit snugly without being forced or left loose enough to rattle. Look for uneven contact that concentrates weight at one spot before you proceed.
Step 2: Loosen Roller Bracket Bolts
After the boat is fully off the trailer and secured elsewhere, park the trailer on level ground and loosen one roller bracket at a time with the correct wrench or socket. If bolts are corroded, apply penetrating oil and let it work before you crack them loose. Back each bolt off only enough for the bracket to slide; don’t remove the hardware.
Where a roller uses paired brackets, loosen both sides evenly to keep the assembly aligned with the trailer’s centerline and prevent it from tilting as it moves. Use the bracket-to-bracket gap as your fit reference: the roller should sit snugly in its mounting space, without being forced in or left loose enough to rattle. Tighten firmly; inspect bolts and holes before testing.
Step 3: Set Roller Height Evenly
Once the brackets can slide, set each roller to the same height using a consistent reference, such as its top surface relative to the trailer frame. Before raising or lowering, confirm the shaft or bolt diameter matches the roller bore; common sizes are 1/2, 5/8, or 3/4 inch.
Measure the bracket-to-bracket gap for each keel or wobble roller. Choose replacements that fit snugly, without cramming or rattling.
Adjust both sides from the same reference so rollers support the keel evenly. Lower the hull onto the trailer and check that it settles uniformly on the intended support area. Watch for rocking or a pressure spot showing one roller contacts first.
If your trailer has non-adjustable rollers, you can’t change height. Recheck hull shape and deadrise, then choose the correct roller setup.
Step 4: Align Rollers With Chines
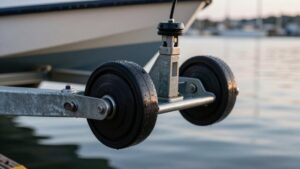
To keep the chines on their intended support lines, position keel rollers to guide the centerline and use chine rollers suited to the hull’s shape, such as correctly aligned V-profile or wobble rollers. Measure roller length between bracket inside edges, then place each roller fore and aft so the chine won’t ride up or leave its support line.
Match the profile to your hull: spool or V-profile keel rollers locate the keel, while wobble rollers guide chines during retrieval. Set shafts at equal heights and angles on both sides to keep your boat tracking straight and chine contact even during loading. Test the boat with fuel, water, batteries, and gear aboard. Check that no misaligned roller creates a pressure point that could gouge gelcoat.
Step 5: Verify Bow Stop Clearance
With the boat centered, fully loaded, and resting on its normal bunks or rollers, check the gap between the bow stop and the bow or rub rail at the position reached when the winch finishes and the bow settles. Measure distance from the stop or winch-guide contact point to the hull or rub rail; ensure metal can’t make contact with the hull.
Check with the boat on installed bunks or rollers, since roller changes can shift weight and reduce clearance. Don’t assess while partly loaded. Inspect the bow for scuffs, scratches, or dents indicating contact. If tight, adjust only permitted components; some keel rollers or bunk brackets lack vertical adjustment. Confirm the stop contacts its intended spot without binding after each retrieval, with the boat fully settled.
Step 6: Torque Bolts to Specification
Use the torque specification from your trailer or roller manufacturer; the correct value prevents bolts from loosening under load without stripping threads or crushing brackets. Consult the marine-grade specification for your trailer, roller, or axle and bearing hardware. Before tightening, clean threads with a wire brush to remove corrosion.
Apply lubricant or anti-seize only if the manufacturer permits it; lubrication changes the torque required to achieve proper clamp load.
Tighten mounting bolts progressively in an even pattern, alternating sides where practical. This helps each roller seat squarely and supports the hull evenly. If you replace a shaft or bolt, match its diameter exactly—common sizes are 1/2, 5/8, and 3/4 inch—then use the specified torque for that hardware. Recheck torque after the first launch and retrieval cycle, since bedding-in or ramp impacts can reduce clamp load.
Perform a Low-Speed Load Test
After torquing the hardware, launch at idle and winch the boat onto the trailer while watching how the hull tracks over the rollers and bunks. Keep the boat at a controlled crawl; confirm it follows the centerline without sideways force. Watch for full, even cradle support: no roller should crush against one spot, and neither keel nor bow should scrape a crossmember.
During loading, observe each roller turning. Stop if one is seized, cracked, or wobbling excessively, since it can create a pressure point.
After seating the hull, verify each roller fits snugly between its brackets without being crammed or loose. Check that its shaft diameter matches the mounting hardware. If the boat shifts, won’t center, or takes extra winching force, stop at the ramp. Adjust or replace the rollers before continuing; don’t pull the hull farther under strain. Confirm the hull remains seated evenly before leaving the ramp.
Roller Rattle Diagnosis
To diagnose roller rattle, check whether each roller slides or clacks side-to-side on its shaft; excess play usually means the roller is too short for the bracket gap or the shaft or bushing is worn.
Measure the bracket gap; choose a replacement that fits snugly without cramming or rattling. Looseness lets the hull shift while winching. Confirm the bore matches the shaft, typically 1/2, 5/8, or 3/4 inch.
A stiff or cracked roller can bind and release under load. If the test-load hull wanders, check roller shape and alignment.
| Symptom | Check | Likely cause |
|---|---|---|
| Side-to-side play | Measure inside gap | Short roller |
| Rattle despite fit | Verify bolt diameter | Bore mismatch |
| Intermittent chatter | Spin roller by hand | Seizure or crack |
| Hull wanders | Observe test load | Shape or alignment |
Lubricate Pivot Points
With the boat removed and secured elsewhere, grease the wobble-bracket joints and other moving pivot hardware with marine-grade grease. Before you adjust the rollers, keep the boat safely off the trailer so you can reach each bracket without working beneath an unstable load. Coat the roller shaft and bolt contact surfaces with a thin film, not merely the wheel’s outer face; friction at these interfaces can restrict smooth tilting and prevent accurate centering.
If a pivot feels stiff, apply penetrating oil, wait for its labeled dwell time, wipe away residue, then add grease to coat clean metal. Afterward, hand-rock every wobble and keel roller; confirm each moves freely without grinding or sticking before launching or retrieving the boat. Check movement before you make adjustments.
Conclusion
Once you’ve set the rollers, inspect the hull contact pattern and confirm the boat sits level without pressure points. Keep the trailer frame clean and dry, secure the hull on stands before adjustments, and torque every bracket bolt to specification.
Lubricate pivot points where the manufacturer permits. Then load the boat slowly, watch for shifting or rattle, and correct any uneven support before towing. A final check protects your hull and keeps the trailer predictable.
Boat Trailer Parts Selector & Rating Checker
Enter your boat plus gear weight and the rating printed on each trailer part to see which parts are rated below your loaded weight.
Hitch Step Fit Checker
Check if a hitch step fits your receiver: shank vs opening, step load rating vs the heaviest user, and approximate platform height.
Trailer Tire Size Decoder & Wheel Fit Checker
Decode a trailer tire size, get its diameter, compare a replacement size and check rim size, lug count and bolt circle.