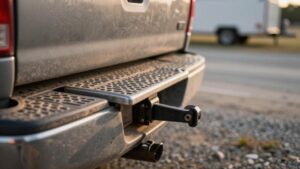
Do Anti-Rattle Hitch Clamps Work? Clamps vs Pins vs Sleeves
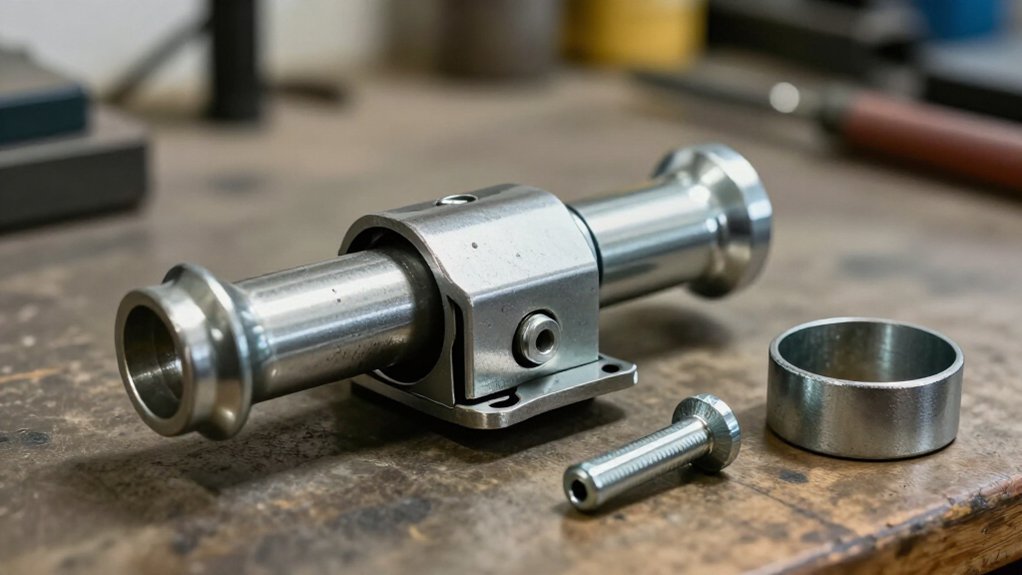
Yes, anti-rattle clamps press your accessory shank against the receiver, reducing play and metal-on-metal clunks.
A clamp often controls receiver movement well; an anti-rattle pin is usually quicker and tool-free, while a sleeve fills clearance for a snug fit.
Choose a device that matches your receiver, shank, and accessory instructions.
It won’t increase towing capacity, so stay within vehicle and hitch ratings.
You’ll see why fit, installation, and road checks matter next during road use.
Clamp, Pin, Sleeve Verdict
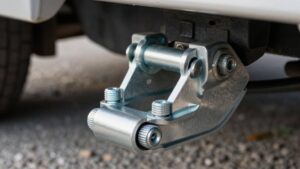
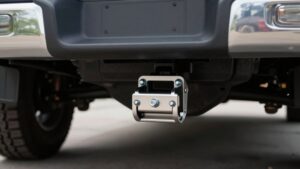
Clamps, pins, and sleeves can all reduce hitch rattle, but the right choice depends on where the movement occurs and how your setup fits. A clamp generally suits side-to-side or vertical movement at the receiver. It wraps around the receiver tube and pulls the accessory snug; some designs need tools, so tighten and inspect them as directed.
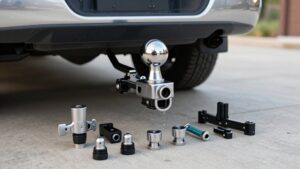
An anti-rattle pin is often the fastest, tool-free option. It applies pressure between the shank and receiver walls, but it must match your hitch size and shank design. A sleeve or stabilizer slides over the shank and into the receiver, holding the parts in firm contact when sized correctly.
First identify whether the noise comes from receiver-to-accessory movement or shifting cargo. Measure your receiver opening and verify compatibility with your carrier’s requirements. No device suits every setup; choose a secure fit, then check fasteners before travel and confirm safe load stability.
Receiver-Tube Clearance Gaps
Although receiver tubes are built with clearance so accessories can slide in and out, that space can allow side-to-side or up-and-down motion that causes road noise. Those gaps can let the shank shift until metal contacts metal, producing clanking and transferring impacts through the hitch. An anti-rattle clamp applies force around the receiver tube, drawing the accessory tighter and reducing the clearance that permits contact.
Depending on its design, it can resist horizontal wobbling, vertical slack, or both. If you measure mainly vertical movement, choose geometry that presses the shank up or down inside the tube; a pin alone primarily holds it centered. Receiver sizes and hitch classes vary, so measure your tube and confirm the clamp’s pressure points align with its dimensions before use. This fit check helps ensure the clamp can apply pressure where the gap occurs.
Keeping Bike Racks Steady
Because receiver tubes need clearance for insertion and removal, a bike rack’s shank can shift up and down or side to side over bumps. A clamp wraps around the receiver and tightens the shank toward its inner walls, reducing vertical and lateral play. This contact limits metal-on-metal movement and clunking as highway bumps load the rack.
That helps stabilize the rack and your attached bicycles during travel. Choose a clamp matched to receiver and shank dimensions; poor fit may leave movement uncontrolled. Some clamps require tools; lever-operated options let you tighten and recheck fit without them.
If your rack has a dedicated anti-rattle shank, confirm compatibility in its owner’s manual. After installation, check that the rack is secure before loading or driving, and recheck security.
Clamp, Pin, and Sleeve Designs
Clamp-style devices tighten around your receiver to limit movement, though some models require tools for a secure fit. Pin designs pull the shank against the receiver’s inner walls; threaded pins require a hollow shank, so check compatibility before use.
Sleeve stabilizers reduce rattling by filling the gap, making an accurate receiver and shank fit essential for safe towing.
Clamp Design and Function
An anti-rattle hitch clamp wraps around the receiver and tightens the accessory shank against it, reducing side-to-side or vertical movement that causes metal-on-metal noise. That clearance lets you insert and remove the shank, but it can leave a gap at the connection. The clamp applies pressure across the receiver and shank to hold them in a consistent position, limiting wobble under road vibration and wind loading.
More effective pressure generally means less clunking, provided the clamp fits your receiver and accessory geometry. Check that its contact points sit squarely and that the shank remains fully seated; a clamp can’t correct movement elsewhere in your towing setup. Some designs require tools and careful tightening, while no-tool versions use a lever for adjustment.
Follow the manufacturer’s installation and load instructions, then inspect the clamp and connection before travel. A clamp addresses receiver-to-shank clatter, not unrelated noise from other moving vehicle components.
Anti-Rattle Pin Types
Anti-rattle devices secure a hitch connection in several ways: clamps press the receiver against the shank, pins seat an internal component against the receiver wall, and sleeves fill the gap around the shank. Choose by matching the mechanism to your receiver and accessory. Clamp designs can require tools; lever-operated options let you tighten without them. Threaded pins fit 2-inch or 1¼-inch receivers, but require a hollow shank; some add a lock to deter theft. Spring-loaded setups hold a nut while you thread the pin, reducing metal-to-metal contact. Use the specified hardware and confirm secure engagement before towing. Never substitute a pin type unless its shank and receiver requirements match exactly.
| Design | Action |
|---|---|
| Clamp | Applies pressure to limit movement |
| Pin | Seats an internal component |
| Sleeve | Reduces gap-related noise |
Sleeve Fit and Stability
Beyond pin type, fit determines how well an anti-rattle device stabilizes the connection. A sleeve slides over your accessory shank and seats inside the receiver, taking up clearance. By supporting the shank against the receiver, it can reduce movement and metal-on-metal rattle. A sleeve creates a snug fit; it doesn’t apply the same compressive force as a clamp.
A tightener clamp wraps around the receiver tube and pulls your accessory against its inside wall when you tighten it. That pressure can limit vertical and lateral play. Pin-based designs use a pin-and-sleeve mechanism rather than a wrap-around grip, so you must match the pin to your shank type, including whether it’s hollow, and use the correct size.
Measure your receiver and shank carefully. Built-in clearance aids insertion, but poor fit can leave movement, noise, or an unstable connection.
Vehicle and Load Weight
Match the clamp and receiver fit to your setup, but don’t treat the clamp as added capacity. Account for the full towing weight, including the vehicle, accessory, and cargo. Check your vehicle and hitch ratings, and stay within the lowest applicable limit.
Match Clamp Capacity to Load
Because heavier towing setups put more force on the hitch, choose a clamp rated for your vehicle’s hitch class and actual tongue or receiver load. An anti-rattle clamp takes up clearance between receiver and shank, applying pressure to limit vertical and lateral movement. Check the manufacturer’s capacity and confirm it suits your receiver’s dimensions and construction.
Measure the opening, then verify compatibility with a solid or hollow shank; a mismatched clamp may not maintain pressure. For a heavier setup carrying an RV, boat, or cargo, use hardware intended for that hitch class. Match the stabilizer’s pin diameter and category to the receiver size; products may differ for two-inch and 2.5-inch receivers. Proper fit helps resist highway vibration and reduces receiver-to-shank rattle and noise. Secure trailer cargo separately; a clamp can’t stop shifting inside it.
Account for Total Towing Weight
When calculating total towing weight, remember that an anti-rattle device reduces movement and noise at the receiver, shank connection but doesn’t increase your vehicle’s or hitch’s towing capacity.
You must account for the loaded vehicle and trailer or cargo when evaluating the forces acting on the connection. Higher highway speeds can add wind resistance and road vibration, increasing dynamic loads that make receiver gaps rattle more. Choose a clamp, pin, or sleeve sized for your hitch class and receiver; receiver sizes include 2-inch, 2.5-inch, or 3-inch. For heavier applications, use sizing guidance such as a 2.5-inch Silent Hitch Pin for Class 5, or a 2-inch option for Class 4. Measure the receiver and confirm the hardware fits your accessory’s shank design, so the gap closes.
Check Vehicle Hitch Ratings
Before choosing an anti-rattle device, check your vehicle’s hitch rating and the load’s gross trailer and tongue weights.
Confirm your receiver class and verify that every clamp, pin, or sleeve is rated for your expected use; hardware must not become the weakest link. Match its size to your receiver diameter, commonly 2-inch, 2.5-inch, or 3-inch, and measure the accessory shank. Fit varies with tolerances, so choose a device that takes up the gap without preventing secure installation.
An anti-rattle device reduces movement and metal-on-metal noise; it doesn’t increase towing capacity. Your vehicle and hitch ratings still control what you can haul safely. Check the accessory manual, especially for racks that require specific shank or pin styles. Confirm the selected hardware works with that setup.
Testing on Uneven Roads
On uneven roads, an anti-rattle hitch clamp can reduce clanking by pressing the accessory shank against the receiver and limiting vertical and side-to-side movement.
Drive a familiar bumpy route at low, controlled speed first, then listen for clanks and watch the connection from a safe stop. Check that your clamp suits a solid or hollow shank; an incorrect grip can leave play. Clamps often control vertical and lateral looseness better than pins or sleeves, though tool-operated models may need periodic tightening. Repeat the route at highway speed only when conditions and posted limits allow: vibration and airflow can reveal noise from receiver tolerances. Stop and inspect if movement or unusual sound persists.
| Test | Check |
|---|---|
| Bumps | Noise |
| Side play | Movement |
| Vertical | Movement |
| Repeat | Noise |
Clamp Slippage Under Heavy Loads
Under heavy loads, an anti-rattle hitch clamp can slip if vibration and tongue weight reduce its grip on the shank. The clamp must generate enough force to keep the accessory drawn against the receiver. A mismatch between receiver-tube dimensions and shank type can weaken that action, allowing gradual side-to-side or vertical movement.
Some designs need tool tightening. If you don’t tighten them to the maker’s specification and recheck them, road vibration can loosen fasteners. Choose a clamp rated for your receiver and hitch class, and for your load; clamps depend more on receiver geometry than pins or sleeve-style stabilizers. If movement returns, metal-on-metal contact can bring back noise and wear. Stop and inspect the connection before continuing, rather than treating rattling as harmless.
Incorrect Hitch Clamp Placement
Incorrect placement can keep an anti-rattle clamp from removing play, even when it feels tight. The clamp must wrap the receiver and press the accessory shank inward; tightening the wrong section may leave lateral or vertical movement. Before you apply force, check its position around the hitch-pin gap, where clearance can permit motion.
- Center the clamp over that gap so it pulls the shank against the receiver’s interior.
- Keep the shank at the vertical position your clamp design requires; a clamp set too high or low may miss the needed pressure.
- Align the clamp evenly before tightening. Uneven contact can quiet clanks briefly, then vibration at highway speeds may restore movement.
If rattling continues, stop and reposition the clamp before towing.
Check Your Receiver’s Fit
Even with correct clamp placement, a poor fit between your receiver and accessory shank can leave enough clearance to rattle.
Measure your receiver and confirm its dimensions match the clamp before installation. Receiver tolerances allow easy insertion and removal, so even slight side-to-side or vertical movement can become audible.
A correctly sized clamp can apply pressure to close that gap; an undersized or incompatible model can’t.
Check whether your shank permits the clamp’s wrap-and-pull-down or pull-up action. Some clamps fit solid and hollow shanks, but threaded-pin and sleeve designs generally need a hollow shank.
If yours isn’t compatible, choose a suitable alternative rather than forcing the setup. Review your accessory’s owner’s manual: some products require a specific anti-rattle solution matched to shank geometry and receiver fit. Verify secure engagement before towing, and stop if movement remains.
Conclusion
Anti-rattle clamps work when you match the device to your receiver and load. A clamp can reduce movement, but it can’t correct a poor fit or replace a rated hitch pin. Sleeves address clearance gaps; pins secure the connection.
Before towing, check your receiver’s dimensions, clamp placement, and weight limits. Test the setup on uneven roads, then stop and inspect it for slippage. If anything shifts, tighten or change the fit before carrying your load.