How to Replace a Trailer Coupler: Bolt-On vs Weld-On Swap
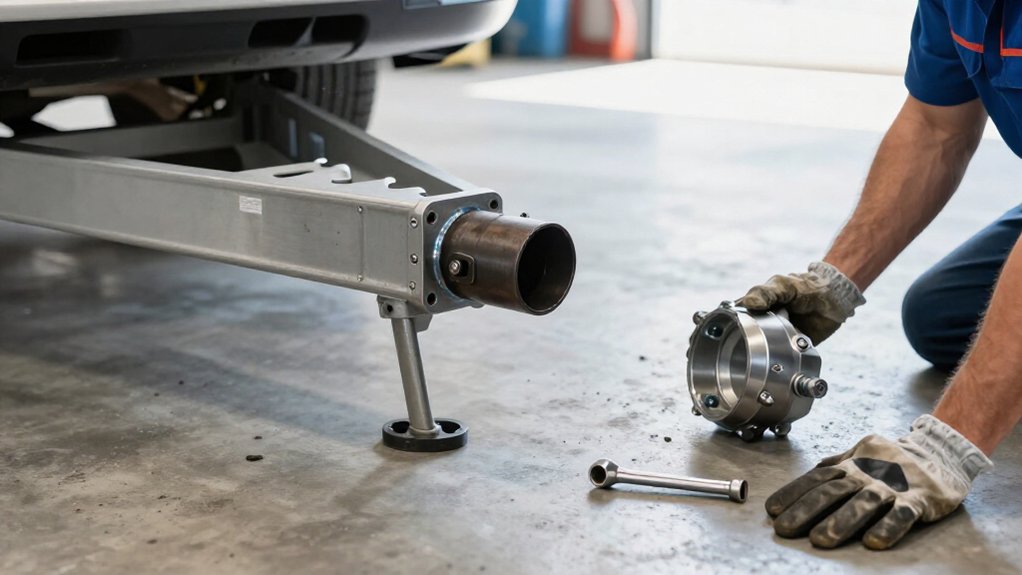
Match the coupler’s channel size and capacity to your tongue and trailer, and confirm the ball socket fits; grease won’t fix a diameter mismatch.
Support the unloaded tongue on rated stands, then identify bolt-on or weld-on mounting.
Mark alignment through the coupler holes before drilling, or replace welds only along the original edges.
Wear eye, hearing, hand, and respiratory protection; control fire hazards.
Torque fasteners to the maker’s specification, verify the latch and safety catch, and inspect chains annually.
More checks follow below.
Coupler Fitment and Compatibility
Before replacing a trailer coupler, match its channel size and rated capacity to the tongue and trailer load. Choose a coupler that fits the tongue and meets or exceeds your load rating. Fulton #CT-3001-Z fits a 2-inch channel at 3,500 lb; #F343000301 fits a 3-inch channel at 5,000 lb.
If you’re switching from a 1-7/8-inch ball to a 2-inch ball coupler, check the tongue and clamp dimensions; a 2-1/2-inch box tongue and 2-3/4-inch coupler need a compatible fit.
Don’t rely on shims alone: overlapping bodies can misalign bolt holes and weaken the joint. Position the new body and mark its hole pattern through the tongue. Use sleeves or spacers under a bolted base to prevent crushing, or fully remove the old coupler before welding the replacement.
Coupler Replacement Safety Gear
Once you’ve confirmed the replacement coupler fits, secure the trailer tongue on jack stands or another rigid support so it can’t shift. Before grinding welds or drilling holes, clear hazards and prepare protective gear:
- Wear impact-rated eye protection, thick gloves, and hearing protection; sparks and fragments can cause serious injury.
- Fit a respirator or particulate mask to limit metal dust and welding-related fumes.
- Keep a fire extinguisher within reach and ventilate the work area; grinding can ignite paint or grease, and welding adds burn hazards.
- Disconnect nearby ignition sources and remove fuel, solvents, and oily rags before grinding or drilling.
Keep access clear, check tools before use, and shield nearby surfaces if welding; let hot metal cool before you handle it with welding gloves.
Step 1: Remove Trailer Tongue Weight
With the trailer secured, unload the coupler before removing it so its weight can’t bind the joint or pull, crack, or twist the tongue during grinding or drilling.
Jack the tongue until the coupler is unloaded, then lower the trailer onto stable blocks or rated jack stands at sound support points. Don’t rely on the coupler, its bolts, or factory welds to carry load while you work; even a common 2-inch coupler may be rated for 3,500 pounds.
Chock tandem-axle wheels and verify the tongue can’t shift or twist before grinding welds or drilling. If you’re fitting a bolt-on unit, never drill 1/2-inch holes through a loaded, stressed tongue. Keep the supports in place as you remove the coupler, and recheck them immediately afterward.
A stable, unloaded tongue reduces binding and helps prevent metal damage or sudden movement. Use a jack to adjust support gradually, and keep hands clear of pinch points.
Step 2: Inspect the Coupler Mounting Style
Check how the coupler attaches to the tongue: factory weld beads around the tube indicate a weld-on unit, while bolts indicate a bolt-on unit.
Inspect tongue material and size. A 2-1/2-inch box-tube tongue may carry a welded coupler; measure the mounting face and match the replacement to its channel: 2, 2-1/2, or 3 inches. Confirm the required ball size and coupler capacity.
Fulton #CT-3001-Z is rated 3,500 pounds for a 2-inch channel; F343000301 is rated 5,000 pounds for a 3-inch channel. If you have a welded unit, grind or break only its welds—don’t cut into the tongue or frame. For bolt-on options, check for stiffeners and compatible tongue geometry; through-bolts often need sleeves to prevent crushing the tube. Use specified hardware as the manufacturer specifies.
Step 3: Mark Tongue Alignment
How do you mark the tongue accurately? Position the new coupler on the 2-1/2-inch box tongue, or the correct channel, and align it squarely. Center it across the tongue width; on 2-1/2-inch box tubing, check that the coupler’s outside faces match the tongue edges, especially if its stated width is 2-3/4 inches.
Use the coupler as your template. Don’t drill first. Pass a marker or scribe through each existing coupler hole and transfer every bolt location onto the tongue. Mark additional holes for accessories, such as safety chains, from the same verified reference.
Before drilling typical 1/2-inch bolt holes, recheck measurements and pattern symmetry. Confirm the coupler sits square and each mark is positioned; misalignment can leave holes offset or force bolts to bind.
Step 4: Bolt-On Versus Weld-On Installation
Once you’ve marked the coupler’s position and bolt pattern, choose a bolt-on or weld-on installation based on the tongue design and your skills.
For bolt-on installation, set the coupler on the channel or tube, then drill the tongue at the confirmed locations. Use the specified fasteners—often two 1/2-inch Grade bolts with matching nuts—and sleeves where required to prevent crushing the tongue.
Weld-on replacement avoids drilling, but you must remove the old coupler by breaking its welds, then weld the new unit along the previously welded edges. Use appropriate protective gear and have the work done by a qualified welder if you lack skill; poor welds can fail under load.
Match ball size and coupler rating to your trailer’s tongue and intended load.
Step 5: Lubricate the Coupler Socket
Before installing the replacement, apply a thin layer of light, corrosion-resistant trailer hitch grease to the coupler socket’s ball-contact surfaces to reduce wear and help the ball seat smoothly.
Match the grease to your coupler type: weld-on couplers are typically factory-journaled to the tongue, while bolt-on units need seated, greased mating surfaces. Before greasing an upgrade from a 1⅞-inch ball to a 2-inch ball, verify the socket size; grease can’t correct a diameter mismatch.
After installation, torque and check the coupler bolts according to manufacturer’s specifications, then reapply grease so the ball won’t start hitch cycles against dry metal. Use grease only to prevent wear; it can’t fix a cracked coupler or misaligned bolt-hole fit. Stop and correct structural or fitment problems before towing.
Step 6: Apply Corrosion-Resistant Coating
After removing the old coupler and drilling any required ½-inch holes, clean the bare tongue and coupler-mounting surfaces to bright metal with a wire wheel or grinder, then wipe away dust and grease so the coating bonds properly.
Before installing the bolt-on coupler, apply corrosion-resistant primer to tongue edges and corners, especially around drilled holes where moisture sits. Use corrosion-rated sleeves or spacers when specified to prevent tongue crushing; coat them to protect the interior. After installation, coat bolt heads, nuts, and weld or ground areas with rust-inhibiting paint or zinc-rich coating.
If a visible void separates coupler and tongue, seal it with paintable seam sealer. Reinspect and touch up after washing or salt exposure, focusing on bolt-and-drilled junctions where water can wick and cause corrosion.
Verify Latch Engages Securely
With the trailer secured and the correct-size ball seated in the coupler, close the latch and confirm the lever returns fully to its locked position, the jaw closes without a gap, and the safety catch engages by hand. Check the indicator, if fitted, for its locked mark; don’t rely on appearance alone. With the latch closed, gently rotate the ball and check for only minimal movement; the latch mustn’t slip open.
Then apply a light upward and downward pull to the coupled assembly. The coupler should stay seated and engaged. If the lever won’t reach its stop, the jaw leaves a gap, or the catch won’t engage by hand, stop and verify ball diameter and coupler compatibility before towing. An incorrect-size ball can prevent full seating. Also check for abnormal movement where the coupler meets the tongue, including any sleeves or backup welds. Correct any engagement problem before use. Repeat the check after correcting the fit, then confirm the catch remains secure.
Coupler Bolt Backing Out
A secure latch won’t make up for a coupler that’s shifting on the trailer tongue. Use at least two 1/2-inch Grade 5–8 bolts, correctly sized internal sleeves, and lock nuts or vibration-rated threadlocker. Sleeves prevent box-tube walls from crushing or elongating, while locking hardware resists rotation.
| Check | Risk | Action |
|---|---|---|
| Bolt grade | Fastener failure | Use Grade 5–8 |
| Tongue holes | Progressive loosening | Inspect for elongation |
Tighten bolts to the coupler maker’s specification; if unavailable, use the appropriate torque for bolt grade and diameter. Recheck torque periodically. A gap beneath the coupler or shiny fretting around holes signals movement.
Stop towing; replace worn bolts, nuts, or sleeves rather than simply retightening them. Don’t return the trailer to service until coupler sits flush and mounting hardware stays secure.
Inspect Safety Chains Annually
Inspect safety chains at least once a year for stretched links, cracks, broken welds, corrosion, or deformation at the coupler and frame attachments. During a coupler replacement, inspect both chain runs and their attachment points. Check that each chain sits properly, isn’t twisted, and uses secure, correctly sized spring hooks or snap links.
Verify each chain, hook, and connection carries a rating suitable for your trailer’s gross weight; match hardware and links to that rating. For example, a common replacement set for a 3,500-pound-class trailer may use 5,000-pound-rated chains.
Measure chain slack with the trailer connected. Keep chains clear of the road, yet long enough to allow full turns without becoming taut. Tight chains can overload hardware and fail early.
Replace any chain, hook, or link showing pitting corrosion, elongation, or structural damage. Don’t weld, straighten, or patch damaged parts; use rated replacements and recheck attachments.
Conclusion
Before you install a coupler, verify its ball size, tongue rating, and mounting style. Support the trailer and remove tongue weight before loosening hardware; mark alignment so the new unit sits square. Use rated bolts or qualified welding, then apply corrosion-resistant protection.
After installation, confirm the latch closes fully and the safety chains remain sound. Recheck fasteners and test the connection at low speed before towing. If anything shifts or binds, don’t tow; correct it.