Trailer Hitch Class 1 Vs 2: Which One Your Car or Crossover Actually Needs
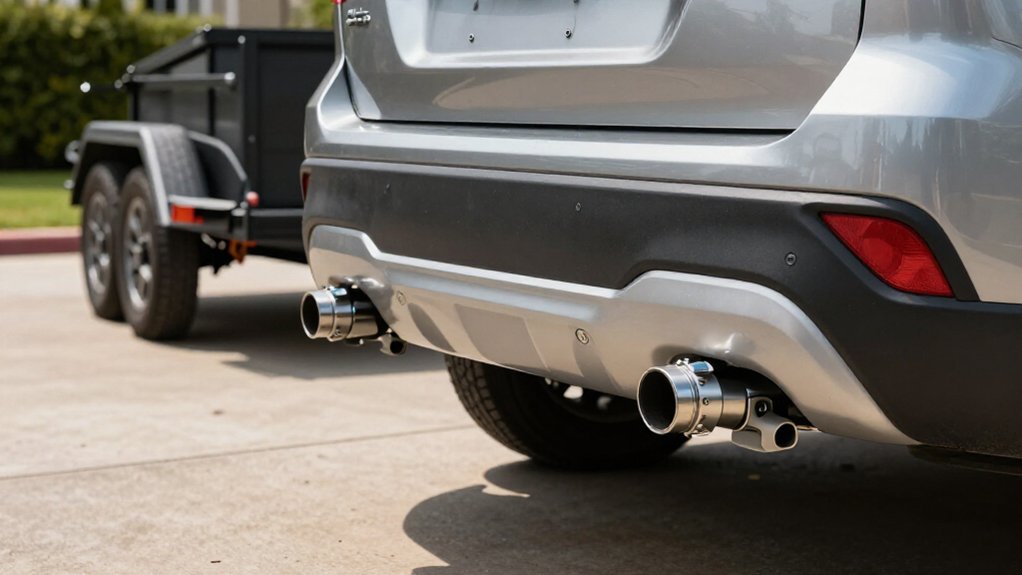
Choose Class 1 for light-duty bike racks or cargo carriers; choose Class 2 when your loaded trailer exceeds Class 1’s limits, but only if your vehicle allows it.
Both use a 1¼-inch receiver, so size alone doesn’t determine capacity. Keep the load within the lowest-rated limit among your vehicle, hitch, and accessory: Class 1 tops out at 2,000 pounds GTW and 200 pounds tongue weight; Class 2, 3,500 and 350.
The details below help you check fit, stability, and installation.
Receiver Size and Capacity
Class 1 and Class 2 hitches both use a 1-1/4-inch receiver, but their capacities differ: Class 1 supports up to 2,000 lb GTW and 200 lb tongue weight, while Class 2 supports up to 3,500 lb GTW and 350 lb tongue weight.
| Hitch class | Maximum ratings |
|---|---|
| Class 1 | 2,000 lb GTW; 200 lb TW |
| Class 2 | 3,500 lb GTW; 350 lb TW |
| Loaded limits | Lowest component rating |
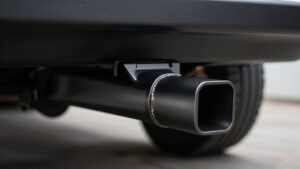
Both classes accept 1-1/4-inch ball mounts, but the shared opening doesn’t establish safe capacity. Check loaded GTW and downward load, including tongue-mounted items. Your usable limit is the lowest rating among hitch GTW, hitch TW, and your vehicle’s tow ratings.
If either load exceeds Class 1 limits, choose Class 2 only if your vehicle permits it. Weigh the loaded trailer; don’t rely on empty weight.
Class 1 vs. Class 2 Hitches
At a glance, Class 1 and Class 2 hitches look alike because both use a 1-1/4-inch receiver, but their ratings differ: Class 1 supports up to 2,000 pounds GTW and 200 pounds TW, while Class 2 supports up to 3,500 pounds GTW and 350 pounds TW. Choose Class 1 for lighter accessories such as bike racks and cargo carriers.
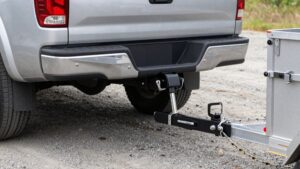
Select Class 2 when you need to tow a utility trailer or a camper, jet ski, or boat trailer within its limits. Before buying or loading either hitch, check its official capacity; receiver size alone doesn’t identify its rating. Confirm your vehicle’s towing and tongue-weight limits, too. Your allowable load can’t exceed the lowest-rated component, whether that’s the hitch or vehicle. Keep both GTW and TW within those limits.
Trailer Stability Under Load
How well a trailer tracks behind your vehicle depends in part on tongue weight (TW): aim for about 10%–15% of the trailer’s gross weight (GTW) to help reduce sway. A Class 1 hitch supports up to 200 pounds of TW and 2,000 pounds GTW, so a heavier or poorly balanced load can exceed its limits quickly. Class 2 allows up to 350 pounds TW and 3,500 pounds GTW, typically giving trailers more stability when you stay within rating.
Too little tongue weight invites dangerous sway; too much can overload your rear suspension and compromise steering and braking, especially when fully loaded. If your vehicle sags behind, reduce tongue weight or consider weight distribution on higher-class setups; excess front-axle unloading weakens control.
Hitch Installation and Wiring
Before installing the hitch, confirm the trailer’s electrical needs and choose a vehicle-specific wiring harness that connects properly to the taillight circuits.
Match the harness to your trailer: lights-only setups need lighting wiring, while trailer brakes may require brake-controller wiring. Use factory-style connectors and establish a firm chassis ground; poor connections can cause intermittent signals.
- Route wiring away from exhaust heat, suspension movement, and pinch points; secure it with clamps or protective loom.
- Use the supplied connectors, then secure a clean chassis ground to prevent intermittent lighting or brake signals.
- Test left and right turns, brake lamps, running lights, and reverse lights when applicable, using a trailer or circuit tester.
- Recheck every function after installation, and keep the receiver opening clear for accessory attachment.
Compact-Car Clearance Considerations
Because Class 1 and Class 2 hitches both have a 1¼-inch receiver, clearance depends more on how far the hitch or loaded accessory extends below the bumper than on its class. Check the lowest point with the accessory installed, then allow for driveway ramps, speed bumps, and uneven roads. A small bike rack suits a Class 1 hitch, rated to 2,000 pounds gross trailer weight (GTW) and 200 pounds tongue weight (TW).
A cargo carrier may call for Class 2, rated to 3,500 pounds GTW and 350 pounds TW, but its capacity won’t prevent scraping if the load makes the rear sag. Keep tongue weight within the hitch limit and around 10%–15% of GTW. Distribute cargo, and verify your vehicle’s limits; a lower ride height can reduce clearance.
Rustproofing and Replacement Costs
Rust can weaken either Class 1 or Class 2 hitch, but a Class 2 hitch’s higher capacity, up to 3,500 pounds GTW and 350 pounds tongue weight, often means more frequent, heavier use, making rustproofing especially worthwhile. Before buying, inspect the hitch’s finish and plan routine checks:
- Prefer a main body with a liquid A-coat and black powder coat; sound coverage helps steel resist red rust.
- Rinse road salt, then dry and touch up damaged coating promptly.
- Corrosion can prevent proper seating of the shared 1/2-inch pin and clip at the receiver opening.
- Treat rust at brackets or tube as a replacement warning; frame-fastener and hardware removal raises costs.
Both classes use a 1-1/4-inch receiver, so base protection on exposure and towing frequency.
Inspect often; replace affected parts if corrosion compromises secure pin engagement before towing, and budget for upkeep.
Load-Induced Frame Fatigue
Coating checks help prevent corrosion, but repeated overloading can fatigue the vehicle’s frame with either hitch class. Fatigue builds through repeated stress cycles. When you exceed tongue weight—your trailer’s downward hitch load—you increase bending forces from the receiver and mounting brackets into the frame. Keep tongue weight roughly 10–15% of trailer weight (GTW); too little can cause sway, while too much can overload suspension and hitch-to-frame attachment points.
Class 1 receivers are limited to 200 lb tongue weight and 2,000 lb GTW; Class 2 ratings reach 350 lb and 3,500 lb, but your vehicle may be rated lower. Follow the lowest limit in your setup. Repeated loads near or above that limit raise cracking risk at mounting areas. Choose a suitable hitch class, and weigh your loaded trailer before towing.
Bike-Rack Versus Cargo-Carrier Fit
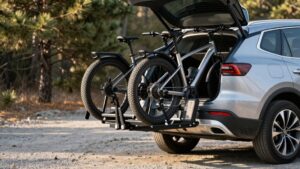
A 1-1/4-inch receiver can fit a compatible bike rack or cargo carrier, but you’ll need the correct 1/2-inch hitch pin and must check the rack’s rating. A light bike rack often stays within tongue-weight limits, while a cargo carrier and its load can approach them quickly.
Compare the combined carrier and cargo weight with the hitch, vehicle, and carrier limits before loading.
Bike Rack Compatibility
Will your 1-1/4-inch receiver fit a bike rack or a cargo carrier? Both Class 1 and Class 2 often share a 1-1/4-inch opening, but size doesn’t confirm fit. Measure your receiver’s inside width, then match the rack’s opening. Check limits:
- Confirm your hitch class and rating: Class 1 supports up to 2,000 pounds GTW and 200 pounds tongue weight; Class 2, up to 3,500 GTW and 350 tongue weight.
- Verify your vehicle’s tongue-weight limit.
- Check the rack or carrier’s tongue-weight capacity.
- Assess carriers separately: leverage may exceed Class 1 limits; Class 2 suits only rated models within 350 pounds.
If unsure whether an accessory counts as a rack or carrier, check specifications. Avoid adapters; they can compromise fit and reliability.
Cargo Carrier Capacity
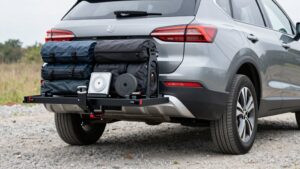
For cargo carriers, a 1-1/4-inch receiver’s fit doesn’t guarantee enough capacity: Class 1 is rated for up to 200 pounds of tongue weight, while Class 2 allows up to 350 pounds.
Class 1 suits light bike racks better than typical cargo carriers. Class 2 offers more headroom, but 1-1/4-inch carrier choices remain limited.
Add carrier, cargo, baskets, and bags; keep their combined weight within the hitch’s tongue-weight limit. Exceeding it risks rear sag and instability.
For bike racks, count rack and bikes against the same limit: 200 pounds for Class 1 or 350 for Class 2. Receiver fit alone doesn’t confirm safe capacity.
Check the accessory’s own tongue-weight rating too; the receiver’s size and hitch rating don’t override a lower published carrier limit.
Choosing by Typical Cargo Loads
If you carry a small bike rack or light utility trailer, a Class 1 hitch supports up to 2,000 lb GTW and 200 lb tongue weight. For heavier modest loads, a Class 2 offers up to 3,500 lb GTW and 350 lb tongue weight, but your safe limit is the lowest rating among the hitch, vehicle, and carrier.
Match your gear to those limits, and keep trailer tongue weight near 10%–15% of GTW without exceeding any component’s rating.
Lightweight Cargo Loads
With a small hitch-mounted carrier or light bike rack, a Class 1 hitch’s 1-1/4-inch receiver and ratings, up to 2,000 pounds GTW and 200 pounds tongue weight, are often enough, but count the carrier and cargo together against that 200-pound limit.
For your setup, use these checks:
- Match the carrier to a 1-1/4-inch receiver; a 2-inch carrier won’t fit unless an appropriately rated adapter is approved.
- Add carrier and cargo weight, then stay below the lowest hitch, vehicle, and carrier rating.
- Keep tongue weight realistic: cargo tongue weight is generally 10–15% of GTW.
- If the combined load nears Class 1’s 200-pound tongue limit, choose Class 2, rated to 350 pounds.
Heavier Gear Limits
Once your gear gets heavier than a light rack or carrier load, Class 1’s limits, up to 2,000 pounds GTW and 200 pounds tongue weight, can rule it out quickly.
Class 2 raises the ceiling to 3,500 pounds GTW and 350 pounds tongue weight, making it a better fit for typical crossover utility loads. But those figures aren’t a target: your vehicle and 1¼-inch accessory can impose lower limits. Estimate tongue weight at roughly 10%–15% of loaded GTW; too little can encourage sway, while too much can cause instability or rear sag.
For example, a 2,000-pound load calls for about 200–300 pounds of tongue weight, already beyond Class 1’s cap at the upper end. Choose Class 2 only when your expected cargo genuinely needs its added capacity, and keep every part within its stated limit. Bulky tools, camping equipment, or a loaded utility carrier can add substantial weight before you account for the carrier itself.
Match Cargo to Ratings
Match the hitch to your heaviest expected load, not just the accessory’s fit: Class 1 and Class 2 both use a 1¼-inch receiver, but Class 1 supports up to 200 pounds of tongue weight (TW), while Class 2 supports up to 350 pounds. Before loading, check the vehicle, hitch, and carrier labels; your usable limit is the lowest rating.
- Use Class 1 for light trays or bike racks; keep tongue load below 200 pounds to prevent sway or rear sag.
- Choose Class 2 for utility trailers or heavier carriers, only within its 350-pound TW and vehicle limits.
- Confirm the carrier fits the 1¼-inch opening; matching size doesn’t confirm adequate capacity.
- For trailers, target 10–15% TW: a 2,000-pound trailer yields 200–300 pounds, favoring Class 2.
Vehicle Warranty Considerations
A hitch that fits your car can still put its warranty at risk if the towing setup exceeds the vehicle’s ratings.
Warranty coverage may be jeopardized when hitch loading, especially tongue weight, exceeds your manufacturer’s ratings. Class 1 hitches allow up to 2,000 pounds GTW and 200 pounds tongue weight; Class 2 allows up to 3,500 pounds GTW and 350 pounds tongue weight. Exceeding either limit can lead to damage claims.
A compatible hitch doesn’t raise your vehicle’s tow limit: safe capacity is set by the lowest-rated component. Confirm the 1¼-inch receiver opening and use compatible accessories to avoid fit failures.
If trailer load exceeds about half your vehicle’s total weight or the rear sags, consider weight distribution; skipping it may affect handling, suspension, and warranty coverage.
Conclusion
Choose the hitch class your vehicle manufacturer approves—not simply the one with the higher rating. Match receiver size and towing capacity to your trailer, rack, or carrier, and include tongue weight in your load calculations.
Confirm clearance, wiring, and installation details before use; an unsuitable setup can cause instability or frame damage. If you’re unsure, check your owner’s manual and ask a qualified installer. A correctly rated, properly fitted hitch helps protect your vehicle and keeps every trip safer.