Are Hitch Adapters Safe for Towing? Reducers, Risers and Real Limits
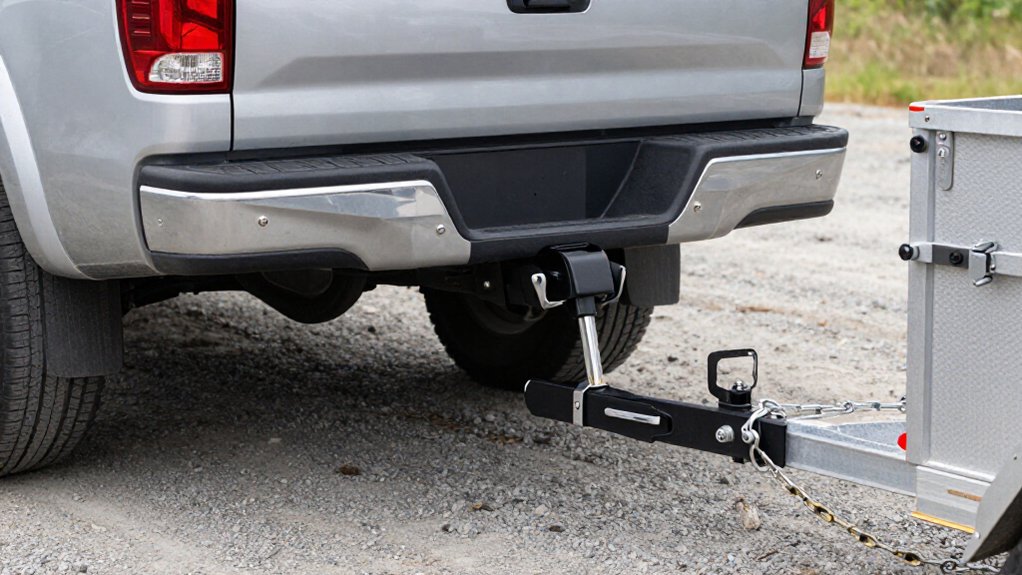
Hitch adapters can be safe for towing when you use an approved configuration and keep every load within the lowest-rated component’s limit. Check the hitch, receiver, adapter, shank, and accessory; reducers and risers don’t increase capacity, and extenders add leverage.
Don’t stack adapters. Confirm pin alignment, secure the retention clip, and check loaded clearance at the bumper, spare tire, and driveway angles.
Manufacturer approval matters for warranty and safety; the details below explain what else to verify.
Adapter Rating and Leverage
Check every component in the towing load path—hitch, receiver, adapter, shank, and accessory—and keep tongue weight and other loads within the lowest rating. A reducer or extender adds leverage and can increase movement at the receiver, so your safe load may fall below the vehicle’s nominal capacity. Follow stated adapter or extender limits; the lower limit governs.
A 350-pound Class II extender caps the load; a higher rating can’t raise another component’s limit. Use only one adapter at a time: stacking adapters further reduces capacity, with warnings of reductions exceeding 50 percent. A correctly sized converter improves fit between receiver standards; it doesn’t add strength. Play in a sleeve adds movement and noise; account for its leverage, too.
Receiver Labels Aren’t Tow Ratings
A receiver’s 2-inch or 2½-inch label identifies its size, not the towing capacity of the system. Class II or III wording may describe a class, but it doesn’t replace component-specific limits. Class labels and decorative marks describe fit; they don’t certify what your complete towing setup can carry.
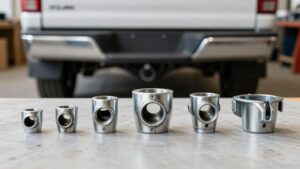
A reducer helps your accessory fit the tube, but it can’t raise the weakest component’s rating. Adapters and extenders also add movement, which may lower the safe load.
| Part | What it tells you | Check |
|---|---|---|
| Receiver | Tube size | Published rating |
| Adapter | Fit change | Its rating |
Before towing, compare the receiver, adapter, hitch, and accessory ratings. Use the lowest published capacity as your limit. If you trust the receiver label alone, you could exceed that limit even when the adapter fits correctly. Check each component’s documentation; a matching size isn’t permission to tow more.
Measuring Actual Hitch Clearance
With the trailer fully loaded and level, measure from its lowest point, the tongue jack, hitch plate, or coupler, to the truck’s bumper or bed and to the ground. Repeat the check at expected rise and drop angles, then at the driveway incline where the connection could bottom out.
An adapter can create a low point, so inspect its body as well as the trailer. If a reducer or tube adapter changes how deeply the shank sits, recheck coupler-to-bumper and spare-tire clearance; seating differences matter.
Use the adapter’s extension or rise/drop dimensions to estimate the change; an extender adds length and leverage, while an eight-inch drop or rise shifts height, and verify physically. Re-measure after a truck, receiver size, or adapter-length change; receiver standards and seating depth vary.
Pin-Hole and Anti-Rattle Hardware
Match the adapter’s pin-hole alignment and diameter exactly, and use a hitch pin rated for the application with its retention clip secured. Seat the anti-rattle hardware fully to limit movement, but don’t use it in place of a locked hitch pin.
Check the connection after installation; excess play can impact and wear the holes during towing.
Match Pin-Hole Alignment
Before towing, confirm the adapter and receiver pin holes align cleanly; even slight misalignment can add stress and movement. Slide the adapter fully into the receiver and check that the openings coincide without forcing either component. If the holes don’t line up naturally, stop and verify that the adapter size, orientation, and seating are correct; don’t enlarge or modify the openings.
Once aligned, seat the pin and clip completely through both walls; partial engagement can permit load cycling and raise failure risk. Tighten supplied anti-rattle hardware until it contacts as designed, removing vertical and lateral play without shifting the adapter. Finally, push and pull firmly at the connection; confirm minimal hole-interface movement and that the hardware contacts as designed under firm hand pressure.
Use Rated Hitch Pins
Use a hitch pin or bolt rated for your receiver class and size, and make sure it fully engages the pin hole or threaded holes; friction fit alone isn’t a secure connection.
Choose towing-rated, strength-marked hardware; the pin or bolt is in the load path, so its capacity must not become the limiting factor. Install clips, screws, or wedges only as their manufacturer directs. Anti-rattle components control noise or snugness, not towing shear or bending forces, and shouldn’t be treated as structural pins.
Check that hardware clears the receiver’s locking lugs and stop surfaces; interference can reduce engagement depth, increase play, and raise impact loads. Inspect the pin and hardware for loosening, deformation, or corrosion. Replace worn components to preserve the receiver connection’s strength.
Reduce Rattle Without Substitutions
To reduce receiver play without changing the hitch geometry, install the correct hitch pin, locking clip, and any anti-rattle hardware specified for your receiver and shank size. Use contact points designed for your receiver tube size to snug the shank and improve fit tolerance. This can limit movement and noise, but it doesn’t raise the assembly’s load rating.
For a reducer sleeve or converter, rattle control depends on how firmly each shank seats in the receiver holes. If clearance remains, anti-rattle hardware can’t make a loose fit a rated, zero-motion connection.
Check that the pin passes fully through aligned holes, then engage its locking system. A partly seated pin or missing clip can loosen under vibration.
If proper hardware doesn’t control rattle, switch to a hitch or accessory with the correct size match; don’t stack adapters to compensate. Follow the receiver and hardware maker’s instructions, and inspect the connection before towing.
Manufacturer Approval and Warranty Limits
Check your vehicle and hitch manufacturer’s approved adapter list before towing, since reducers and extenders don’t increase capacity. Verify that the adapter won’t affect warranty coverage and matches the approved configuration.
Keep every component within its rating, including limits reduced by added leverage.
Check Manufacturer Approval
Before towing with a hitch adapter, confirm that the hitch manufacturer approves that exact configuration; otherwise, you may void the warranty and load components outside their engineered limits.
Check approval against your receiver’s type and class, and follow the manufacturer’s instructions for the reducer, riser, or extender. Ratings apply to configurations; a tube converter doesn’t raise capacity above the lowest-rated component. If you change hitch height, leverage and geometry can lower allowable loads even when the adapter’s label rating stays the same.
Don’t stack adapters unless the manufacturer permits that arrangement; multiple pieces can reduce tongue-weight capacity and may place the setup outside approved use. After an approved change, keep trailer and tongue loads within your tow vehicle’s limits and the lowest component rating.
Verify Warranty Coverage
Even a properly rated adapter may not be covered for towing, so get written confirmation that the manufacturer approves it in your hitch’s load path and that the warranty covers your specific receiver model and class.
| Check | Written proof |
|---|---|
| Towing use | Not accessories only |
| Receiver fit | Your model and class |
| Capacity terms | Lowest-rated part governs |
| Configuration | No stacking or unapproved orientation |
Ask whether the adapter’s rating covers trailer towing; a cargo-carrier or bike-rack rating isn’t towing approval. Confirm the warranty doesn’t exclude your intended use. An adapter can’t override hitch capacity, and coverage may depend on the lowest-rated component. If your exact receiver or class isn’t listed, ask before installation.
Stacked adapters or reversed, unapproved orientations are warranty red flags; follow the manufacturer’s instructions.
Follow Rated Limits
Follow the lowest rated limit in the entire towing setup: the receiver, adapter or extender, and truck. It can’t increase the capacity of the weakest component. Treat a reducer as a fit solution, not a way to raise towing capacity; your load remains capped by the lower-rated shank, receiver, or vehicle limit.
Check the adapter’s rating against your hitch class and towing conditions. Some extenders carry ratings of 350 pounds for Class II, while Class III or heavy-duty models may reach 10,000 pounds. Added leverage from an extender or height adapter can reduce rear load, so recheck weight limits before towing. Use configurations approved by the manufacturer. An adapter outside its class or rating may void warranty coverage and leave you responsible if a failure occurs.
Clearance for Tailgates and Spares
A receiver extender can move a rack far enough back to clear a tailgate or spare tire, but the added leverage and movement can affect towing safety.
A 7-inch model may provide clearance. Check the rack’s travel with the tailgate open and confirm it won’t contact the bumper or spare. A reducer sleeve only changes receiver size; it doesn’t raise capacity.
Your allowable load remains the lowest rating among the hitch, adapter, and accessory. Choose one rated clearance or height adapter rather than stacking parts, which can lower effective capacity and increase leverage. Verify receiver geometry and ratings before towing; some Class II extenders are limited to 350 pounds, while heavy-duty adapters may carry higher ratings. Don’t assume a rating suits your vehicle.
Corrosion and Fatigue Risks
Because each added joint can move slightly under load, a reducer or adapter may accelerate fatigue at welds and pin holes.
Your added interfaces also create crevices where water and road salt collect if the adapter isn’t fully seated or inspected. Coatings and galvanizing don’t protect cut edges or contact surfaces; rust pitting can reduce metal cross-section and help cracks grow.
An imperfect fit, such as a smaller shank inside a larger receiver, can increase cyclic bending and corrosion-assisted fatigue.
Wet, salty conditions and torque from accessories raise concern. Inspect for rust-through, elongated pin or bolt holes, and excessive play. Replace damaged components rather than relying on a tighter pin or added coating. Keep interfaces clean and dry, and follow manufacturer limits for use.
Weight Distribution Setup
An adapter won’t improve weight distribution; your setup remains limited by the lowest-rated component in the load path, including the receiver, adapter, hitch, and tow vehicle.
Extra sleeve play can let the hitch move under load, changing force transfer and reducing stability. Keep every component within its stated capacity; added leverage from an extender can make load distribution less favorable.
- Check the adapter and receiver ratings against your trailer’s tongue load.
- Use a leveling drop or rise to keep the trailer level; recheck it when either vehicle changes.
- Don’t stack adapters; multiple pieces can cut capacity by over 50% and weaken stable load transfer.
- Confirm the tow vehicle’s limits before towing.
After installation, verify fit and follow the hitch maker’s weight-distribution instructions before trips.
Choose the Right Extender Length
Choose the shortest extender that clears the bumper or spare tire, or lets your rack swing open; pushing the hitch connection farther back increases leverage on the receiver and can add movement and stress.
Stay within the extender’s listed capacity: a 7-inch Class II VersaHaul VH-HE2 is rated around 350 pounds for carriers or racks. For heavier loads, consider an extender such as the Blue Ox BX88265, rated to 10,000 pounds. The weakest-rated component limits your setup, and longer leverage makes that limit more important. Its adjustable 6.75- to 8.75-inch range lets you fine-tune clearance while minimizing extension.
Don’t add length for convenience or assume you can average ratings. Recheck that your receiver, extender, and trailer tongue or carried load are rated for the demands your setup will impose.
Conclusion
You can use a hitch adapter safely only when every component’s ratings, fit, and installation support your actual load. Check the vehicle, hitch, adapter, and accessory limits; don’t treat a receiver label as a tow rating.
Measure clearance, confirm pin fit, and follow the manufacturer’s approval and weight-distribution requirements. Keep the adapter as short as practical, inspect it for corrosion or fatigue, and recheck hardware before each trip. If any rating or fit is uncertain, don’t tow.