How to Pack a Hitch Cargo Carrier and Keep Gear Dry on the Highway
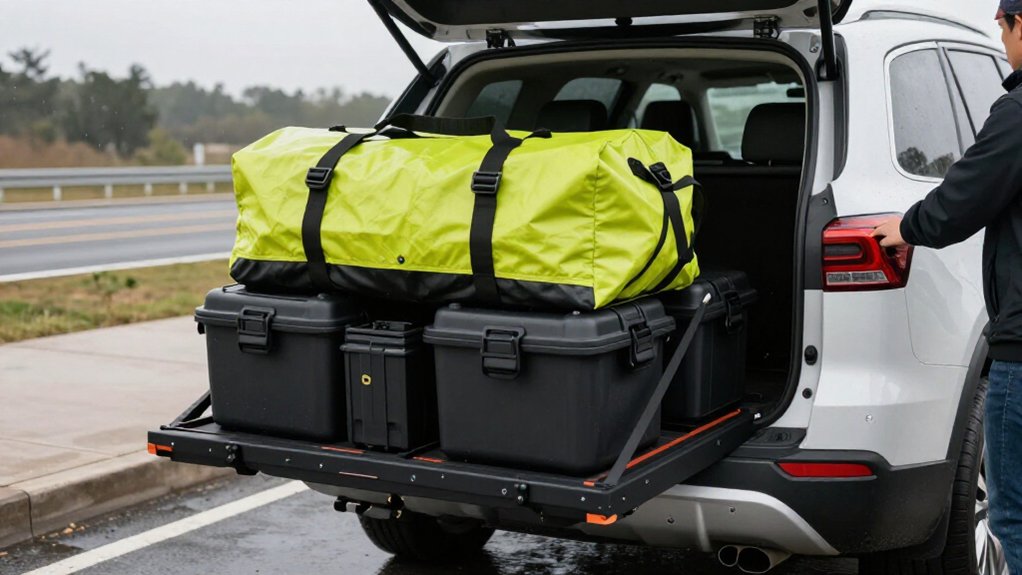
Before loading, confirm your hitch class, tongue-weight rating, and carrier limit; count the carrier’s weight because capacity doesn’t override your vehicle rating.
Check bags and carrier floor for moisture, then fit a waterproof liner and seal dry items separately.
Center heavy cargo low and near the hitch, fill gaps, and secure it with straps or a net.
Keep reflective markers and brake lights visible; recheck tension after 30–50 miles.
More checks help protect your trip.
Highway Gear Weatherproofing
Before loading for a rainy highway trip, choose a carrier that matches how much protection your gear needs: an open basket is easy to tie down but leaves cargo exposed, while an enclosed carrier such as the 17-cubic-foot GearDeck shields it from spray and offers slide-out rear access and integrated LED lighting. For an open rack, use a waterproof cargo bag, including Mockins’ included bag, and keep loose items inside. Pack heavy gear low and centered; fill gaps with blankets or duffels to limit shifting and block spray.
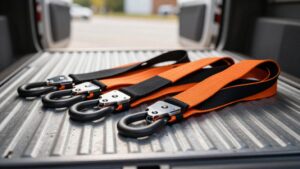
Secure the load with ratchet straps or heavy-duty tie-downs. After 30–50 miles, stop safely and check tension: vibration can loosen straps, opening gaps to water. Consolidate exposed items in a container and add locking straps or a cage.
Check Hitch and Carrier Limits
Check your hitch receiver’s class and attachment method against the carrier’s requirements, then confirm your vehicle’s tongue-weight rating can support the full setup. Before loading, read both manufacturers’ limits; the carrier’s capacity doesn’t override your hitch rating.
- Add the carrier’s own weight to your gear: a 44-pound steel tray plus 400 pounds of cargo means 444 pounds on the system.
- Compare that total with the carrier’s stated maximum and your hitch limit; a 500-pound carrier rating won’t make a lower-rated hitch safe.
- Account for distance: guidance may drop 20% for each foot the load sits beyond the hitch face, including an extension.
Recheck added hardware, installation, and clearance, and keep the entire highway load within every published limit before you pull away or travel safely.
Step 1: Inspect Gear for Moisture
Inspect each item for wet spots, damp fabric, or condensation before loading; highway airflow and gaps can turn a small leak into soaked gear. Check bags and lids for tight seals, and close every cooler drain plug; escaping water can spread across the rack floor and reach nearby gear.
Before loading, make sure the carrier floor is clean and dry, with no standing water or rust flakes that could transfer moisture to clothing or sleeping gear. If you’ve used items in rain or dew, let them air-dry completely; trapped moisture can keep evaporating inside the carrier. After a hose-down or your first rainy stop, inspect seams and edges for dampness. Adjust bag positions carefully so water won’t pool beneath straps or in pressed-down corners.
Step 2: Pack Waterproof Liners First
Although a cargo cover can block rain and road spray, start with a fully waterproof liner, such as a heavy-duty cargo bag, inside the hitch carrier. Keep it snug against the floor so water can’t pool underneath or seep through gaps at seams. Before loading, check the liner for tears, and place soft cushioning around sharp or fragile items to prevent punctures as the carrier vibrates.
Create separate sealed zones: use a dry bag for electronics and another bag for clothing, so a small splash won’t spread across your gear. After you tie down the load, confirm the liner remains closed and sits above metal grates and edges. Check that shifting cargo hasn’t exposed it. Recheck the closure during regular stops on long drives.
Step 3: Center the Heaviest Gear
Place the heaviest gear on the carrier floor, centered side to side and as close to the hitch as possible. Keep dense items low and near the vehicle to limit rocking and avoid extending the load beyond plan. Capacity guidance can drop by 20% for every foot the load extends from the hitch face, so don’t push weight toward the outer edge.
Balance the remaining gear front to back and across the platform; an uneven load can respond unpredictably to crosswinds and airflow. Pack soft sleeping bags, blankets, or duffels around lighter items to fill gaps and keep them from shifting into the heavy gear. Then strap everything securely. Check the straps after the first 30–50 miles and afterward. If gear settles, restore centered balance.
Step 4: Seal Seams With Waterproof Tape
Before loading the carrier, seal its outer seams with waterproof tape to reduce the risk of leaks from rain and highway spray.
Run seam-sealing tape where the plastic or steel frame meets the carrier skin, or where fabric panels are stitched or fastened. These joints can admit water during travel, especially when spray strikes the carrier. Check for screw or bolt openings along the seam line, since water can enter around those penetrations.
Clean and dry the surface first; tape won’t hold reliably on dust or moisture. Press it firmly with your palm or a roller to secure full contact before airflow and vibration challenge the bond. Hose down the seams at home and confirm they stay dry before you leave.
Step 5: Protect Zipper Openings and Corners
Zippers and corners are vulnerable to wind-driven spray, so point openings and corner seams downward when possible to keep water from pooling near the closures. Before you leave, place a waterproof cargo bag, or dry bag, with its top fully zipped inside the carrier.
Cushion its edges with soft padding so it won’t bulge; stretched corner fabric can strain zippers and invite leaks. Keep items with exposed zippers in the center, then pad all four sides to shield seams from direct airflow.
For an open-frame carrier, cover zipper areas with plastic wrap or a thin rain cover before strapping. After 30–50 miles and after heavy rain, check zipper tracks and corners for moisture; retighten straps if the load has shifted before you continue along the highway.
Step 6: Add Reflective Load Markers
Once the load is dry and secured, add outdoor-rated reflective markers to the carrier’s rear corners and any wide edges. These markers help tailgaters see your load at night and in rain or fog. Position them high enough to stay above road spray, but keep them within the carrier’s footprint so they don’t hang down or snag.
Keep each reflective face fully visible. Route straps and place duffels or cargo bags so they don’t cover the markers; uninterrupted reflective surfaces improve visibility. If you’re using a cargo bag, attach the markers to its exterior, not to items beneath the straps. That keeps them aligned if the contents shift.
After the first 30–50 miles, pull over safely and check that each marker remains secure. Tighten or reposition any that have started to slip or vibrate loose.
Check Brake-Light Visibility
Can drivers behind you see your brake lights clearly? Before you leave, check that your carrier doesn’t block tail or brake lights, even at night, and that your license plate remains visible. Have someone stand behind the vehicle while you press the brake pedal; confirm lights show. Cargo can shift or sit higher, so don’t rely on a driveway check alone.
Tie your load low and centered to keep it from tilting toward the lights during turns or when airflow catches loose items.
With an enclosed carrier or high rails, check clearance again after 30–50 miles and at every stop for slack straps or settled cargo. Recheck lights and plate whenever you redistribute gear, especially when moving heavier items toward the hitch face and center; clear signals support safer handling.
Diagnosing Carrier Rattle
After confirming your brake lights stay visible, listen for rattling that may signal a loose hitch connection or shifting cargo.
Pull over safely and check the hitch pin or lock; an anti-rattle pin must fully engage. Re-seat it, verify the correct receiver attachment and adapter hardware, and add a hitch tightener if needed. Extensions can increase play. At your first stop after 30–50 miles, recheck the connection.
| Cause | What to inspect | Action |
|---|---|---|
| Hitch play | Pin, lock, adapter | Re-seat; tighten |
| Cargo shift | Load, straps, net | Center; secure |
Center heavier items low and toward the vehicle, balanced side to side. Secure cargo with straps or a net; retighten after airflow and bumps settle it.
Persistent metallic rattles? Inspect carrier bolts, especially folding joints, before driving again.
Rinse Off Road Salt
Road salt and grit can corrode your hitch carrier, so rinse the frame, floor, straps, and metal rails thoroughly after winter-road trips.
Pay special attention to drain points and grated sections, where brine can collect. If you use an open-frame carrier, rinse underneath and around the corners near the hitch connection; salty spray often settles there.
Wipe the carrier or let it dry completely before storage so trapped moisture won’t cause rust.
For an enclosed or lockable unit, rinse its exterior and keep the interior clean and dry; salt deposits can damage weather seals over time. After rinsing, inspect and retighten hitch hardware, following the carrier maker’s instructions.
Corrosion and vibration can loosen connections, so don’t load or drive until the hitch is secure.
Conclusion
Before you hit the highway, confirm your hitch and carrier stay within their limits, and pack dry gear inside waterproof liners. Center the heaviest items, secure every strap, and add reflective markers without blocking brake lights or your plate.
If the carrier rattles, stop and tighten its connections before continuing. Check the load again at fuel stops, especially after rain. When you get home, rinse off road salt and let the carrier dry to help prevent corrosion and keep your gear ready for the next trip.