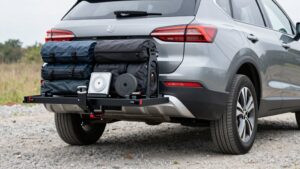
Are Hitch Cargo Carriers Safe? Weight, Visibility and Legal Concerns
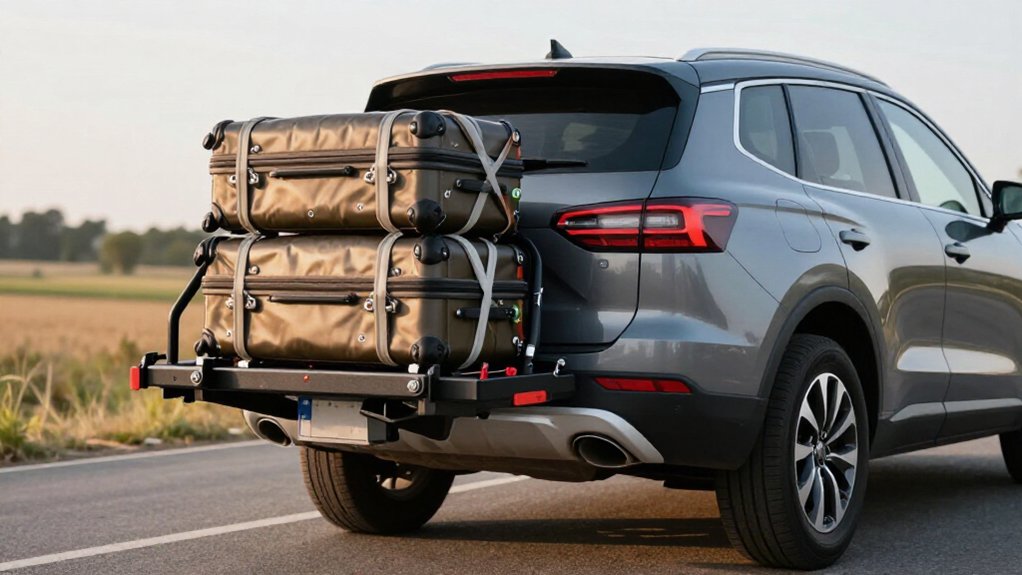
Hitch cargo carriers can be safe if you stay within your vehicle’s tongue-weight limit, counting both carrier and cargo. Place heavy items close to the vehicle, center them, and secure everything with ratchet straps. Keep tail lights and your plate visible; check local rear-overhang rules and add required markers.
At night, confirm brake lights remain visible. Recheck straps, pin, and visibility after 30–50 miles, since vibration can loosen connections or shift loads.
More follows.
Safety, Weight, and Visibility
A hitch cargo carrier can be safe at highway speeds when you match it to the correct hitch and stay within the vehicle’s tongue-weight limit, including the carrier’s own weight. Confirm your hitch size and class; many carriers fit 2-inch Class III receivers, but your vehicle and hitch ratings control. Check whether the carrier’s capacity means cargo alone or gross weight, then keep carrier plus cargo within the tongue-weight limit. Quality models carry about 300 pounds of cargo, though ratings vary.
Secure every item with ratchet straps or a cargo net, even inside an enclosed box. Wind and vibration can loosen loads; recheck straps after 30–50 miles. Keep your plate and brake, turn, and tail lights visible. Check overhang limits, often three to four feet; excess may require a red flag or light.
Rear-Axle Load Shift
When heavy cargo sits too far behind your vehicle, it increases leverage on the hitch and loads the rear suspension, which can worsen handling and braking. The carrier’s weight counts too: if carrier and cargo exceed your vehicle’s tongue-weight rating, you risk overloading the rear axle during acceleration, turns, or emergency stops. Check the vehicle and hitch limits before loading; don’t assume the axle can safely carry more because the cargo fits.
Place heavier items closest to the vehicle and center them side to side to reduce leverage, sway, and uneven loading. Avoid tall, top-heavy stacks, which can shift in airflow or over bumps. Secure everything with ratchet straps or a cargo net. After the first 30–50 miles, stop and check for loosened straps or settled cargo; shifting can increase bounce and instability.
Nighttime Brake-Light Checks
Cargo can shift as well as block your lights, so before driving at night, have someone stand 50–100 feet behind your vehicle and confirm the brake lights are clearly visible.
If the carrier blocks tail or brake lights, install auxiliary lighting, such as a wired LED bar or carrier-mounted lamps, so drivers behind you can see your brake and turn signals. Don’t assume an enclosed box fixes the problem; when loaded, it may sit at tail-light height and hide them.
Obscured lights can prompt a stop or citation, and they make your braking predictable to drivers. After 30–50 miles, recheck visibility: straps and cargo can settle and change what you block. If you can’t keep the load low or light enough to leave lights visible, adjust or relocate cargo before driving.
Mesh-Floor vs. Solid-Floor Baskets
Mesh floors drain water and shed debris, but small items can fall through unless you secure them with a net or tarp. Solid floors contain loose cargo, yet bumps can shift loads, so strap items firmly and keep heavier gear centered near your vehicle.
Consider how each floor affects cleanup and wear, and stay within your carrier’s and vehicle’s weight limits.
Drainage and Debris
Because water and grit can change how cargo rides, floor design matters for both cleanliness and stability.
Mesh-floor baskets let rainwater and small particles drain through. That can keep cargo drier and lighter, reducing the chance that wet items remain exposed to grit.
Solid floors can hold pooled water and sand, leaving gear damp and the tray dirty. You may need to tip and clean it; trapped moisture can promote rust, while grit can make the surface slippery.
If you choose a closed basket, add a cargo mat, tub, or liner to contain spills and ease cleanup. Straps won’t stop water from collecting beneath cargo. Whichever floor you use, check rear overhang and confirm your load doesn’t block lights when cargo or debris adds height.
Load Stability
Floor design affects how securely your load rides: mesh baskets let small items fall through, so pack gear in bins or bags and strap them down; solid baskets contain loose items, but their smooth bases can let cargo slide if straps are loose.
With either style, keep heavy cargo low and close to your vehicle; rear-mounted loads face bouncing in wind. Spread weight evenly across both sides, and avoid tall stacks that raise sway. Use ratchet straps or a cargo net, not bungee cords alone.
After the first 30–50 miles, stop and retighten straps: settling can loosen tie-downs, letting cargo shift or strike the carrier. Secure each container and heavier item individually, then check that nothing can roll, tip, or escape before every trip.
Cleaning and Durability
After wet trips, check your hitch basket for rust and corrosion; brush exposed metal with a wire brush and apply a protective coating. Choose mesh if you carry damp gear: mesh floors drain water and slush, and airflow helps them dry faster. That reduces trapped moisture that can accelerate corrosion.
But check that small items can’t fall through openings; choose a solid floor when you need that protection. Solid surfaces let you wipe spills and sticky messes clean, while mesh needs rinsing and scrubbing through openings. If you haul damp loads on a solid floor, dry it to limit moisture and corrosion.
Whichever style you choose, confirm its rating matches your load and strap cargo securely; shifting items can damage finishes or affect stability.
Hitch Extension Leverage Effects
A hitch extension moves your cargo farther behind the vehicle, increasing twisting force and sway. Your vehicle’s tongue-weight limit still governs—even a highly rated carrier can exceed what the hitch can safely control.
Keep heavy items low, centered, and close to the vehicle, secure the hitch connection, and recheck it and your straps after 30–50 miles.
Increased Leverage
Because a hitch carrier extends behind your vehicle, even a modest load can create significant leverage on the receiver during braking or when you hit a pothole.
A carrier’s distance from the bumper gives cargo a longer lever arm, boosting torque on the receiver and straps as you brake or hit jolts. Road impacts and crosswinds can magnify sway, especially with tall cargo or items near the basket’s outer rim.
Keep heavier items low, centered, and closest to your vehicle; secure them against shifting. This placement reduces bending stress and helps your vehicle handle predictably. Check rear overhang to ensure it doesn’t block your plate or lights; obstruction can bring compliance risk as well as control concerns. Recheck all fasteners after the first short drive.
Reduced Hitch Capacity
That added leverage can also reduce how much weight your hitch can safely carry. A receiver’s tongue-weight rating doesn’t tell the story once a carrier extends behind it. The distance increases bending force, so a rear-mounted load may reach the hitch’s practical limit before its listed rating suggests.
Your vehicle’s tongue-weight capacity also includes the carrier itself: a 55-pound rack plus 300-pound cargo puts 355 pounds on the tongue. That can exceed a hitch or vehicle’s limit, even when cargo alone appears acceptable. A Class III hitch may be rated around 350-500 pounds, but that figure isn’t automatically a safe cargo allowance. High or far-back weight can further increase sway and instability. Check whether the published capacity includes the carrier itself.
Safer Extension Use
Even within the receiver’s rated limit, a rear-mounted load can increase sway and reduce stability in turns and crosswinds. Keep the heaviest items as far forward on the rack as possible; extending them rearward lengthens the moment arm and magnifies leverage.
Use your receiver’s rated tongue-weight limits; Class III hitches allow 350–500 pounds, but exceeding your rating can compromise braking and handling. Don’t assume a rating makes an extended load safe.
After loading, recheck straps and tighten anti-wobble devices after the first 30–50 miles. Vibration and leverage can loosen connections, shift cargo, and increase wobble.
Check whether the extension creates illegal rear overhang or blocks your lights or plate. If needed, add auxiliary lights, relocate the plate, and use rear flags to meet rules.
Transporting Muddy Recovery Gear
When you carry muddy recovery gear on a hitch carrier, stay within both the carrier’s capacity and your vehicle’s hitch or tongue-weight rating; pack the heaviest items closest to the vehicle and secure everything with ratchet straps or a cargo net, not bungee cords. Spray and turbulence can shift loose gear. Blocked lights or plates can prompt tickets.
Bulky straps, shovels, and traction boards may extend beyond the bumper. Check state limits, often three to four feet; if you exceed them, mark the rear point with a red flag by day or a red light or reflector at night. Before and after 30–50 miles, walk around: retighten straps, check visibility and plate legibility from a typical following-driver distance, and verify locking hardware and anti-wobble devices are properly fitted where required.
Corrosion Around Hitch Receivers
Road salt and trapped moisture can aggressively corrode the receiver tube, pin holes, and contact surfaces, compromising the fit and increasing carrier wobble. Winter salt speeds corrosion at steel-to-hardware contact points, especially around pin holes. Before each trip, inspect the receiver and pin area for rust flakes, thinning walls, or seized hardware.
If the pin won’t slide smoothly, don’t force it; you could damage mating surfaces. Brush away rust, dry the opening, and apply corrosion inhibitor or anti-seize to the pin and contact points. A locking hitch pin can help keep water and debris out. Deep pitting, metal flakes, or a fit that lets the carrier rock signals serious wear. Replace worn components as the hitch maker recommends; cargo capacity alone doesn’t ensure a stable connection.
Loose-Ratchet-Strap Hazards
Loose or poorly tightened ratchet straps let cargo bounce and shift, creating sway that can exceed your vehicle’s hitch or tongue rating even when the total load is within limits.
Treat restraint as part of load management, not a formality. Use this routine:
- Choose ratchet straps, not bungee cords, and tighten them until cargo can’t move manually.
- Place heavier items nearest your vehicle; center weight side to side to limit rocking.
- Check that nothing can rattle against the receiver or anti-wobble hardware; vibration can worsen wobble and wear the connection.
- Airflow may loosen slack straps, so recheck after 30–50 miles and at regular stops. If cargo shifts, it may cover your plate or lights, creating visibility and legal problems; stop and secure it again.
Verify Hitch Pin Engagement
After securing the cargo, verify the hitch pin is fully through both receiver holes and its lock or retaining clip is engaged; a partially seated pin can let the carrier shift. Use a locking hitch pin and anti-wobble device, such as a Silent Hitch Pin, to reduce rattle and movement that can loosen hardware. Before loading, push and pull the carrier firmly; if you feel play at the receiver, correct the connection first.
After the first 30–50 miles, recheck the pin and any stabilizer or bracket, since vibration can reveal poor seating. Before every trip, confirm the pin passes through both holes, the safety clip or cotter key is present, and securing hardware is tight. Don’t load or drive until the coupling feels secure.
Conclusion
Before each trip, check the carrier’s load against your hitch and vehicle limits; weight behind the axle can affect handling. Secure gear so straps cannot loosen, and confirm the hitch pin is fully engaged. Make sure the load does not block brake lights or your view, especially at night.
Choose a floor suited to your cargo, clean off mud, and inspect for corrosion. If you add an extension, account for its leverage and reduced hitch capacity. When unsure, don’t drive until you’ve verified the setup.