
How to Measure a Trailer Axle: Hub Face, Spring Center and Capacity
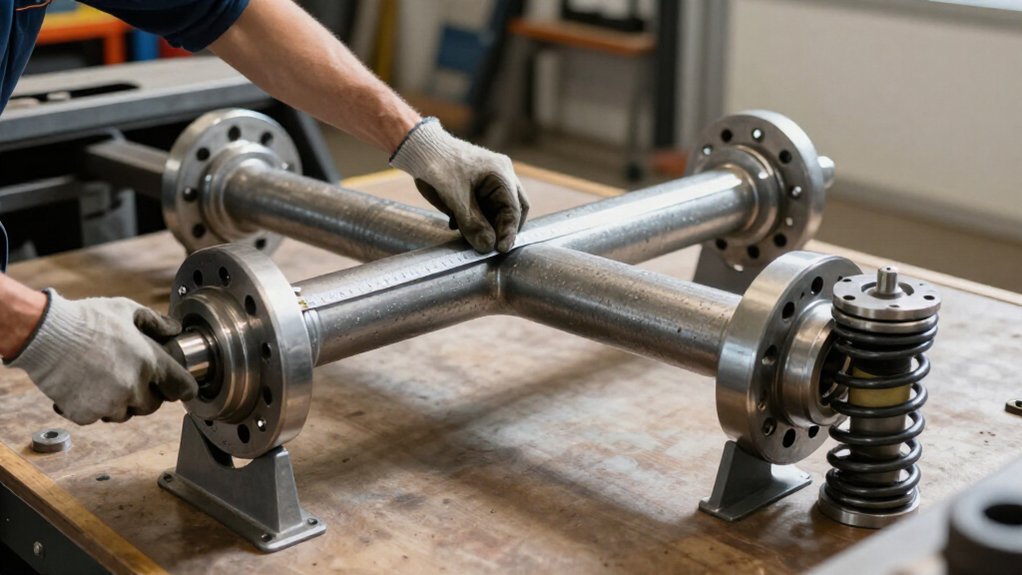
Chock the trailer on level ground, seating chocks against the tire treads, and keep it stationary.
Measure hub face outside-to-outside across the wheel-to-hub mounting surfaces, not backing plates.
Measure spring center from the center of one spring seat to the center of the opposite seat; mark both points consistently.
Record both dimensions in inches.
Check the axle’s capacity label or trailer paperwork and confirm its maximum load rating.
The checks help verify fitment and condition.
Measure Hub Face and Spring Center
Measure hub face from the outside mounting surface of one hub—the flange where the wheel studs sit—to the same point on the opposite hub, typically halfway between the hub’s top and bottom. Use the wheel-to-hub mounting surfaces, not the backing plates; that outside-to-outside dimension must match your trailer’s hub face or track.
Next, measure spring center from the center of one leaf-spring pad or seat to the center of the opposite pad. You can use the U-bolt or spring-attachment center points. If locating centers is difficult, measure from the outside of one leaf spring to the inside of the opposite spring; this gives the same center-to-center dimension.
Record both measurements. Axle listings commonly state them as hub-face-to-hub-face / spring-center-to-spring-center, such as 89/74. Compare each value with your trailer’s specifications.
Gather a Tape Measure and Chalk
Before taking the hub-face and spring-center measurements, gather a tape measure that reaches at least 6 feet, chalk or a marker, and a pencil, pen, or phone for recording the values.
- Choose a tape long enough to span the full hub-face distance, measured outside-to-outside, and spring-center distance, measured center-to-center.
- Mark the exact outside point where each rim contacts the hub, then mark the center of each leaf-spring seat.
- Keep corresponding reference points consistent on both axle ends so readings match the specifications.
- Ask a helper to steady the tape if needed, and record each value immediately under its correct label.
Measure between the marks, not nearby components. Record hub face and spring center separately; don’t rely on memory or combine the values later.
Step 1: Chock the Trailer Wheels
To keep the axle and hubs from shifting, park the trailer on level ground and chock the front and back of at least one wheel with solid chocks that fully contact the tire tread. Confirm each chock sits firmly against the tread, not merely beside the tire, and use a stable pair that resists movement in both directions. Before you begin, test the setup from a safe position; the wheel must not roll when you apply light pressure.
Keep the trailer stationary throughout the measurement, and don’t load or unload it, since changing its condition can affect how the axle sits. If you’ll work from both sides, recheck that the chocked wheel can’t move before reaching across the axle. Do this before you start taking measurements.
Step 2: Measure Hub-Face to Hub-Face
With the tires removed, measure outside-to-outside across the hub faces, where the rims contact the hubs. Hook your tape at the wheel-mounting surface on one hub, then extend it to the point on the opposite hub. Measure halfway between the top and bottom of each hub so your reading matches the reference location.
Don’t measure from backing plate to backing plate; those plates aren’t the wheel-mounting surfaces. The hub face is the stud-base area where the rim seats. Keep the tape across the axle and read the distance.
This measurement is called hub face-to-hub face or axle track. Record it in inches, such as “hf = 89.” You can use this dimension to check wheel positioning and axle compatibility and select a replacement axle.
Step 3: Check the Axle Capacity Label
After recording the hub-face measurement, find the axle capacity label on the axle beam or check the trailer paperwork. Confirm its maximum load rating before choosing replacement axles or wheels. Compare that rating with your trailer’s GVWR, and don’t exceed the lowest-rated component in the load path: axle, hubs and bearings, spindles, tires, or springs.
Check whether your trailer uses one axle or a tandem arrangement. For a tandem setup, compare each axle’s rating with the weight it’ll carry; don’t assume the ratings combine evenly unless the load is distributed that way. Labels may show ratings such as 2K, 3.5K, 5.2K, 6K, 7K, 8K, or 10K, but rely on the actual rating printed on your axle. If missing, consult the axle maker for confirmation.
Step 4: Measure Spring-Center Spacing
Next, measure spring-center spacing from the center of one leaf-spring seat to the center of the opposite seat, across the axle. Find the point where each spring locates on its seat, usually at the U-bolt attachment area. Measure between those two seat centers, keeping the tape straight across the axle.
If you can’t identify the centers directly, use the outside-to-inside method: measure from the outside edge of one spring pack to the inside edge of the opposite pack. This gives the same center-to-center distance when you measure consistently. Treat U-bolts only as visual guides to each spring’s mounting position; don’t measure between the bolts. Record the result in inches. Match that value to the axle’s required spring-center specification to confirm the seats will align with your trailer’s springs.
Step 5: Confirm the Axle’s Drop Height
Once you’ve recorded the spring-center spacing, confirm the axle’s drop height.
Measure from the spindle’s bolt or bearing center to the bottom of the main axle tube. Use the spindle centerline as your reference, and measure at the same side point on both sides with a steel tape measure.
On a straight axle, this measurement is effectively zero because the spindle centerline and tube reference align. On a drop axle, the spindle centerline sits higher than the tube, so the distance records the drop. This offset affects trailer ride height.
Record the result in inches, such as “spindle center to axle tube bottom = X in.” If you’re matching a replacement axle, use your supplier’s same spindle-to-tube-bottom definition so the new axle sits at the correct height under your trailer.
Step 6: Inspect the Spring Seats
Inspect each spring seat where the leaf spring contacts the axle, checking that the mounting surface is flat and unworn for proper load transfer. Check the seat and surrounding pad for cracks, bending, or looseness; damage can shift alignment and accelerate tire and suspension wear.
Measure spring-center spacing against the axle specification, and compare both sides to confirm they match and keep the suspension aligned left to right.
Remove rust scale, heavy corrosion, and debris from the contact area; these can prevent full seating and let a spring shift under load. Confirm the welded or loose seat type suits your axle and springs, and check height and mounting. A mismatch can alter ride height or alignment; correct defects and recheck spacing before installation.
Inspect Spindle Threads
Clean the spindle threads so you can see their full height and spot gouges, dents, bends, or other damage.
Remove dirt, grease, and rust with a brush and cleaner; don’t file or grind the thread crests, which can alter their profile. Examine the flanks for galling, corrosion, flattened crests, or torn metal.
Rough or damaged threads may prevent the nut from holding torque and contribute to loosening or bearing problems.
Check that the threads match the bearing and hub hardware you’ll install. Use the existing nut or a compatible collar as a fit check: start it by hand and turn it through threads. It should engage smoothly without binding, wobbling, or cross-thread resistance. Never use a wrench to force a reluctant fastener.
If the threads are stripped or the nut won’t engage correctly, replace the spindle or have a shop repair it.
Measure Spindle Thread Diameter
Remove the wheel and hub as needed to expose the spindle threads, then use a caliper to measure their outside diameter across the widest points. Measure at multiple spots along the threaded length; consistent readings indicate a uniform diameter, while variation may signal taper or wear.
A caliper gives better precision than a tape measure, though either can provide an estimate.
| Check | What to record | Why it matters |
|---|---|---|
| Diameter | Outside thread size | Matches spindle dimensions |
| Thread pitch | Tool reading or standard | Identifies compatible nut |
When you’re sourcing replacement parts, don’t rely on diameter alone: note the thread type or standard; remove the hub or locknut if needed to identify it. Record diameter and pitch, when measurable, with hub face and spring center measurements to order the correct axle or hub kit before placing your final parts order.
Grease the Wheel Bearings
Pack the wheel bearings with the lubricant specified for your hub or axle: grease for most setups, or oil if the kit requires it. Check your axle and hub specifications before choosing axle grease, an EZ Lube-compatible grease, or oil. Don’t mix lubricant types unless the manufacturer permits it.
Clean each bearing and race thoroughly, then inspect for pitting, scoring, or damage. Replace worn parts before reassembly. Pack each bearing evenly with a bearing packer or by hand.
Apply firm pressure until lubricant emerges uniformly from the opposite side of every roller; don’t leave dry spots. Install the correct inner and outer bearings in their matching positions. Set the grease seal securely to block contamination.
Wipe away excess lubricant, then rotate the hub by hand. Confirm it spins smoothly without binding, and verify the lubrication method suits your hub and trailer brakes.
Conclusion
You’ve now measured hub face and spring center, checked the capacity label, and inspected the spring seats and spindle threads. Record each measurement and compare it with your trailer’s specifications before ordering a replacement axle.
Don’t guess at capacity or thread size; confirm both with the manufacturer or a qualified trailer technician. Finish by greasing the wheel bearings to the specified procedure. Secure the trailer, recheck your measurements, and keep the details with your maintenance records for future service.
