How to Replace a Boat Trailer Winch Strap Before It Snaps
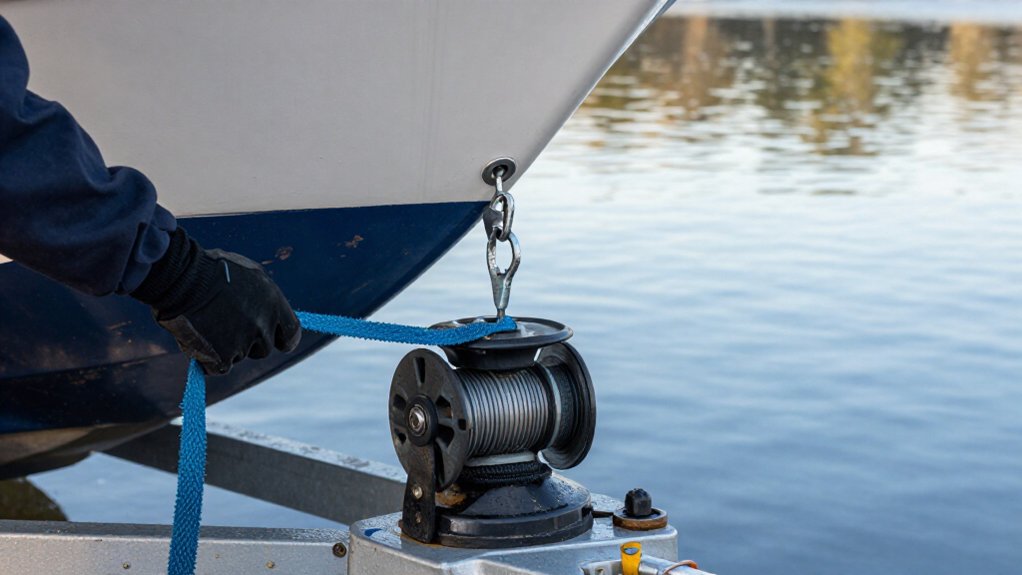
Replace your winch strap at the first sign of fraying, cuts, or permanent creases before towing.
Park on level ground, chock a wheel on both sides, and confirm the boat can’t shift.
Photograph the strap route and drum attachment, then disengage the gear lock and release the pawl.
Remove the old strap slowly, attach new webbing securely, and crank while guiding it evenly.
Check hook retention and test a cycle.
More details cover binding and saltwater care.
Strap Wear Warning Signs
If you spot fraying, splitting, or damaged webbing near the drum or hook loop, replace the strap; these high-load areas wear quickly.
Inspect the full webbing for abrasions, creases, or wrinkles because repeated ramp use and improper winding weaken polyester fibers over time, even when damage seems shallow. Check the hook hardware for wear or deterioration; damage there can signal extra abrasion and stress transfer to the strap. Don’t judge condition by age alone.
Heavy pulling forces during loading and jolts in travel can degrade webbing before it looks old. If the strap winds unevenly or twists and bunches on the spool, plan to replace it soon. That pattern concentrates stress at creased sections and accelerates failure. Stop using damaged webbing; replace it before towing.
Park on Level Ground
After checking the strap for wear, park the trailer on level ground and secure it against shifting. This keeps tension predictable. Don’t detach the strap while the trailer can roll or the boat can move. Before pulling it free, disengage the gear lock so you aren’t fighting an uneven load caused by an incline.
Use this sequence to control the work:
- Chock the trailer wheels and confirm the boat is stable.
- Release the gear lock before unhooking the old strap.
- Keep the new webbing guided tightly as you wind it onto the spool.
Flat ground helps the first layers sit evenly, without twists or bunching.
After installation, crank the winch and verify the strap is snug and hardware is secure before loading or launching.
Step 1: Photograph the Winch Assembly
Before removing anything, photograph the full winch assembly so you can trace the strap’s route through the spool and around the outside components. Keep the image sharp and include the gearbox area; you’ll use it to reproduce the same path without twists or miswinding.
Take a close-up of the drum attachment, showing whether a pin or bolt and nut secure the strap loop. Record fastener orientation and any thread-lock residue to match the original connection. If your winch has gear-lock hardware, photograph its position before disengaging it; note how it sits before loosening the strap connection.
Use adequate light, keep hands clear of pinch points, and don’t rely on memory. These photos guide installation and help confirm the strap winds when cranked under tension.
Step 2: Chock the Trailer Wheels
Secure the trailer against movement before removing the strap or disengaging the gear lock. Park on level ground, then place wheel chocks tightly against both sides of at least one wheel. If the trailer sits on a slope, chock all wheels; don’t rely on the tow vehicle or gear lock to hold it. Set the parking brake, if equipped, for added security.
Check that the trailer stays stable before you handle the strap. After you secure the new strap’s loop end with its pin or bolt, recheck the chocks and confirm the trailer hasn’t shifted. Any rolling can alter the strap’s routing and make tightening or testing unsafe. Keep the chocks in place while you crank and test the winch, and remove them only after the trailer is fully secured.
Step 3: Release the Winch Drum Pawl
With the gear lock fully disengaged, turn the winch handle to release the drum pawl while keeping steady tension on the strap. Keep your hands clear of pinch points as you turn the handle slowly and maintain control of the strap throughout the release.
If the pawl won’t release, stop turning and check that the gear lock is fully disengaged; an engaged lock can block pawl movement.
Once the pawl releases, continue easing the handle so the drum rotates smoothly. Keep a firm hold on the strap as it loosens; don’t let the drum unwind rapidly, leaving the strap slack or twisted.
When rotation is controlled, pull the old strap out until you can reach its drum attachment point for safe removal before proceeding.
Step 4: Thread and Bolt New Strap
Once the old strap is detached, route the new strap through the drum along the same path and orientation, using your reference photo to match it. Use the photo to confirm routing and orientation; incorrect routing can cause improper loading. Pass the loop through the drum’s attachment point and reuse the removed hardware: a bolt and nut or retaining pin.
Seat the loop fully and ensure the fastener secures it without pinching or damaging the webbing. For a bolt-through connection, apply thread-locking compound before installing and tightening the nut to resist vibration. Tighten firmly without crushing the strap. Reinstall access covers or components you removed.
Keep hands clear of pinch points. Crank the winch and confirm the strap stays attached and the drum holds steady tension before loading.
Step 5: Wind Strap Without Twists
As you crank, hold the strap under steady tension and guide it onto the drum in the same route as the old strap.
Keep the webbing centered on the spool as you reel it in. Hold it firmly so the first wraps lie tight and flat; loose or angled wraps can load unevenly and encourage twisting.
Keep the strap smooth, with no twists, wrinkles, or folds, which can create weak points and lead to early failure.
If you spot a twist before the strap seats fully, stop cranking and reseat the webbing. Once installed, crank while observing the drum from a position. Confirm the strap spools evenly, without gaps or overlapping ridges. Uneven winding creates abrasion points that can shorten service life.
Step 6: Dispose of the Old Strap
Before discarding the old strap, inspect it for fraying, cuts, or creases, and take a quick photo of its routing for reference.
After the photo, disengage the winch gear lock and unthread the strap from the drum connection point. Work slowly and keep the strap controlled through removal so it doesn’t snag or damage the hook hardware.
Don’t reuse webbing with visible deterioration; fraying, cuts, and permanent creases can signal reduced strength. If you see damage, separate the hook and pin from the strap and set them aside for inspection rather than discarding potentially usable load-bearing parts. Contain the old webbing in a bag or wrap it securely to trap loose fibers, then dispose of it as damaged textile material according to local waste rules. Keep the routing photo available while you prepare the replacement.
Test Hook Retention
With the strap routed as before, confirm the hook loop is secured by its pin or bolt and that the hardware is fully tightened. If your drum uses a bolt to anchor the strap, apply thread lock only when recommended for that hardware, then tighten it to remove slack at the connection.
Hold the strap firmly and crank the winch so its first wraps spool flat and snug; poor winding can compromise how securely the hook stays loaded.
Near full extension, pull firmly by hand. Confirm the hook stays seated with no movement at the connection. Keep clear of the strap’s line of pull. Run a short test cycle; confirm the hook remains retained under load and the strap reels without bunching, twisting, or wrinkling.
Winch Handle Binding Fix
If the winch handle binds after you replace the strap, stop cranking and check the setup before applying more force. Check the old routing and drum-end connection first. Route the strap through the same drum and side hardware; seat its loop pin or bolt fully, without misalignment. Hold tension as you wind the first turns tightly and flat. Then crank slowly and watch the webbing leave the spool straight. Stop if it twists, wrinkles, folds, or bunches to one side.
| Symptom | Check | Fix |
|---|---|---|
| Uneven wraps | First turns | Rewind under tension |
| Crooked tracking | Loop pin or bolt | Reseat connection |
| Persistent drag | Gears and pivots | Apply suitable lubricant |
If binding continues, stop; gritty parts can mimic strap drag. Use marine grease or appropriate penetrating oil only.
Rinse Saltwater Residue
After removing the old strap, rinse the winch area and exposed strap hardware with fresh water to remove salt that can accelerate corrosion. Focus on the drum or spool and every strap routing point. Salt buildup there can abrade the new webbing as you wind it onto the winch.
Use a gentle stream; don’t aim a pressure washer at the drum bearings, which can force water past seals or damage components. If you launch in saltwater often, rinse the winch along with the boat to limit wear on moving metal parts and preserve reliable operation.
Let the winch and hardware air-dry completely before fitting the replacement strap. Once dry, wind the new strap evenly across the spool. This keeps moisture or residual salt from becoming trapped beneath tight coils, where it could weaken the webbing over time.
Conclusion
Replace a frayed strap before it fails under load. Inspect the webbing, stitching, hook, and winch regularly, and don’t ignore cuts, abrasion, or corrosion.
Park level, chock the trailer, and follow your winch’s instructions when fitting and testing the new strap. Confirm the hook stays retained and the drum winds evenly. Keep your hands clear of pinch points. Rinse salt residue after use, then store the strap dry. Maintenance can prevent costly launch or retrieval failure.
Boat Trailer Parts Selector & Rating Checker
Enter your boat plus gear weight and the rating printed on each trailer part to see which parts are rated below your loaded weight.
Towing Capacity & Truck + Trailer Weight Calculator
Total your loaded trailer, estimate tongue weight and compare it with your tow rating, payload, GVWR, GCWR, rear GAWR and hitch limits.