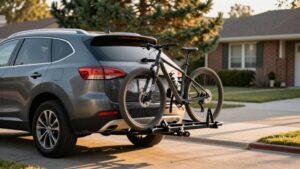
Can Hitch Bike Racks Hold E-Bikes? Weight Limits and What to Look For
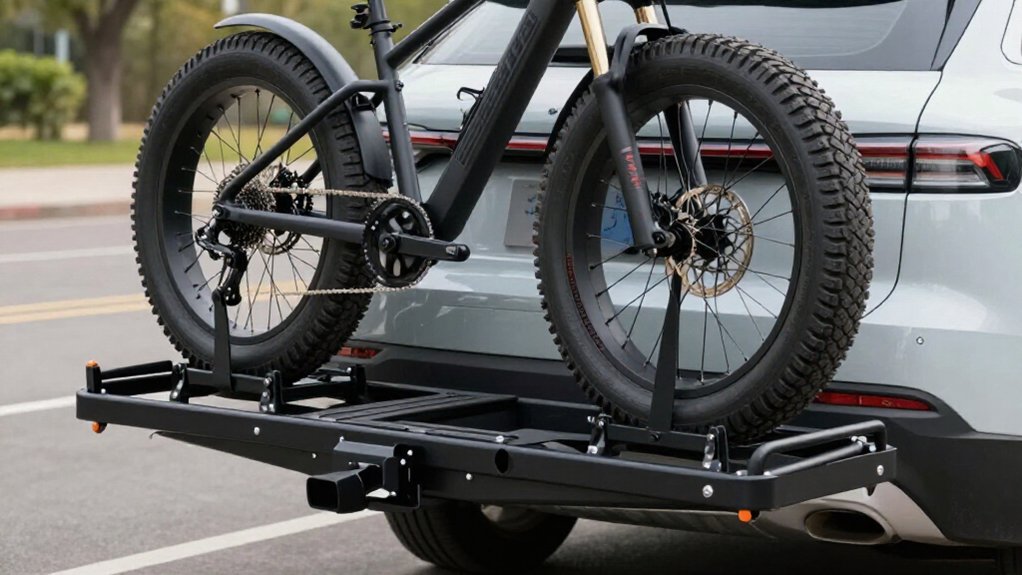
Yes, you can carry e-bikes on a hitch rack if each bike and the loaded rack stay within their ratings. Check the rack’s per-bike and total limits, plus your vehicle’s and hitch’s tongue-weight limits; include the rack and batteries.
Confirm tire width, wheel size, and wheelbase fit, but fit alone doesn’t prove capacity.
Choose secure wheel-supporting trays, remove batteries when advised, lock the hitch pin, and recheck straps and fasteners. More details can guide you.
Hitch Rack E-Bike Weight Limits
Before loading an e-bike, compare its actual transport weight with the rack’s per-bike limit—often about 60–100 lb per position—and its total carrying capacity.
Check specs for tire width and wheel diameter: many electric-ready racks accept fat tires up to about 5 inches and wheels from 18 to 29 inches. A bike that fits can still exceed the rack’s limit.
Its mass increases stress during acceleration, braking, turns, and bumps, so fit doesn’t prove capacity. For example, the Kuat Piston Pro X allows 67 lb per bike; the Piston ION 2 supports 100 lb per tray and includes a loading ramp.
If your e-bike nears the limit, check the maker’s guidance. Removing the battery may reduce carried weight enough to meet the rack’s per-bike rating.
Hitch Tongue Weight Checks
A rack’s bike-weight rating doesn’t confirm that your vehicle can carry the load: check the hitch and vehicle’s maximum tongue weight, which is often the limiting factor. Compare the hitch’s rating with your vehicle manual and the rack’s requirements; use the lowest applicable limit. Include the loaded rack and the e-bikes’ actual transport weight, including batteries unless you remove them.
Don’t rely on receiver size alone: a Class I 1.25-inch hitch is typically rated to 200 pounds, often insufficient for heavier e-bike setups. A Class II 2-inch hitch allows about 300–350 pounds, while Class III 2-inch hitches often exceed 500 pounds and provide more margin, especially for e-bikes or more than three bikes. Verify ratings; never exceed the lowest limit.
Carrying Two 70-Pound E-Bikes
You can carry two 70-pound e-bikes on many hitch platform racks, but check the rack’s per-bike rating—not just its total capacity—and confirm the hitch and vehicle can support the combined weight of the bikes and rack. Choose a model rated for at least 75 pounds per bike; a 67-pound rating leaves a 70-pound bike over its limit, even if the rack’s combined capacity seems adequate.
Add both bikes and the rack when checking tongue-weight limits. For stability, choose a platform rack with firm, secure wheel holds, and verify compatibility with your exact tires and wheelbase. Fat tires up to five inches may exceed the manufacturer-stated range. A loading ramp or power-assisted method can reduce lifting strain and help you secure each bike correctly.
Rack Arm and Cradle Designs
Check where the rack contacts your e-bike: wheel-supported trays or chocks can reduce frame stress compared with hanging cradles. Confirm the cradles fit your tire width and wheel size, or the bike may sit insecurely.
Choose strong, wide-grip arms that limit sway under braking and turns, and stay within the rack’s per-bike weight rating.
Frame Contact Points
Because e-bikes often weigh 60–100 pounds, their rack contact points must hold securely through braking and bumps. If you use a hanging hitch rack, its arms and cradles carry the bike at frame-contact points. Check where each cradle touches your frame, and choose broad, well-padded supports that sit snugly without pinching cables or pressing fragile components.
Excess movement can rub paint and concentrate force during jolts.
A platform rack supports the wheels, reducing or avoiding frame contact and lowering scratch risk. Tire-clamping arms or rigid wheel chocks transfer stabilizing loads through the tires rather than relying on the frame. Whichever design you choose, secure restraints as directed and confirm the bike can’t shift before driving. Recheck straps and contact points after a trip.
Cradle Compatibility
Beyond secure contact points, make sure the rack’s cradles fit your e-bike’s wheels or frame. Choose wheel-supporting trays or padded frame cradles according to your bike’s design; the wrong fit can concentrate pressure or leave the bike poorly seated.
Check adjustable cradle spacing and strap or clamp coverage against your wheel diameter and tire width. Manufacturers often list supported wheel sizes, such as 18–29 inches, and some models accept tires up to five inches wide.
If the rack grips the frame, confirm it suits your e-bike’s geometry: step-through and unusual frames may lack a cradle position or required mounting points. A platform rack’s wheel chocks support tires, reducing frame fit concerns. Verify the per-bike cradle limit and compare it with your e-bike’s transport weight.
Arm Strength and Stability
A rack’s arms must hold each e-bike steady without exceeding their load rating. Choose a platform rack with wheel cradles or chocks that clamp the tires, not the frame; this routes support through the wheels and limits movement. Check the per-bike rating before loading: Kuat Piston Pro X supports 67 lb per tray, Thule Epos 2 rates 75 lb per bike, and Kuat Piston ION 2 allows 100 lb per tray.
Don’t exceed the limit, because arm strength can fall off under load. Confirm the cradles fit tire width and wheel diameter; a Piston Pro X accommodates tires up to 5 inches and 18–29-inch wheels. Tight wheel chocks provide anti-sway contact, while loose or hanging designs can let bikes shift during braking, acceleration, and vibration.
Hitch Receiver Class Differences
Class I and II receivers can have limited tongue-weight capacity for heavy e-bikes, so check your hitch and rack ratings before loading. Class III and IV hitches generally offer more capacity, but the receiver class alone doesn’t confirm your setup is safe. Compare the hitch’s tongue-weight rating with the loaded rack weight and each bike’s weight limit.
Class I and II Limits
Because an e-bike rack loads the hitch as it extends behind the vehicle, check the receiver’s tongue-weight limit—not just the rack’s capacity.
A Class I receiver is 1.25 inches and typically allows up to 2,000 pounds of towing and about 200 pounds on the tongue. That margin usually suits one or two lighter e-bikes, not a heavy pair.
A Class II receiver is 2 inches, with typical ratings up to 3,500 pounds towing and 300–350 pounds tongue weight, so it’s a more common e-bike choice. Before loading, add the rack’s weight to every bike’s weight; that total must stay below the lower tongue-weight rating of your hitch and vehicle. Choose a compatible 2-inch rack, secure each bike as directed, and recheck the load after mounting. The added margin helps the setup remain stable through braking, turns, and bumps. Verify both ratings in your owner’s manual before loading.
Class III and IV Capacity
When you carry several e-bikes, a Class III 2-inch receiver, with a typical tongue-weight rating of 500 pounds or more, can provide more headroom than Class II. Class III’s 2-inch opening suits racks built for heavy loads, making it a sensible starting point for three or more e-bikes. Class II’s roughly 300–350-pound capacity may suit e-bikes but offers less margin for several heavy bikes.
Don’t assume class alone proves compatibility: match receiver and rack sizes, then verify per-bike and total rack payload limits. Class IV isn’t covered by guidelines, so don’t assume automatic compatibility. Confirm vehicle specifications, receiver dimensions, and rack payload before loading. Choose a rack with anti-sway control and secure bikes as directed; added mass and leverage amplify movement during turns and braking.
Check Tongue Weight Rating
Since e-bikes load the hitch downward, check its tongue-weight rating, not just its towing rating, before choosing a rack.
Compare receiver classes, but verify your vehicle manual and hitch label; ratings vary.
| Class | Typical rating |
|---|---|
| I (1.25-inch) | 200 lb tongue; 2,000 lb towing |
| II (2-inch) | 300–350 lb tongue; 3,500 lb towing |
| III (2-inch) | 500+ lb tongue; 5,000+ lb towing |
| Practical fit | I: lighter bikes; II: e-bikes; III: e-bikes or 4+ bikes |
Class I suits one or two lighter bikes, not heavier e-bikes. Choose Class II for e-bikes; Class III gives margin or supports more than three bikes.
Add rack weight and every loaded bike’s weight, then compare the total with your vehicle/hitch tongue limit. A rack’s advertised capacity can’t override that limit; don’t exceed the lowest applicable rating.
Weekend Trips With Cargo E-Bikes
For weekend trips with cargo e-bikes, a hitch-mounted platform rack is usually the best choice: its wheel trays support the bikes low and help limit movement on washboard roads. Check both per-bike and total rack limits before loading: a rack rated for 200 pounds overall may still exceed its per-tray limit with one heavy cargo bike.
Since cargo e-bikes can weigh 80–100 pounds or more, choose a heavy-duty rack rated for your bike’s weight, fat tires up to about five inches, and its wheelbase. Confirm the listed wheel-size range fits, too.
For less sway over a long weekend, use secure wheel trays or chocks; hanging racks with frame straps generally let bikes move more. A compatible ramp or lift assist lets you roll a 70–100-pound bike on and off, reducing risky lifting. Secure each bike as directed, then recheck straps and rack fasteners at stops. Inspect the setup before departure and after rough sections.
Removing Batteries Before Travel
Even with a heavy-duty hitch rack, removing the e-bike battery before travel can bring the bike within its per-bike weight threshold and lessen stress on the rack during braking and turns. Many manufacturers recommend removal; batteries can weigh several to dozens of pounds. Close to an 80-pound-per-bike limit, removal may bring your bike within capacity.
Check per-tray ratings in addition to overall capacity: meeting the total by itself doesn’t ensure each tray complies. Confirm whether the stated limit assumes the battery installed or taken out. Recheck wheel and tire compatibility. Secure the battery in your vehicle, protect it from impact and temperature extremes, and follow its maker’s transport guidance.
| Check | Action |
|---|---|
| Per-bike limit | Compare loaded weight |
| Tray rating | Verify separately |
| Battery rule | Check rack instructions |
| Fit | Recheck tires and wheels |
Overlooking Hitch Pin Security
Because a loaded e-bike rack can exert strong leverage forces during braking, cornering, and road vibration, its hitch pin must be fully seated and secured through the receiver’s pin hole.
A 60–100 lb e-bike can magnify movement; even a rack rated above 200 lb may fail if its pin or lock isn’t engaged.
- Match the recommended pin or lock to your rack and receiver size, usually 1.25 or 2 inches.
- Push the pin through the receiver hole and verify full engagement before every trip; secure the clip or lock.
- Tighten anti-rattle hardware or any hitch strap as directed; friction alone can’t secure the rack.
- Recheck the pin and lock after loading and within the first few miles; stop if you notice wobble.
A loose pin worsens sway and risks control.
Inspect Your Vehicle’s Owner Manual
Check your owner’s manual before mounting an e-bike rack. Confirm the receiver’s size and class, plus your vehicle’s maximum tongue weight. Your setup must stay within both the hitch rating and the rack’s limits; the lowest applicable rating controls.
Read the manual’s rules for hitch-mounted accessories, including allowable loads, approved rack types, and any restrictions on rear weight.
Check hauling guidance too: rack and e-bike weight can affect handling during acceleration, braking, and turns.
Compare your combined load with the vehicle limit, not just the rack’s per-bike rating, often 60–100 pounds. Review tire, wheelbase, and clearance notes, especially for tires up to five inches wide. If figures or fit are unclear, ask your dealer before loading. Never assume a rack rating overrides vehicle limits.
Conclusion
You can carry e-bikes on a hitch rack only when the rack, receiver, and vehicle all support the loaded weight. Check tongue-weight limits, account for both bikes and cargo, and confirm the rack’s per-bike capacity and arm design.
Remove batteries if the rack maker recommends it, secure the hitch pin, and inspect every connection before driving. Your owner’s manual is the final check; if any limit is unclear, don’t load the rack until you’ve verified it.