How to Install a Trailer Coupler Lock on a Hitched or Unhitched Trailer
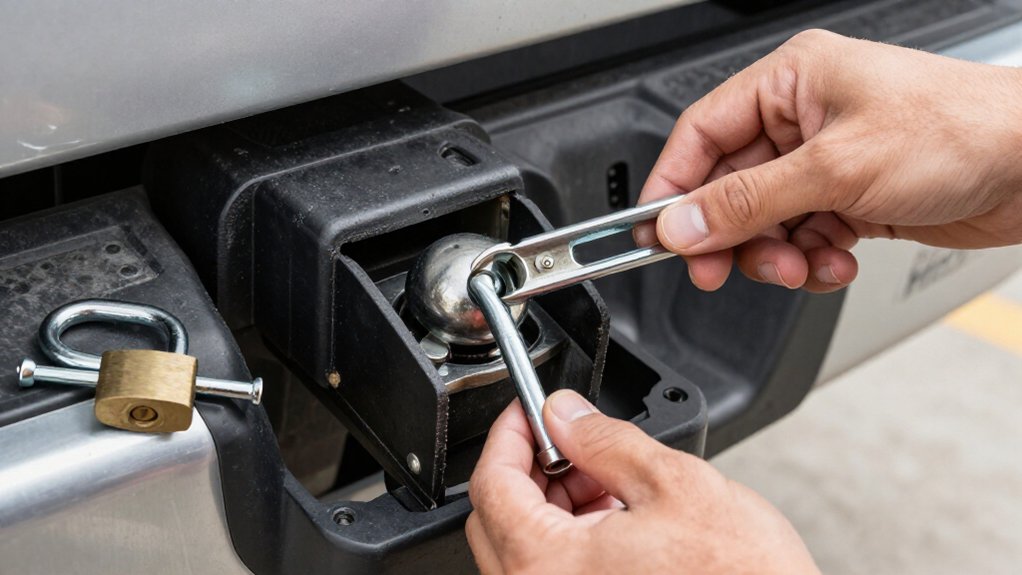
Use a coupler lock only when your trailer’s unhitched; use a locking hitch pin or receiver lock when it’s hitched.
Clean the socket and jaws, confirm the jaws close fully, and match the lock to the coupler size.
Seat the blocking ball flush, close the shackle tightly, and check for movement.
Fit the dust cap and keep the keyway dry.
Lubricate lightly with lock-safe product; never force a frozen key.
Confirm smooth key release and fit.
More checks can help.
Hitched vs. Unhitched Setup
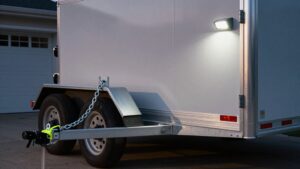
Use a coupler lock when your trailer is parked unhitched: clean the coupler socket, then fit the lock so its ball or puck fully blocks the opening. When you’re hitched, secure the ball mount to the tow vehicle with a locking hitch pin or receiver lock; it prevents removal of the mount from the receiver. These locks serve different purposes, so don’t substitute one for the other.
For an adjustable universal coupler lock, match its setting to your coupler’s 1-7/8-, 2-, or 2-5/16-inch size; a loose fit can allow play and weaken security. Use both locks as a layered system: the coupler lock while parked unhitched, and the hitch pin lock after you connect the trailer. Check each lock is fully engaged before leaving.
Keyway Weather Protection
After installing the coupler lock, seat its dust cap fully over the keyway to keep out rain, snow, and road-salt spray. Check the cover periodically; an exposed cylinder can admit moisture, accelerate corrosion, and make even a pick-resistant mechanism harder to turn. Before outdoor use, wipe the coupler pocket and keyway dry to limit water trapped at the cylinder seam.
- Confirm the dust cap remains fully seated after use.
- Clean and inspect the coupler socket every few months.
- Apply lock-specific lubricant about quarterly; avoid heavy oils.
- Never insert or remove a key while the keyway is flooded or frozen.
- Dry the keyway first so grime won’t grind into the cylinder mechanism.
If moisture persists, let the lock dry fully before operating or storing it.
Step 1: Inspect Coupler Jaw Clearance
Before installing the lock, clean the coupler cup and jaws of grease and rust chips, then check that the jaws close fully with the trailer unhitched.
Inspect the jaw area for debris that could keep the lock’s internal base ball from seating flush. With the latch released, confirm both jaws move into the fully down position and meet without a gap.
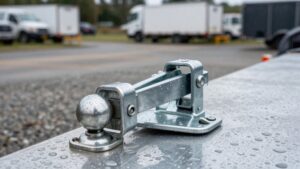
A partly open jaw can leave the lock loose or prevent engagement. Place the dummy ball in the coupler and lower the lock body into position without forcing it. Check around the coupler opening for daylight or a pry gap; the fit should be tight and even.
If the lock rattles or its shackle doesn’t sit snugly, remove it, reopen the latch, and reseat the jaws. Recheck clearance before locking. Keep your hands clear of pinch points while moving the latch, and don’t use the lock to pull misaligned parts together.
Step 2: Verify Lock Compatibility
With the coupler jaws moving freely, verify the lock matches your coupler before installation.
Check the coupler size before selecting a lock: sizes are 1-7/8, 2, and 2-5/16 inches. Look for a stamped marking; if none appears, measure the socket’s inside diameter with calipers. Confirm the lock’s rated for that exact size.
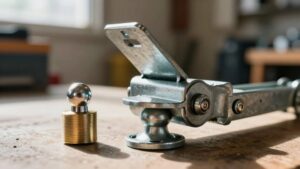
Its dummy ball or blocking head must fit flush, leaving no pry gap. For an adjustable universal model, check that its range covers your coupler and that the adjusted shackle and body remain tight without wobble. Match the cylinder and shackle style to your latch layout; a U-shaped shackle may suit RTL003-type couplers. Use this lock only when your trailer’s unhitched and parked: it blocks the socket, preventing tow-ball insertion.
Step 3: Seat the Locking Ball
Once the coupler is clean and closed, position the latch in the required down position, then insert the lock’s internal base ball fully into the socket.
Check that the coupler cup contains no debris and that the latch remains closed. Guide the base ball straight into the cavity and press it as far as it’ll go; it must occupy the socket completely.
Inspect the rim to confirm the dummy ball sits flush against the coupler with no visible gap. A proper fit blocks an unauthorized hitch ball from seating. Don’t force a misaligned lock or use the latch to draw it into place.
Perform a pull-test on the seated lock and check for rattle or shifting. If it moves or fails to sit flush, release it, clear any obstruction, and reseat it securely before continuing. Keep hands clear of pinch points while handling the coupler and lock.
Step 4: Engage the Locking Shackle
Keep the latch fully closed and down, then slide the U-shaped shackle into the receiving channels around the seated base ball. Clear grime, grease, rust chips, and debris from the cup; contaminants can keep the base ball from seating flush.
With the ball seated, guide the shackle through the channels without forcing it. Use the lock’s ratchet mechanism to draw the shackle down firmly. Select among adjustment positions until the shackle closes tightly against the coupler, leaving no open gaps.
On an RTL003-type lock, use its 11 locking positions as needed. After locking, pull the assembly firmly to test for movement. If you feel rattling or shifting, disengage it and tighten at the next ratchet click. Keep hands clear of pinch points while adjusting, before towing securely.
Step 5: Check Shackle Alignment
Before locking, slide the U-shaped shackle through the receiving channels and check that both legs sit centered and flush. Misalignment leaves pryable gaps. Confirm the lock body sits in the coupler socket, with its internal dummy ball or plug fully contacting the coupler cup.
This contact helps maintain alignment as you tighten. Ratchet the shackle fully until it has no play. Rattling or shifting signals poor alignment or a lock that won’t sit rigidly.
On an unhitched trailer, check the open coupler cup and remove grime, grease, or rust chips; debris can prevent full seating. If alignment’s off, release and adjust to the next ratchet click.
Then pull-test the assembly; proceed only if it stays rigid with no movement under a firm, steady pull.
Step 6: Wipe Excess Lubricant
After cleaning the coupler socket, apply only a light, lock-specific lubricant and wipe away any excess from the socket and rim. Use a clean, lint-free cloth to remove runoff from the coupler cup and surrounding edge. Avoid heavy grease; it can collect grit and promote sticking. If you lubricate after rain or salt exposure, wipe again because moisture-thickened residue can trap debris and make the ratchet or shackle mechanism rough over time.
Before locking, seat the coupler lock fully so its base ball or slide sits flush inside the socket. Check the fit around the coupler for gaps or daylight; slick residue can increase play rather than improve alignment. After you lock it, give the unit a pull-test. Confirm it stays rigid without sliding. Stop and re-clean and wipe if it shifts; don’t tow until the lock sits securely.
Verify the Key Releases Easily
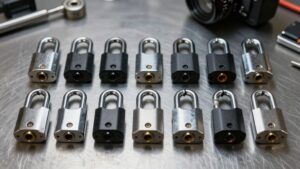
Once the lock is seated and secure, test that the key turns smoothly and fully frees the shackle or locking piece so you can remove the lock without forcing it. Check that the cylinder rotates smoothly after unlocking; grinding or partial release can indicate misalignment with the coupler socket.
Return the coupler latch to its normal closed position. If it can’t move freely, the lock may not sit flush in the coupler pocket.
For an adjustable universal lock, verify key release at the exact setting you used. This confirms the internal base ball sits evenly in the socket.
Finish with a pull-and-fit check: remove the unlocked lock readily, then confirm the coupler accepts a hitch ball normally.
Frozen Lock Cylinder
If a trailer coupler lock cylinder freezes, don’t force the key; the extra torque can shear the tumblers and permanently jam the lock. Warm the key and cylinder gently with your pocket or a hair dryer on low; avoid open flames. After freeing the cylinder, apply light graphite or lock-specific lubricant.
Powder coating helps resist corrosion, but it can’t prevent internal moisture from freezing. Keep a spare key somewhere warm. Clean the coupler socket and lock-base contact area periodically, especially in road salt or snow, to limit grime and water entering the keyway.
| Check | Action | Purpose |
|---|---|---|
| Heat | Warm gently | Free cylinder safely |
| Lubricate | Use lock product | Reduce sticking |
| Prevent | Seat lock flush | Limit trapped moisture |
Don’t leave it misaligned.
Grease the Shackle Pivot
Before installing the coupler lock, wipe old grease and debris from the U-bar shackle pivot, then apply a thin film of lock-safe lubricant so the shackle swings and ratchets smoothly without binding.
Outdoor storage exposes the pivot to rain, snow, and road salt, promoting corrosion and stiffness. A stiff shackle may not seat flush in the coupler socket, leaving gaps that compromise fit. After lubrication, cycle the shackle through lock and disengage motion to distribute lubricant.
Keep lubricant at the pivot; excess can trap grit and resist ratchet movement as you tighten the lock. If the pivot feels gritty or won’t move freely, clean it before reapplying a film. Confirm movement before positioning the lock over the coupler. Keep fingers clear of pinch points.
Conclusion
Before you tow or store a trailer, choose a coupler lock that matches its coupler and setup. For a hitched trailer, confirm the lock clears the ball mount; for an unhitched trailer, secure the coupler jaw as directed.
Seat the locking ball, protect the keyway from weather, and wipe away excess lubricant. Verify the key releases easily. If the cylinder freezes, don’t force it; thaw it safely. Check the shackle pivot and lock before every trip.